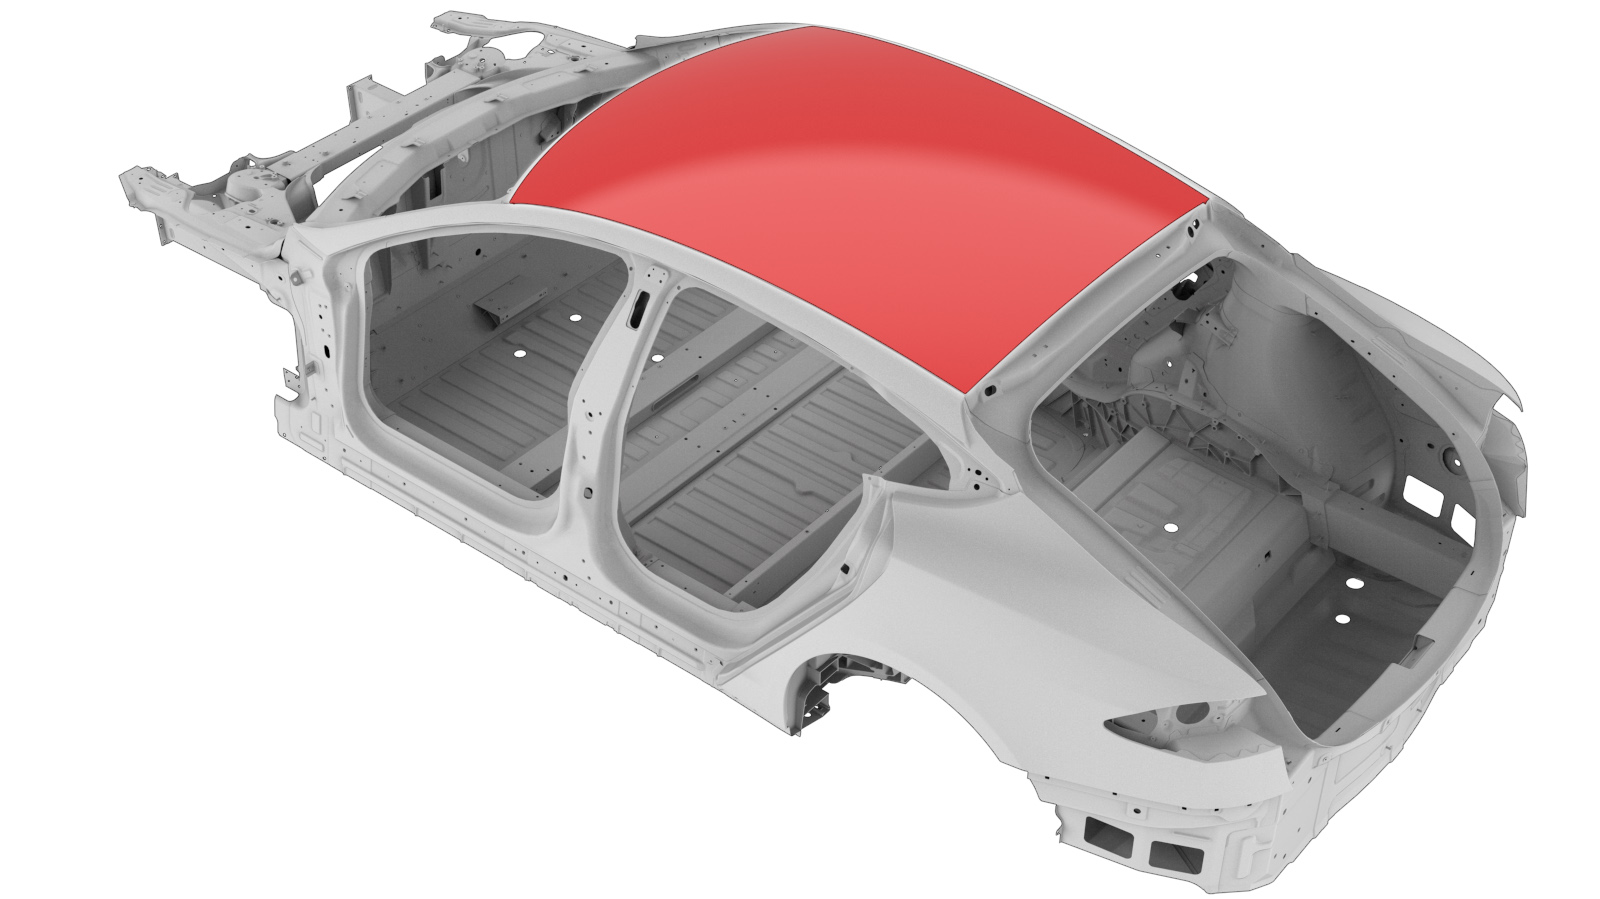
Roof Assembly
 Correction code:
10102704802
NOTE:
Unless explicitly stated in the procedure, the above
correction code includes all Collision Repair and Service
repair work required to perform this procedure, including
the linked Collision Repair procedures and linked Service
procedures. Do not stack Collision Repair correction
codes unless explicitly told to do so. Depending
on the damage to the vehicle, additional repairs may be
required.
Correction code:
10102704802
NOTE:
Unless explicitly stated in the procedure, the above
correction code includes all Collision Repair and Service
repair work required to perform this procedure, including
the linked Collision Repair procedures and linked Service
procedures. Do not stack Collision Repair correction
codes unless explicitly told to do so. Depending
on the damage to the vehicle, additional repairs may be
required.
Repair Information
- This procedure is for the solid roof. Use Service Manual procedure 24102002 for the panoramic roof assembly or Service Manual procedure 10205002 for the glass roof.
- This procedure covers both Remove and Replace and Remove and Install of the roof assembly.
- This repair can be performed with the windshield, liftgate, and headliner in place.
- Refer to Approved Chemicals for a list of approved foam products and structural adhesives.
- Review all collision repair general practices and safety documentation and wear the appropriate PPE (Personal Protective Equipment) before beginning this procedure.
- This procedure can be completed without using a frame bench.
Parts List
| Quantity | Description | Image / Notes |
|---|---|---|
| 1 | COMPLETE ROOF ASSEMBLY (Roof Assembly) | |
| 4 | BUTYL FOIL, 300X150, 2MM THICK | |
| 2 | SEAL, OUTER TRIM, BASE ROOF (Outer Trim Seal) | |
| 7 | BASE ROOF FRONT SPACER | |
| 4 | BASE ROOF REAR SPACER | |
| 1 | Dow BETAPRIME™ 5504G primer | |
| As needed | Dow BETASEAL™ Express Urethane Sealant | Source locally; not available from Tesla. |
These part numbers were current at the time of publication. Use the revisions listed or later, unless otherwise specified in the Parts Catalog.
Repair Procedure
-
Remove the original component.
WarningAvoid cutting into underlying components when cutting the urethane sealant.NoteIf performing a Remove and Install of the roof assembly, a special tool is used: the Equalizer Python Urethane Wire Removal System (or an equivalent tool). The technician using this tool must be trained and certified to use the tool.Cut the urethane sealant to release the Roof Assembly from the:
- Rear HeaderNoteThere is a small portion in the middle of the Rear Header that is slightly higher than the rest of the Rear Header. Take care when cutting the urethane sealant in that area to avoid cutting into the raised portion of the Rear Header.
- Front HeaderCAUTIONThe Front Header is slightly higher in the middle than on the sides. Take care when cutting the urethane sealant to avoid cutting into the Front Header.CAUTIONWhen removing the front portion of the Roof Assembly, make sure not to damage the windshield.
- Roof Rails
- Rear Header
- Remove the remaining urethane sealant from the vehicle in preparation for new urethane sealant during installation.
-
Install the butyl foil pads
on the new Roof Assembly in the arrangement shown (butyl foil pads shown in
light grey).
-
Install the outer trim
seals.
CAUTIONThe outer trim seals must be installed properly before applying urethane sealant.
-
Peel the backing off of the
roof spacers and attach them to the Roof Assembly in the indicated
locations.
- Front spacers (x7)
- Rear spacers (x4)
CAUTIONMake sure that the spacers do not protrude from the edges of the Roof Assembly or they will be visible after installation. - Put the Roof Assembly into position and check the fit (reposition or trim the roof spacers as necessary to achieve a proper fit).
-
Apply primer to any exposed
surfaces and any painted areas of the mating surfaces on the vehicle and the
Roof Assembly.
CAUTIONUrethane sealant will not bond properly to painted surfaces. Prime all painted surfaces in the bond path before applying urethane sealant.CAUTIONFollow the primer manufacturer's instructions for drying time. Do not continue until the primer has dried sufficiently.
-
Apply a bead of urethane
sealant to the vehicle on top of the original urethane path.
NoteModify the butyl patches and roof spacers as necessary (by repositioning or trimming them) to achieve a proper fit and match the original configuration.
- With an assistant, put the Roof Assembly on the vehicle and adjust it so that the gaps are even on all sides.
-
Press down on the perimeter
of the Roof Assembly to seal the urethane sealant.
CAUTIONTake care not to damage the surrounding components when pressing down on the Roof Assembly.
-
Apply suitable tape or
weights (such as sand bags) to hold the roof in place while the urethane
sealant cures.
WarningDo not drive the vehicle until the urethane sealant has cured. Refer to the manufacturer's documentation for the safe drive-away time.
- Perform any necessary post-repair operations.