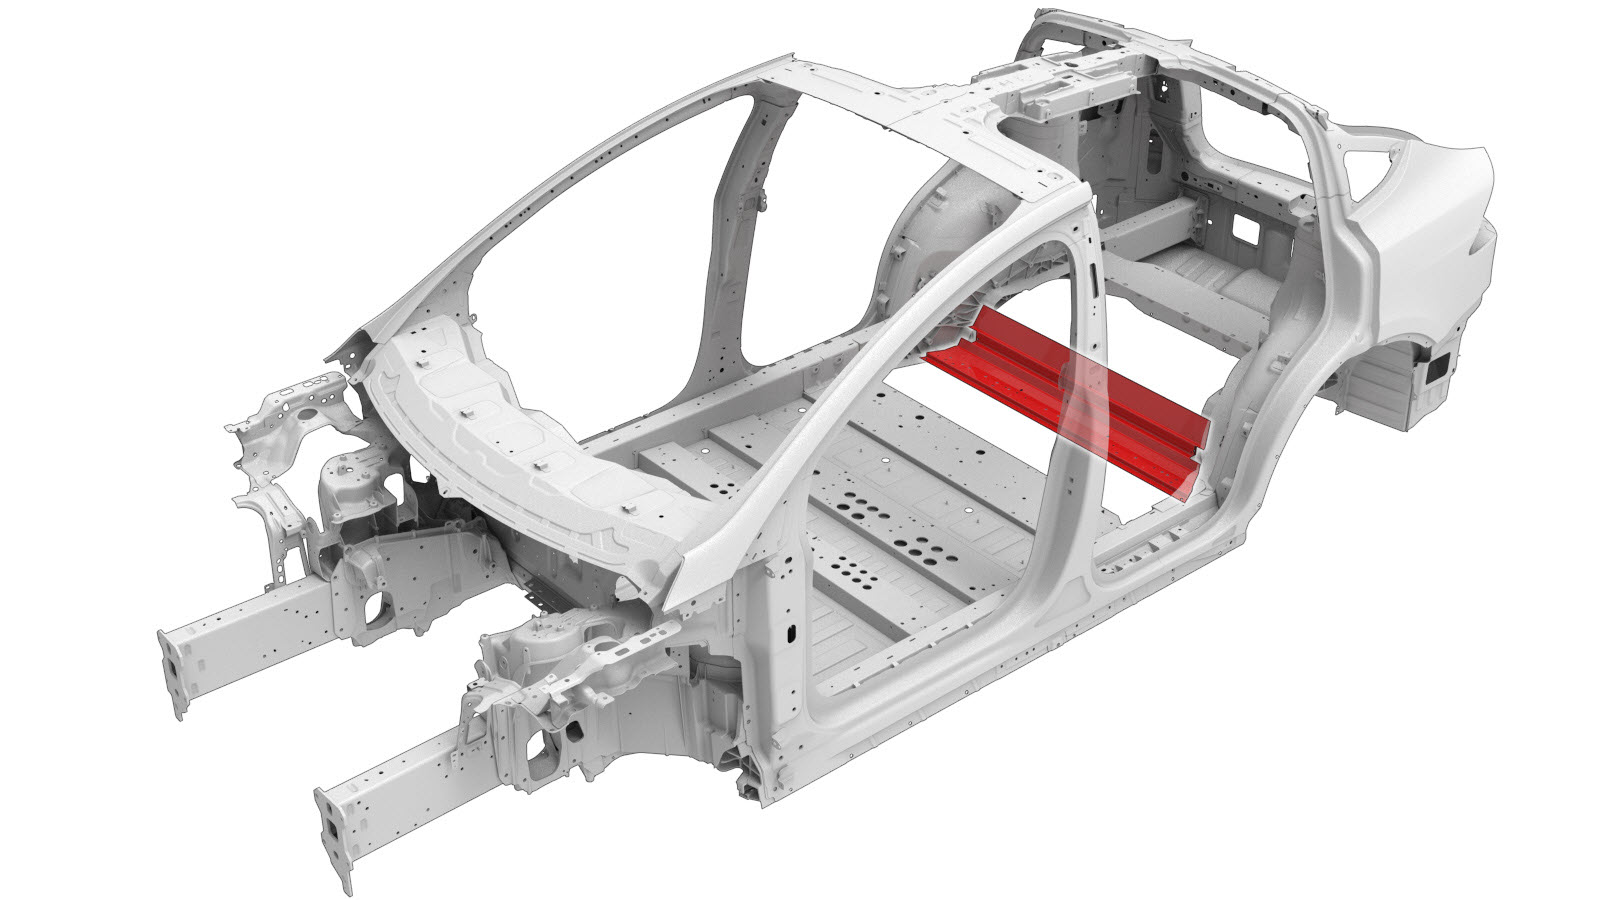
Rear Torque Box Crossmember (Lower) (Vehicles Built January 1, 2021 Through March 6, 2022)
 Correction code:
10100303202
NOTE:
Unless explicitly stated in the procedure, the above
correction code includes all Collision Repair work required
to perform this procedure, including the linked Collision
Repair procedures. Do not stack Collision Repair
correction codes unless explicitly told to do
so. Add any associated mechanical procedures
needed to perform this procedure.
Repair Information
- Review all collision repair general practices and safety documentation and wear the appropriate PPE (Personal Protective Equipment) before beginning this procedure.
- This procedure can be completed without using a frame bench.
Parts List
| Quantity | Description | Image / Notes |
|---|---|---|
| 1 | ASY-CROSSMEMBER RR TORQUE BOX LWR (Rear Torque Box Crossmember Lower) | |
| 7 | High Strength Structural Rivet, 6.5 mm | |
| 2 | Bolt HF, M8-1.25x22,[109],G0110,MAT | Tesla part number 1552447-00-A. |
| 2 | Nut , M8-1.25,HF,Steel[10],ZnAl,BLACK | Tesla part number 1006628-01-A. |
When ordering parts, refer to the Parts Catalog and enter the VIN of the vehicle being repaired to find the correct parts (and the part numbers) for the vehicle. Alternatively, use the search function in the Parts Catalog to find a specific part for the vehicle.
Repair Procedure
-
Remove the Rear Motor Cover.
-
Remove the Second Row Seat Floor Panel.
-
Remove the RH and the LH Rear Torque Box Lower Reinforcement.
-
Remove the original component.
-
Use structural adhesive to
attach the nuts in position on the inside of the Rear Node.
NoteIf necessary, grind the edges of the nuts to make them flush with the mounting location.
-
Prepare for installation.
or High Strength Structural Rivets, 6.5 mm
- A = 24 mm.
- B = 9 mm.
- C = 12 mm.
- D = 11 mm.
or Bolts
- Apply structural adhesive to the mating surfaces on the vehicle and the new component or components.
-
Install the new component or components.
Torque the bolts to 24 Nm.
-
Install the RH and the LH
Rear Torque Box Lower Reinforcement.
-
Install the Second Row Seat Floor Panel.
-
Install the Rear Motor Cover.
- Perform any necessary post-repair operations.