Mount Gateway 3
- Using a knockout
kit, punch out the necessary conduit entrance knockouts in
the Gateway 3. All cable knockouts are ¾ inch in diameter but can be
expanded to 2-½ inches. Additional knockouts can be made in
the area highlighted green in the image below.CAUTIONIf drilling into the enclosure, exercise caution and clean any metal shavings out of the enclosure after drilling. Only drill into the areas of the enclosure indicated in green in the image below. Drilling elsewhere could result in damage to the Gateway 3 and/or water ingress (if drilling into the top of the enclosure).
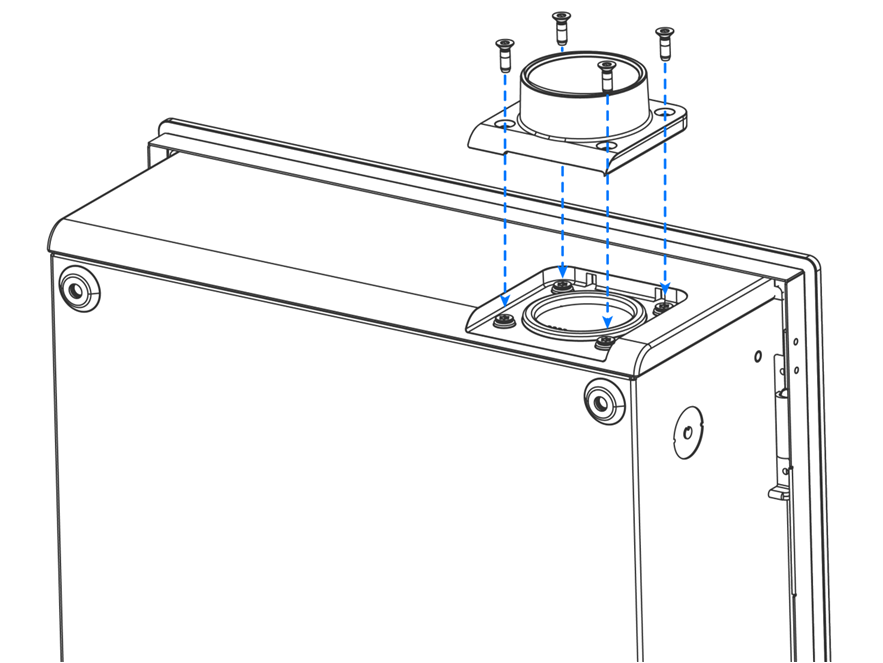
Figure 1. Cable Access Drill Guides 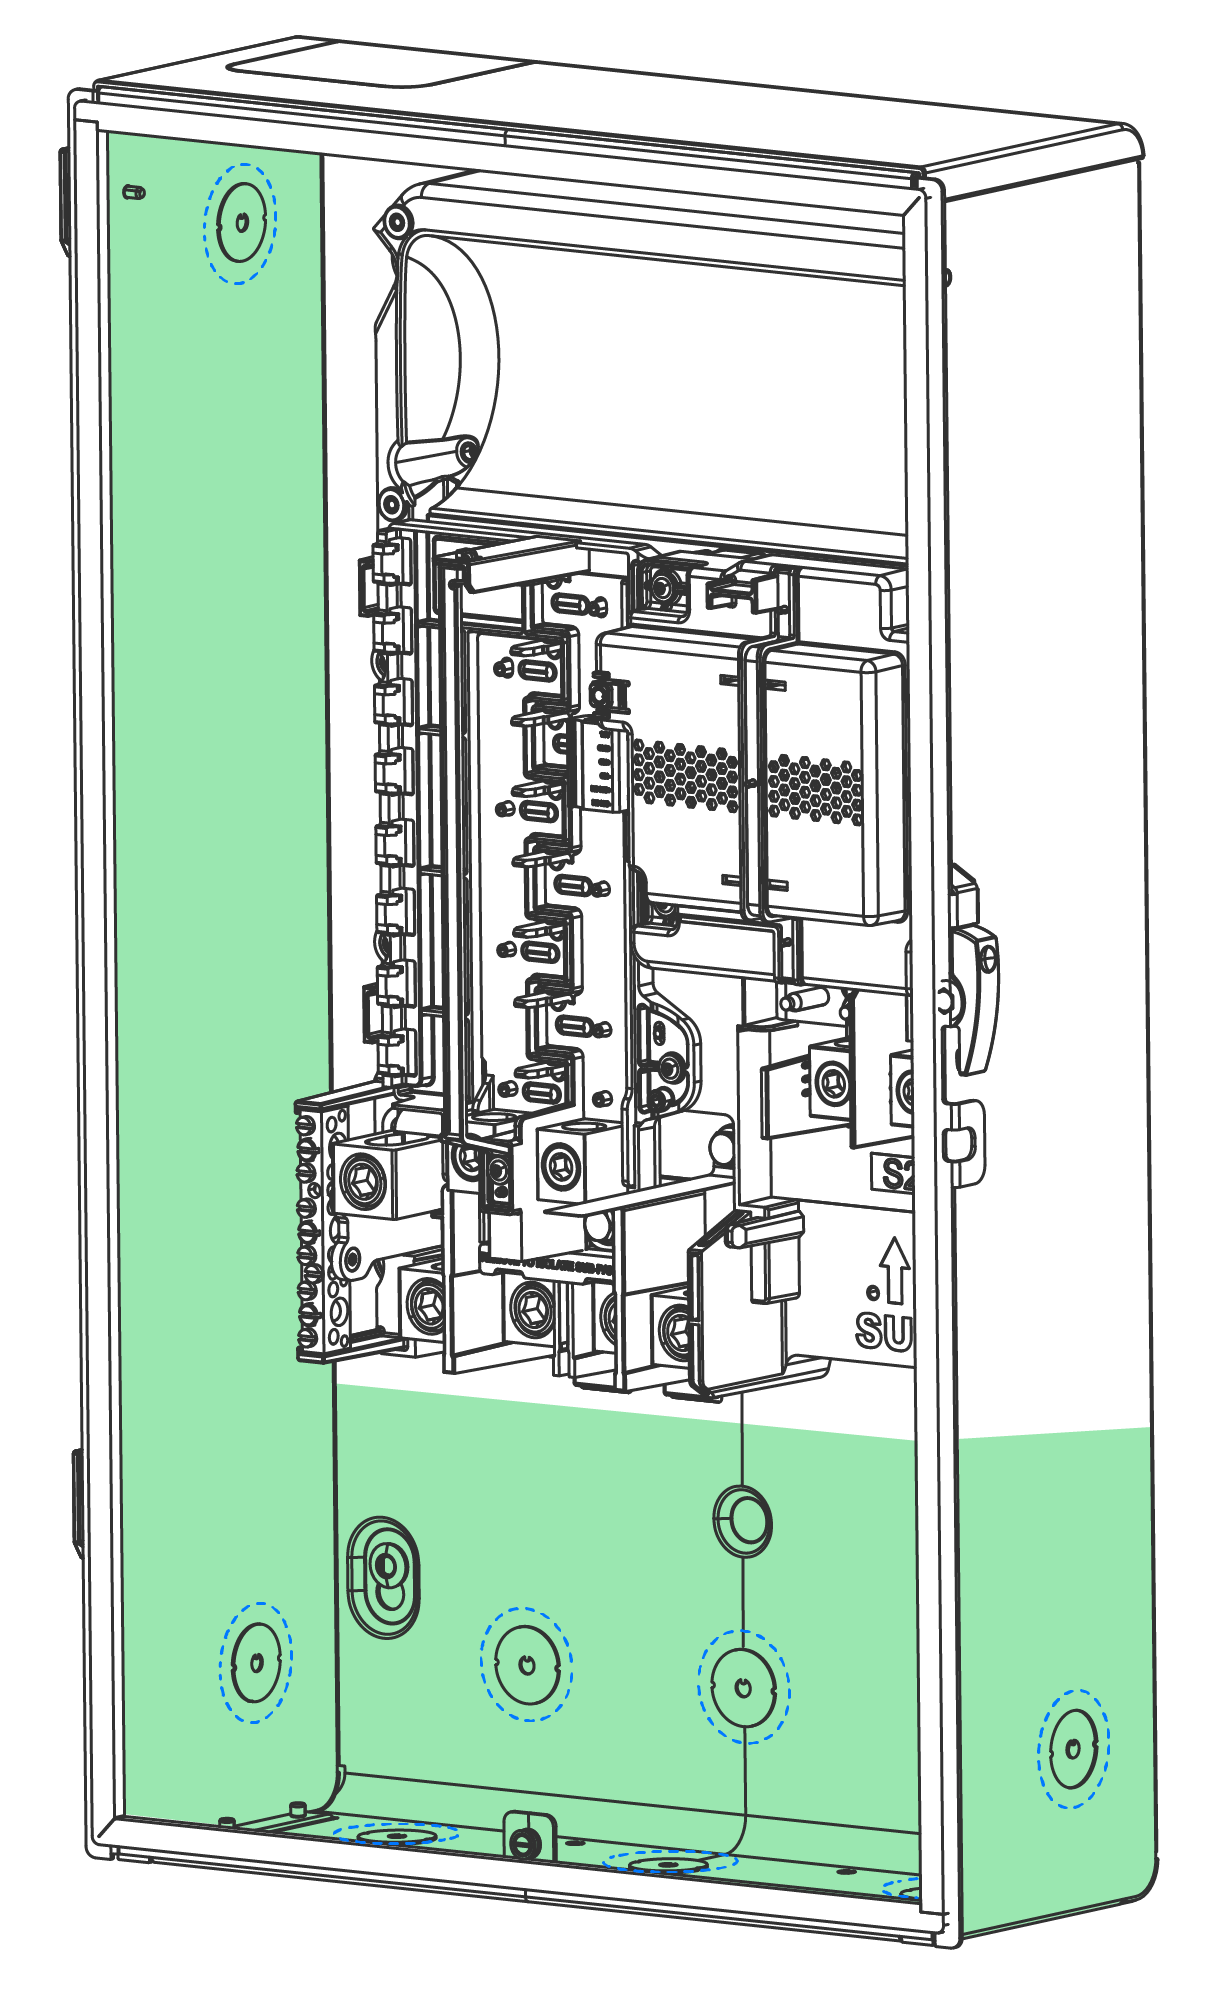 NoteFor conduit entry at the top of the Gateway enclosure, a Tesla Top Hub must be used in order to maintain enclosure ingress protection. If using top cable entry, remove the Top Hub Cap from the enclosure and install the Tesla Top Hub (Tesla P/N 1549184-00-A (2-inch kit) or Tesla P/N 1549184-01-A (1 ¼-inch kit)).
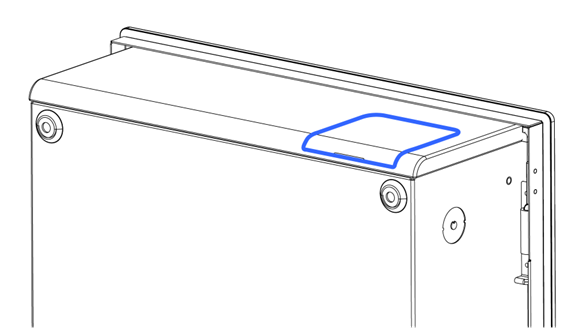
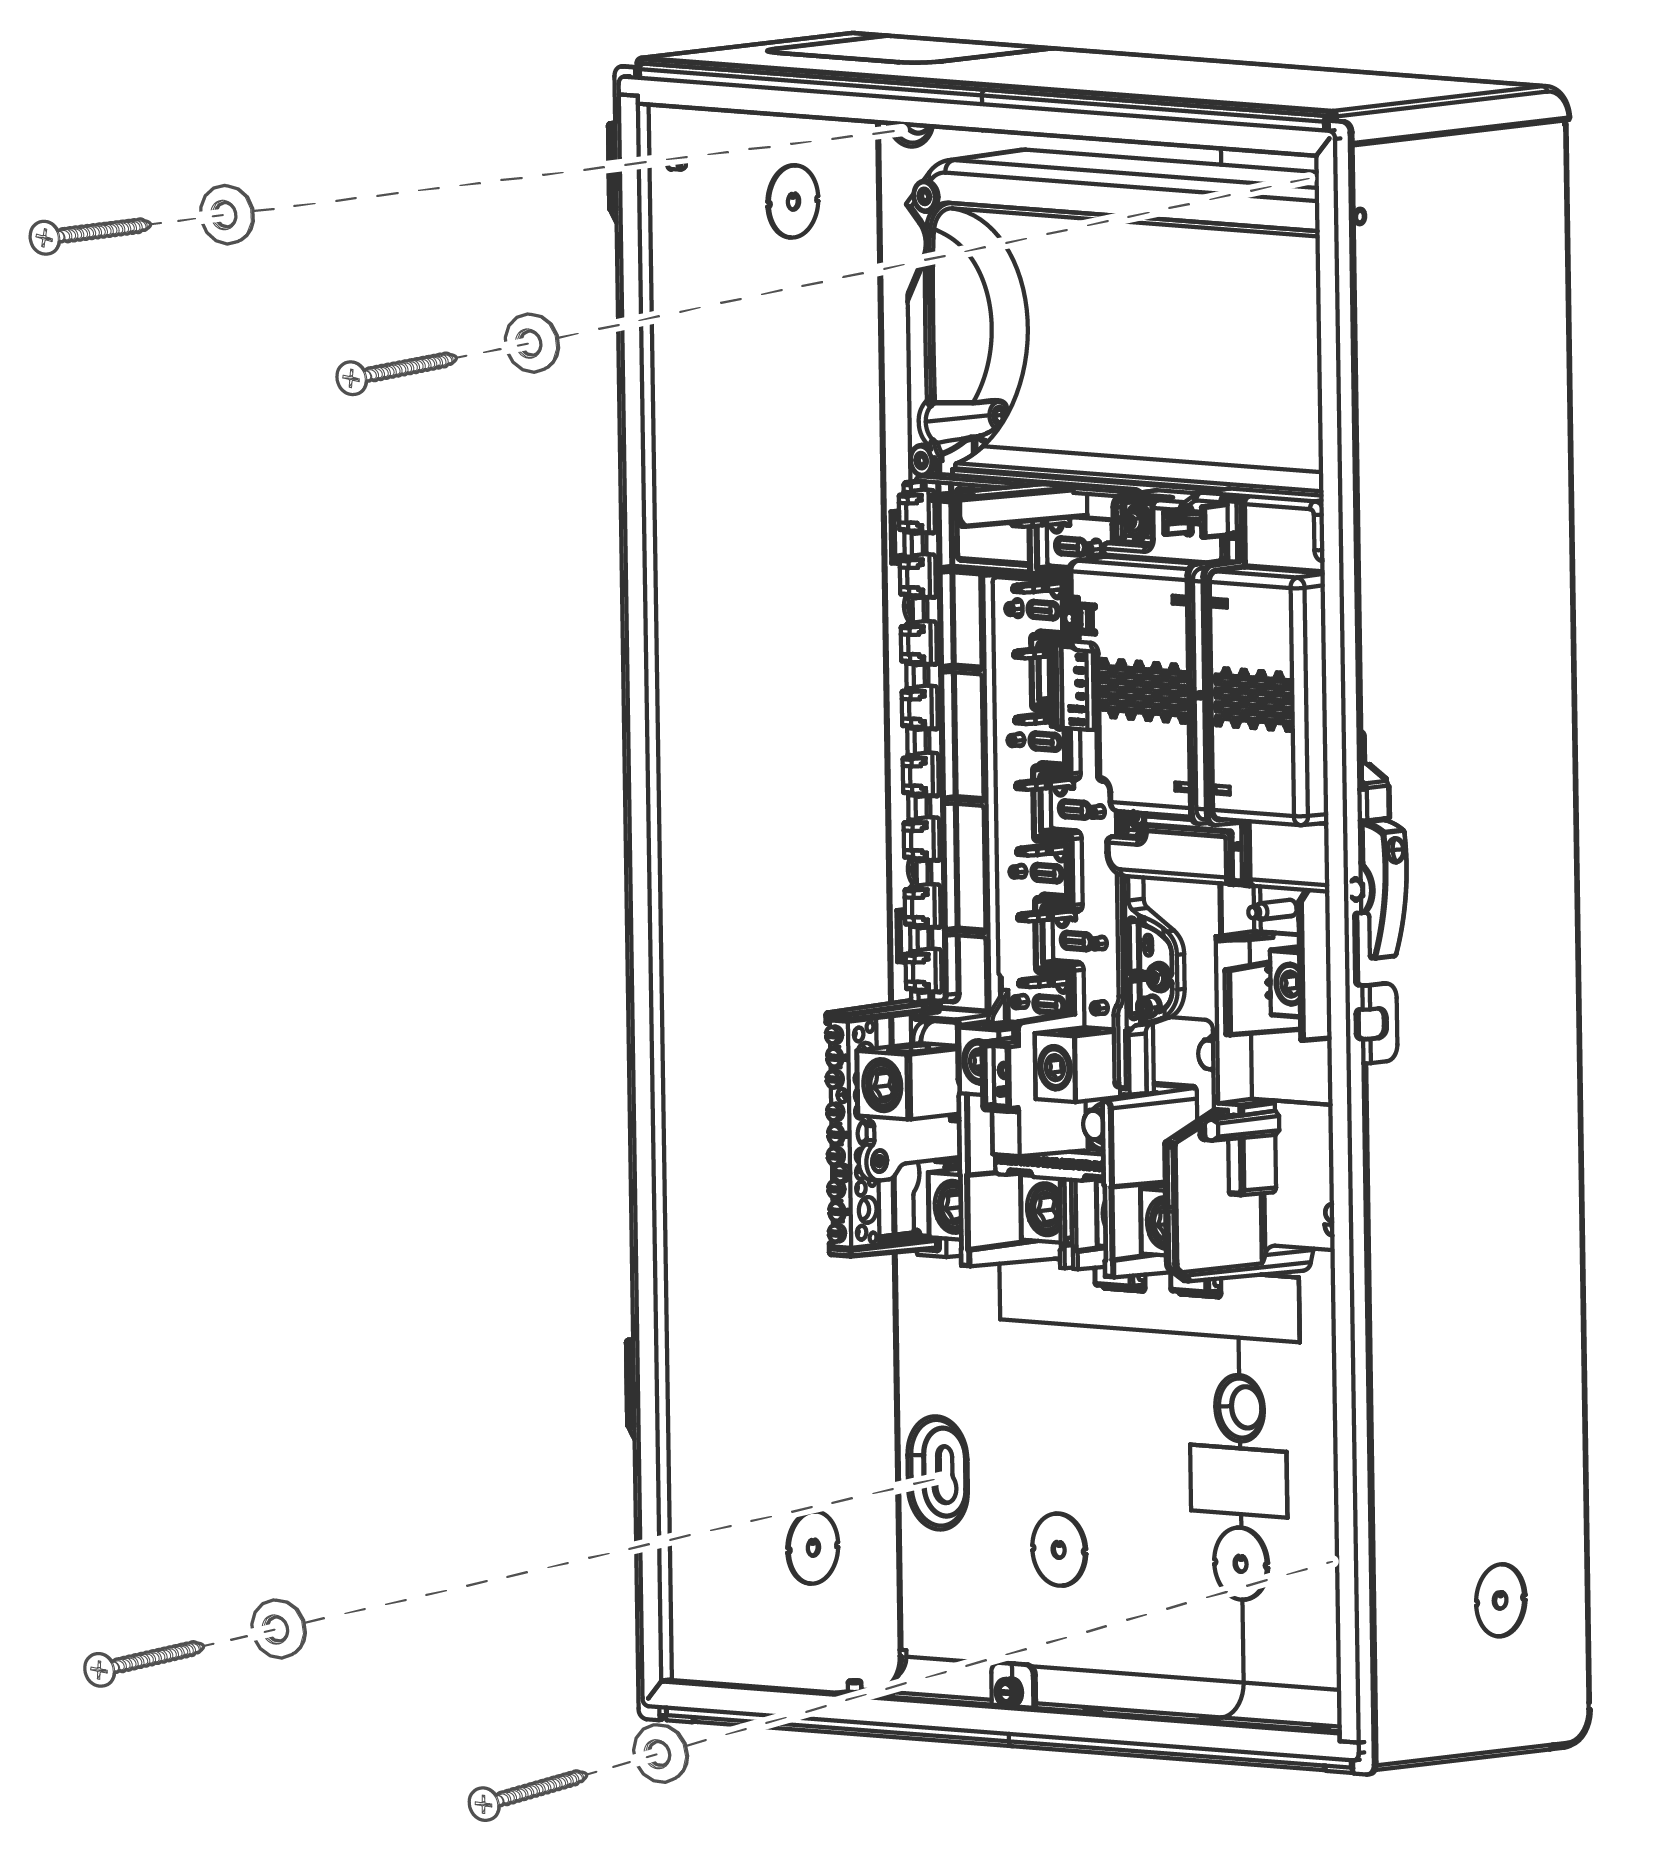
- Using a drill,
level, and ¼ inch screws, mount the Gateway 3 enclosure to a structurally sound wall. At least two
fasteners must be secured to a structural member. NoteThe provided sealing washers must be used when mounting the Gateway 3.NoteMount the Gateway 3 vertically, in the orientation shown below. Do not mount the Gateway 3 enclosure horizontally or upside down.
Figure 2. Gateway 3 Enclosure Mounting Holes