STEP 7: Install Clamp-on Ferrite Cores / Metal PV Shield
Powerwall 3 ships with either (3) clamp-on ferrite cores or (1) clamp-on ferrite core and metal PV shield. Review the following table to learn which parts ship with Powerwall 3 depending on Powerwall 3 part number:
| Powerwall 3 P/N 1707000-00-H and lower | Powerwall 3 P/N 1707000-00-J and higher |
|---|---|
|
|
|
|
CAUTION
Ferrite cores are
fragile; handle with caution.
Note
Equipment grounding conductors do not
need to be included in ferrite cores.
- Install the provided small clamp-on
ferrite core around the factory-installed low voltage harness.
Figure 1. Ferrite Ring Around LV Harness 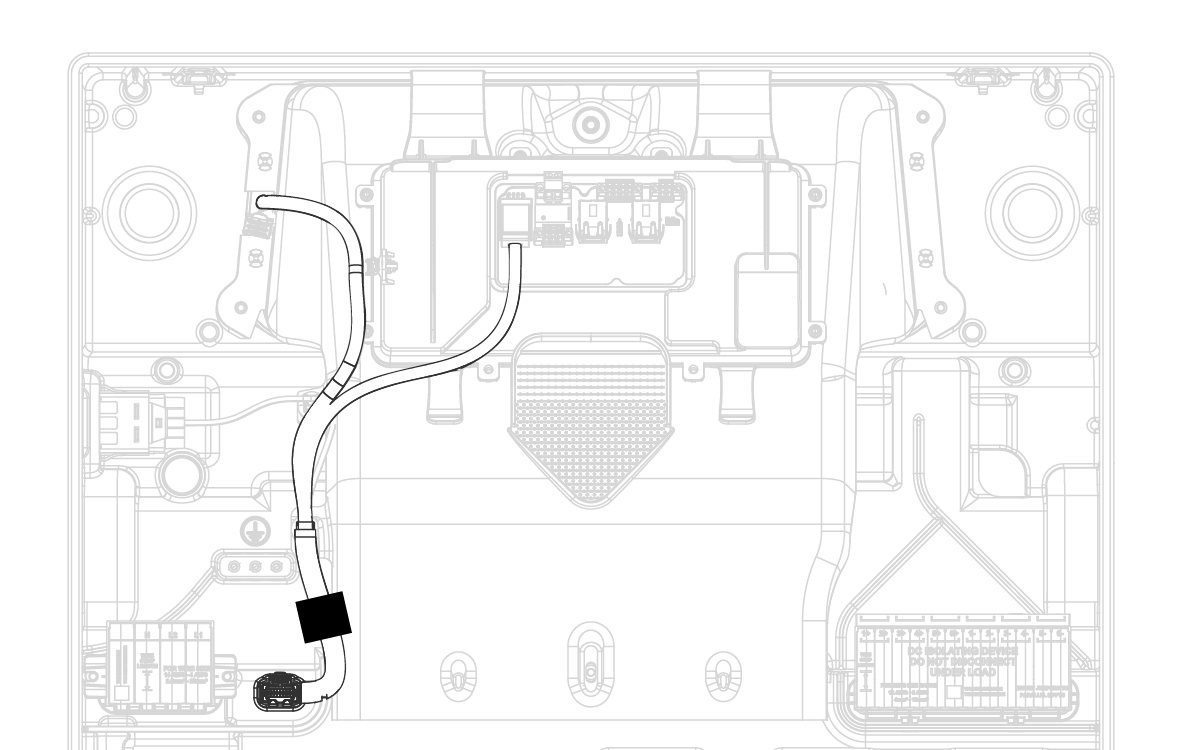
- For Powerwall 3 P/N 1707000-00-H and
lower, install the large clamp-on ferrite cores:
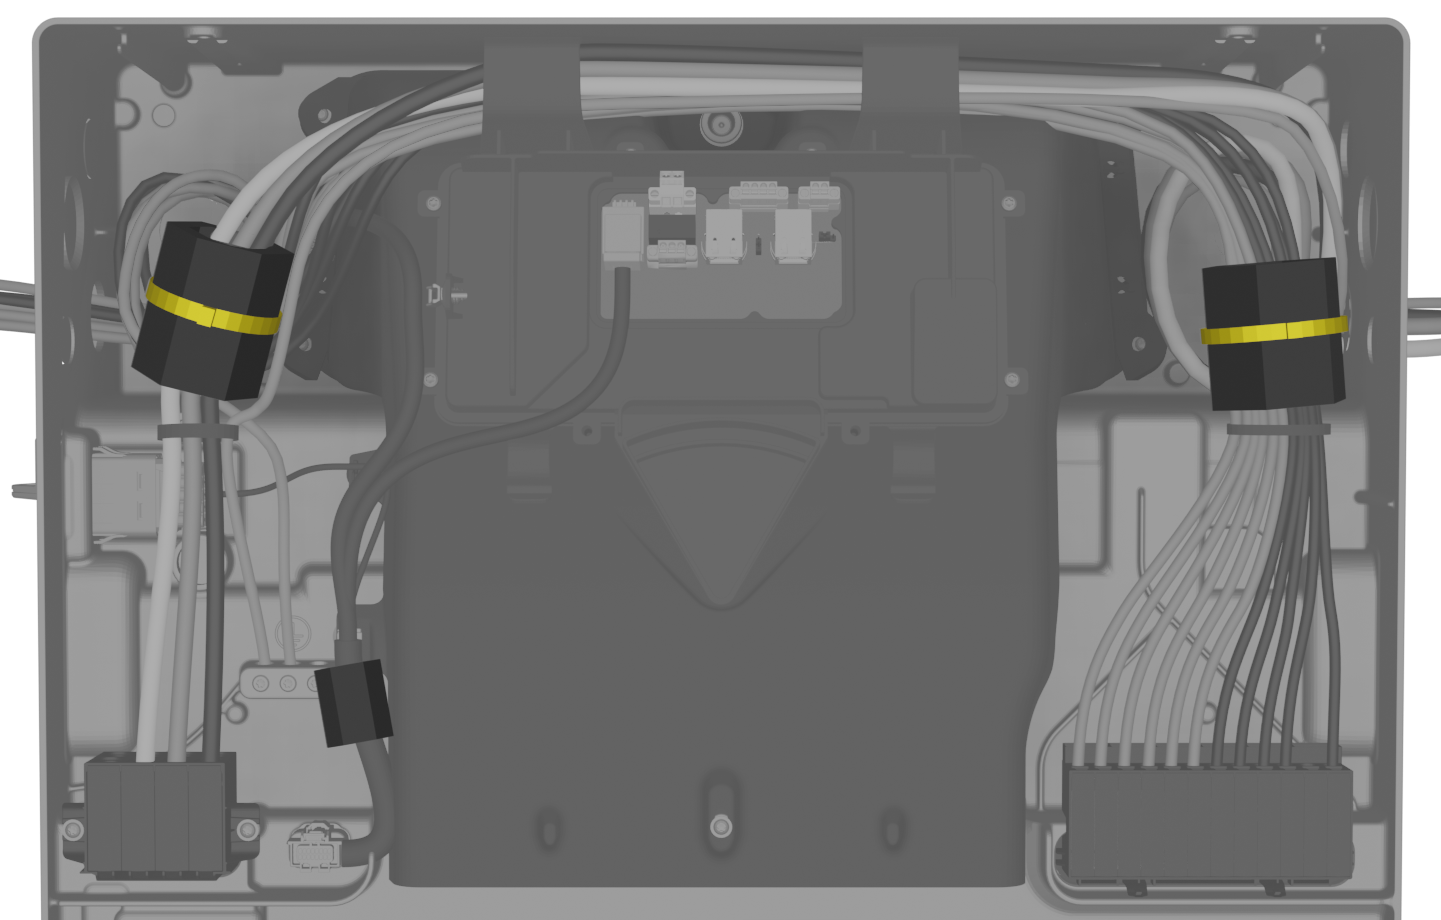
- Install one of the provided
large clamp-on ferrite cores around the AC conductors.
Figure 2. Ferrite Ring Around AC Conductors 
- Secure the ferrite core closed with the provided cable tie.
- Install one of the provided
large clamp-on ferrite cores around the PV conductors.
Figure 3. Ferrite Ring Around PV Conductors 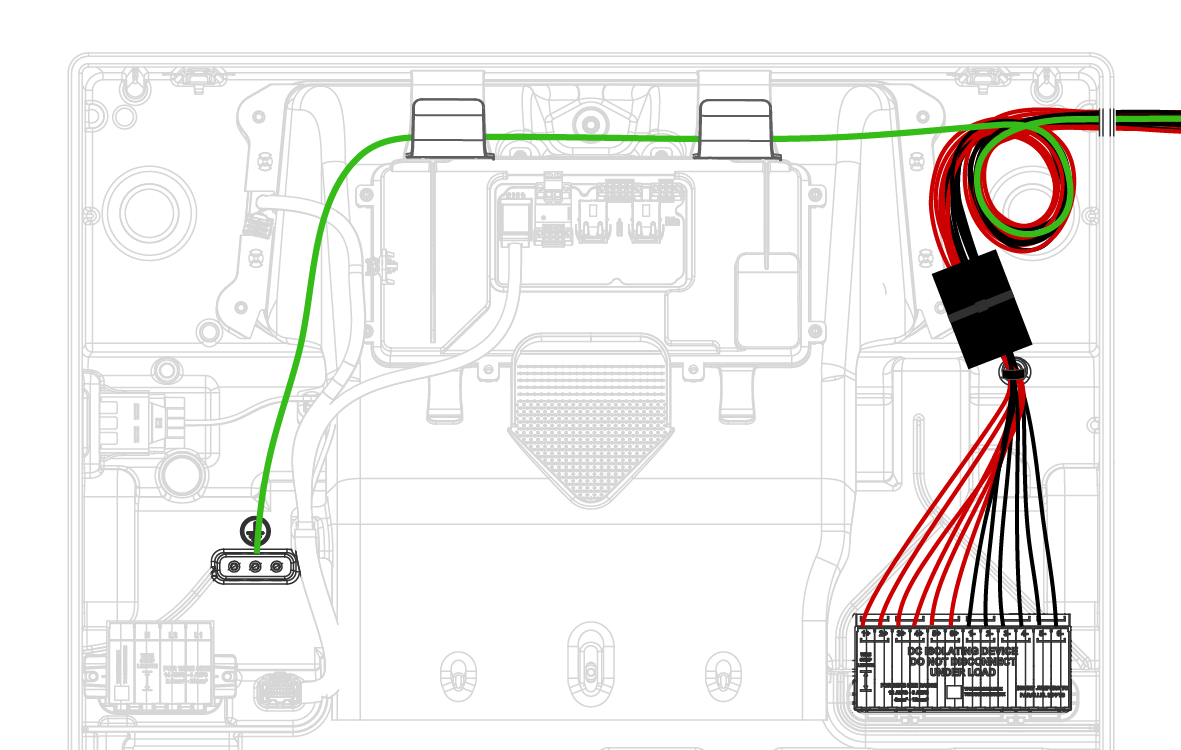
- Secure the ferrite core closed with the provided cable tie.
- Install one of the provided
large clamp-on ferrite cores around the AC conductors.
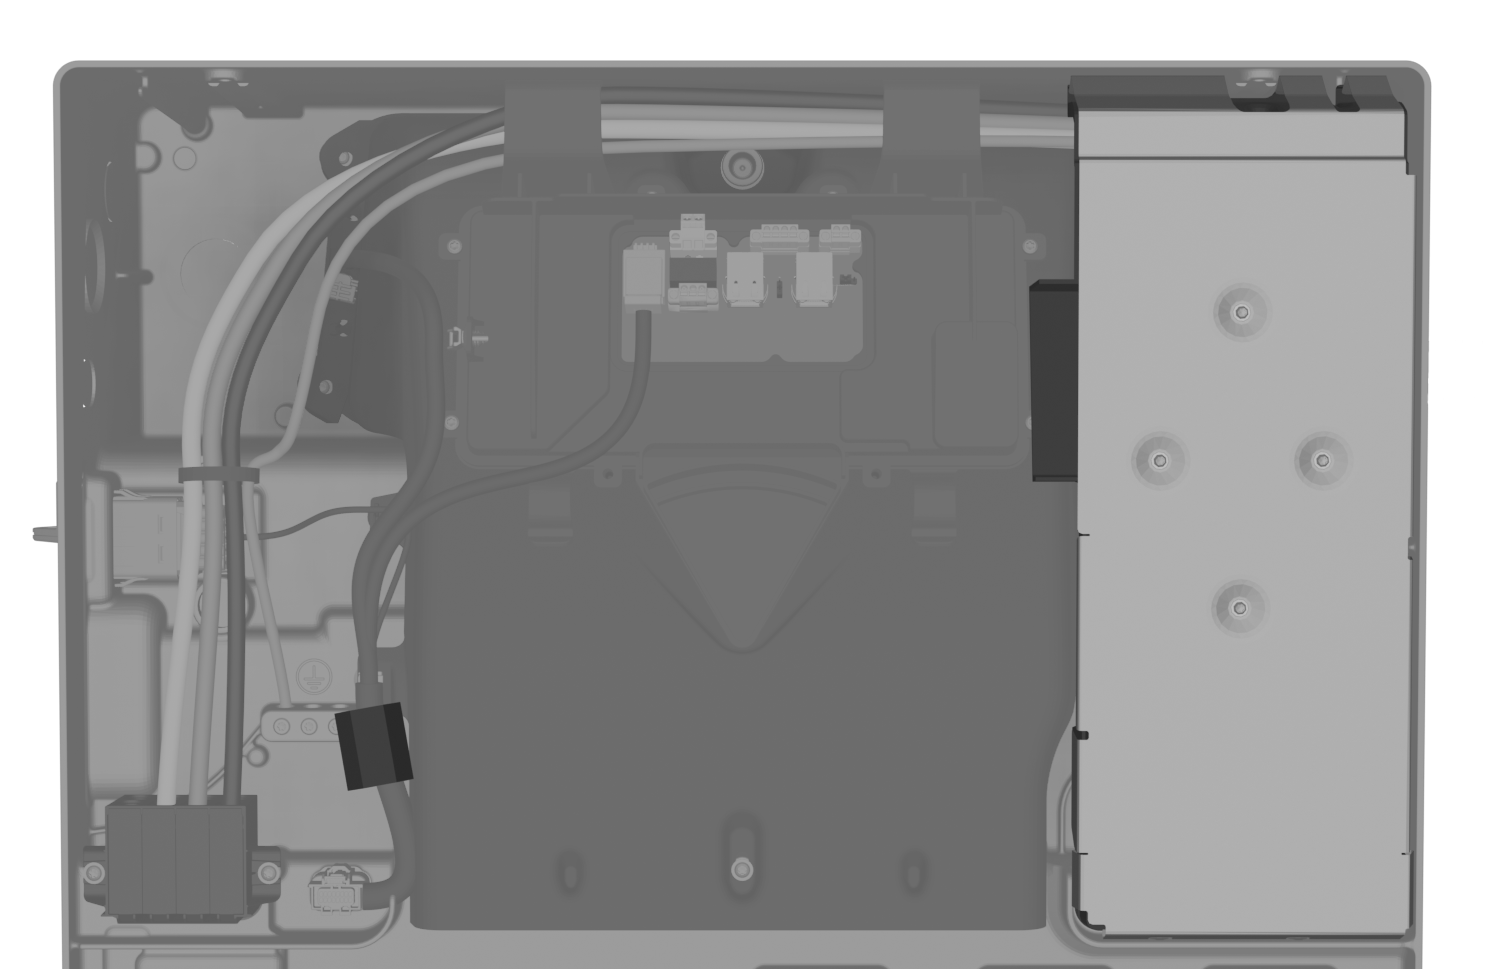
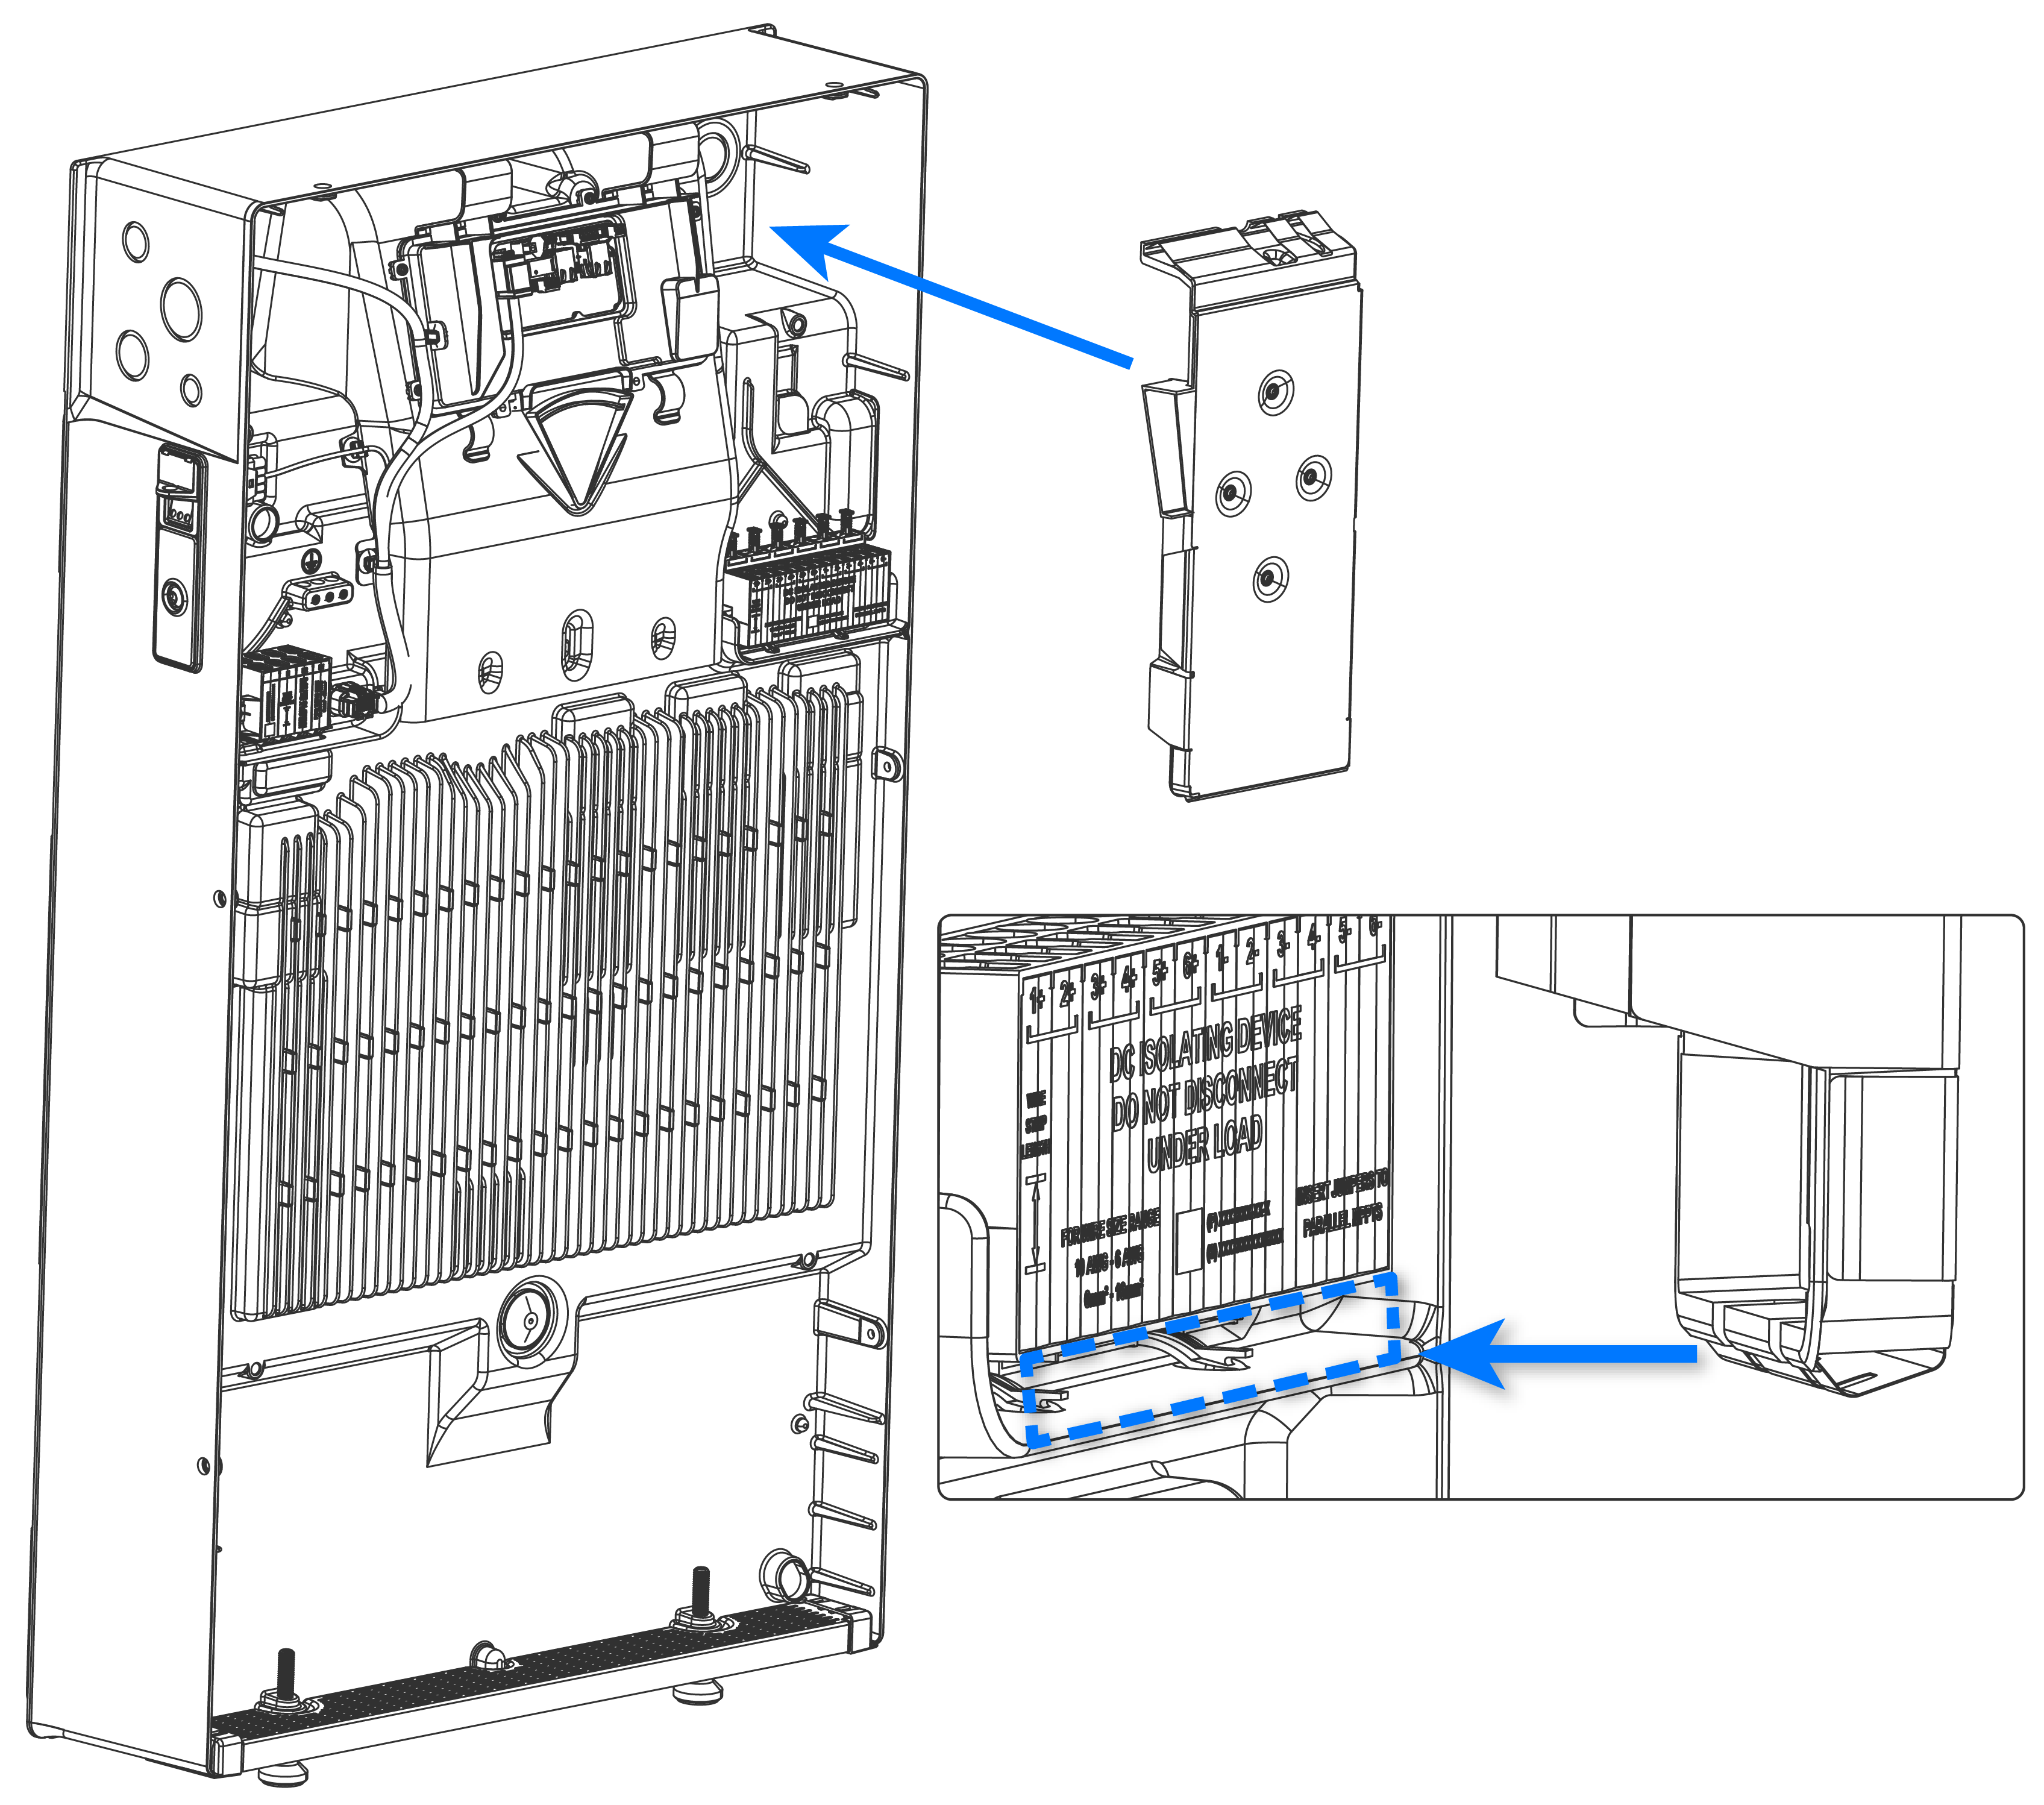
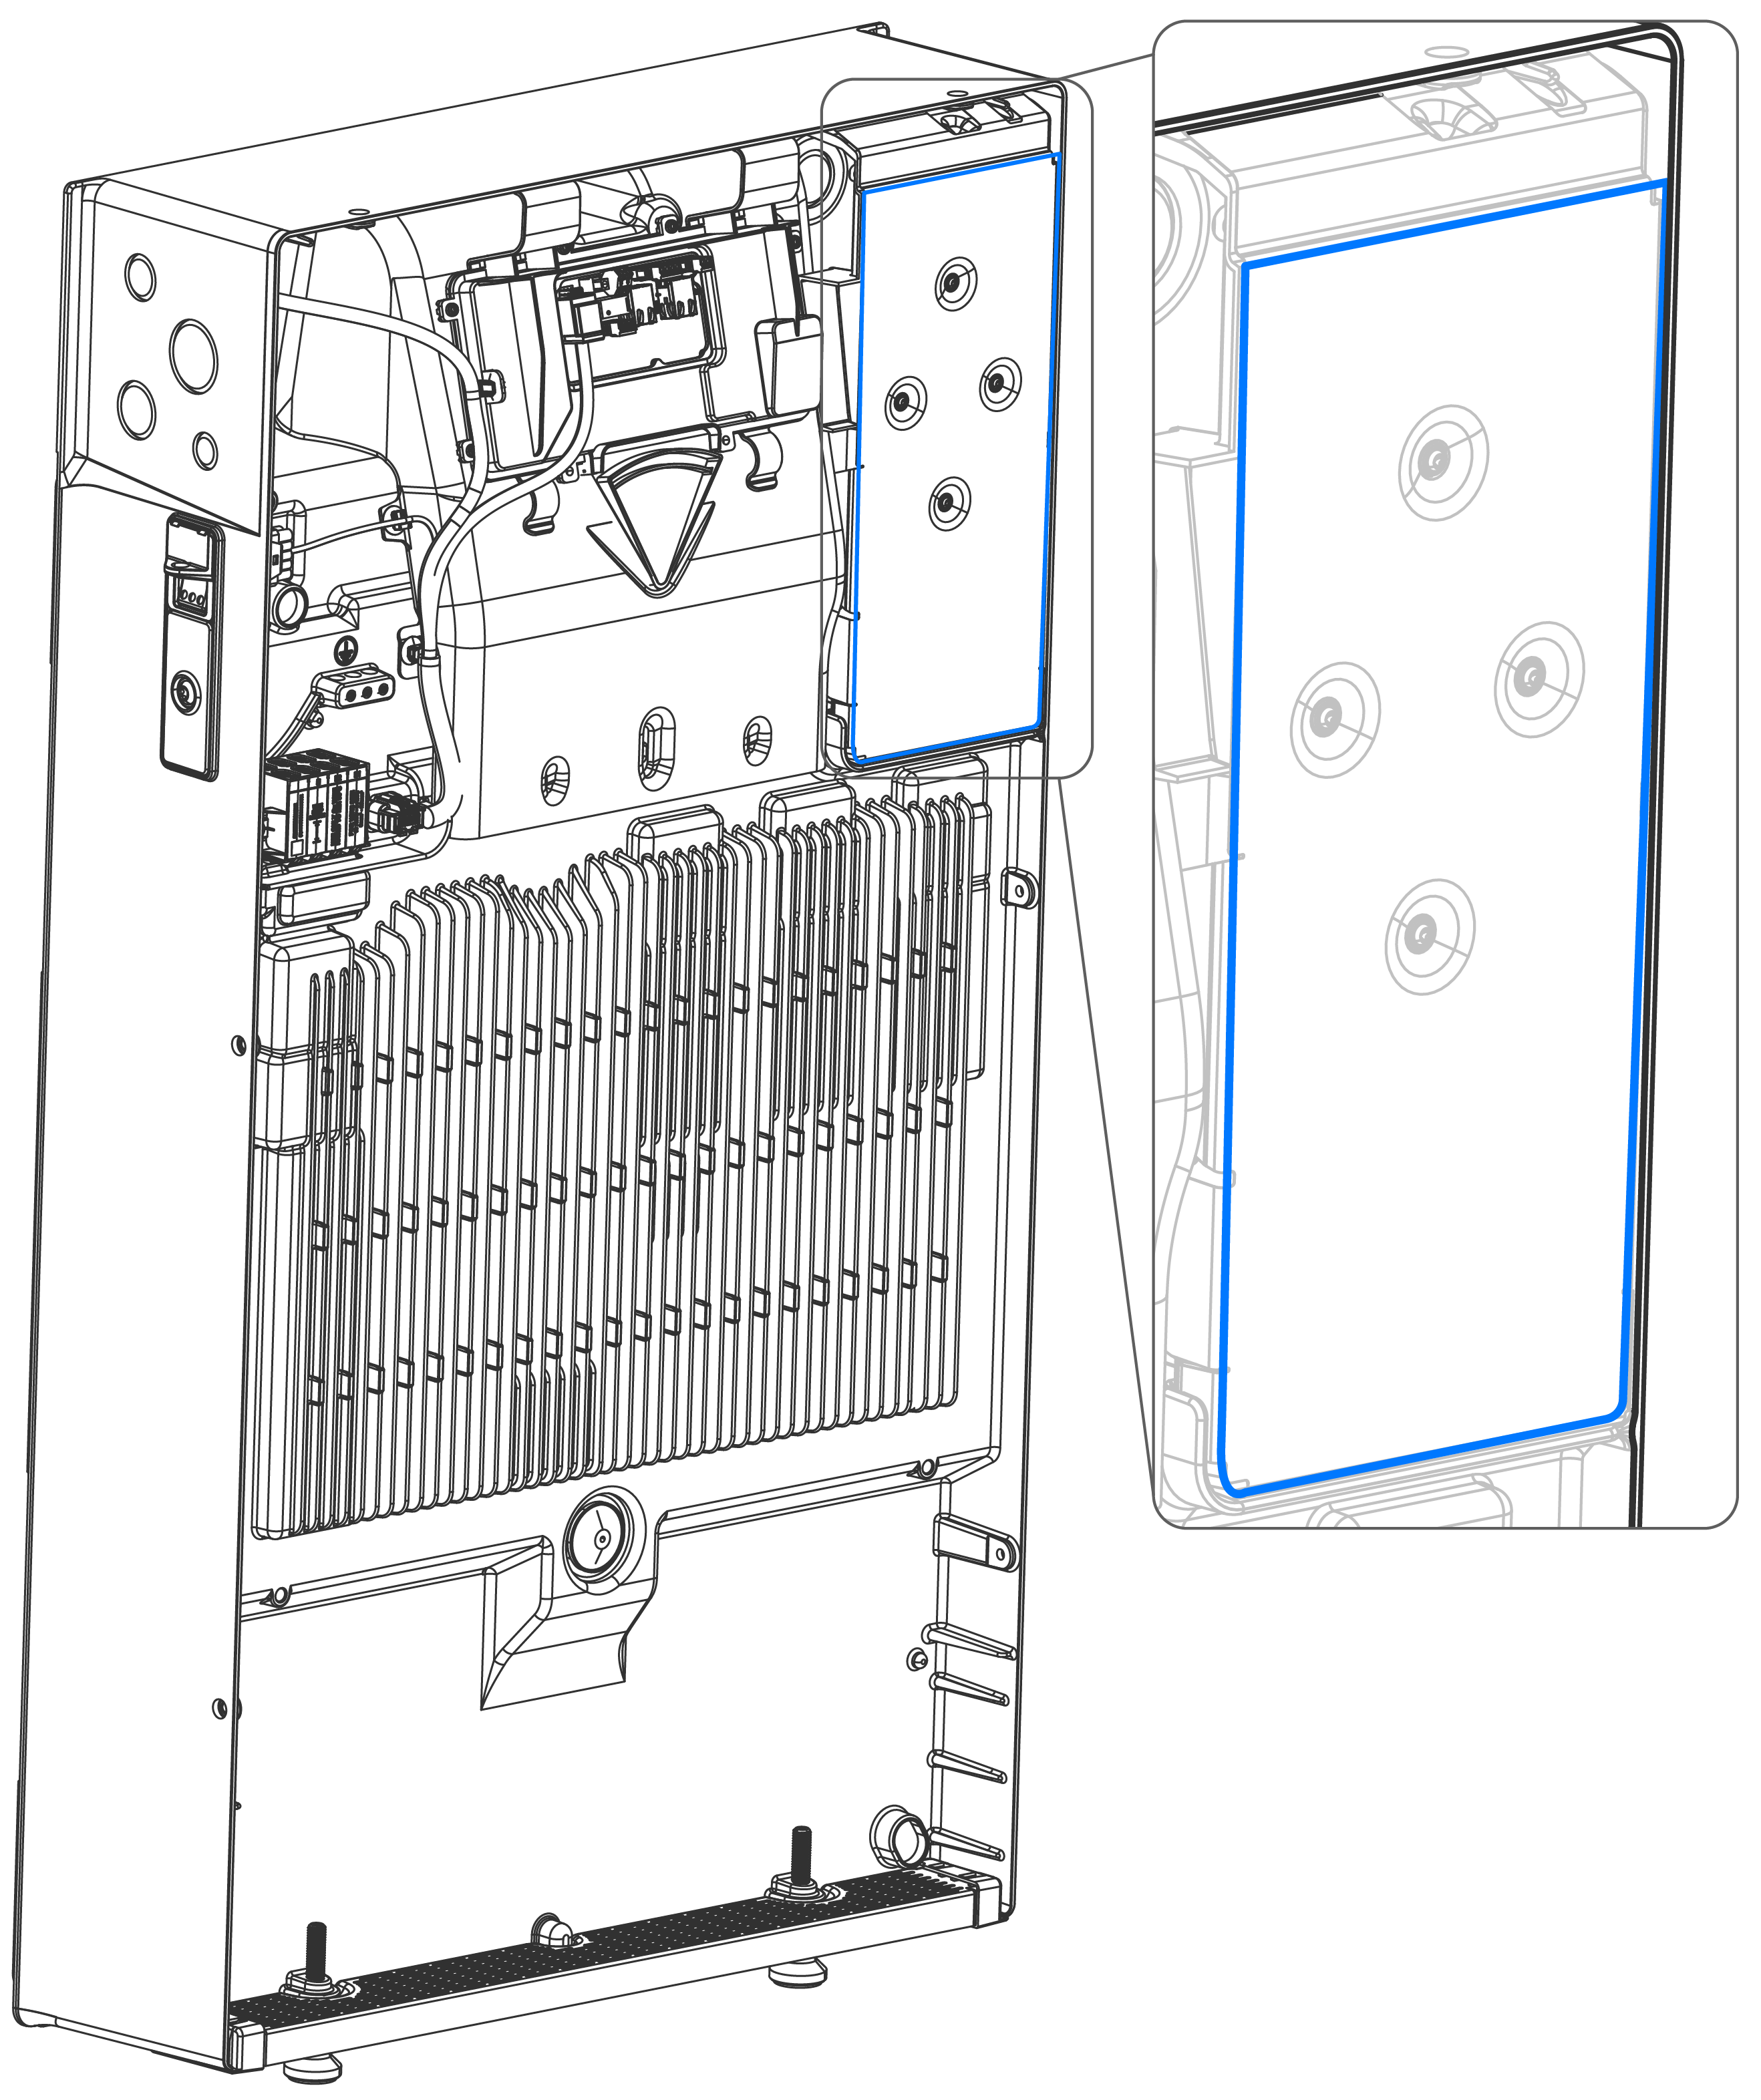
- For Powerwall 3 P/N 1707000-00-J and
higher, install the metal PV shield:
- Inspect the PV shield and confirm the metal is not warped or bent.
- Align the bottom edge of the PV shield with the space between the PV connector and the metal enclosure. Push the PV shield into place.
- Confirm the edges of the PV
shield do not protrude past the edges of the Powerwall 3 enclosure.
NoteWhen the metal PV shield is installed, additional ferrite cores are not required on the AC and PV wires.