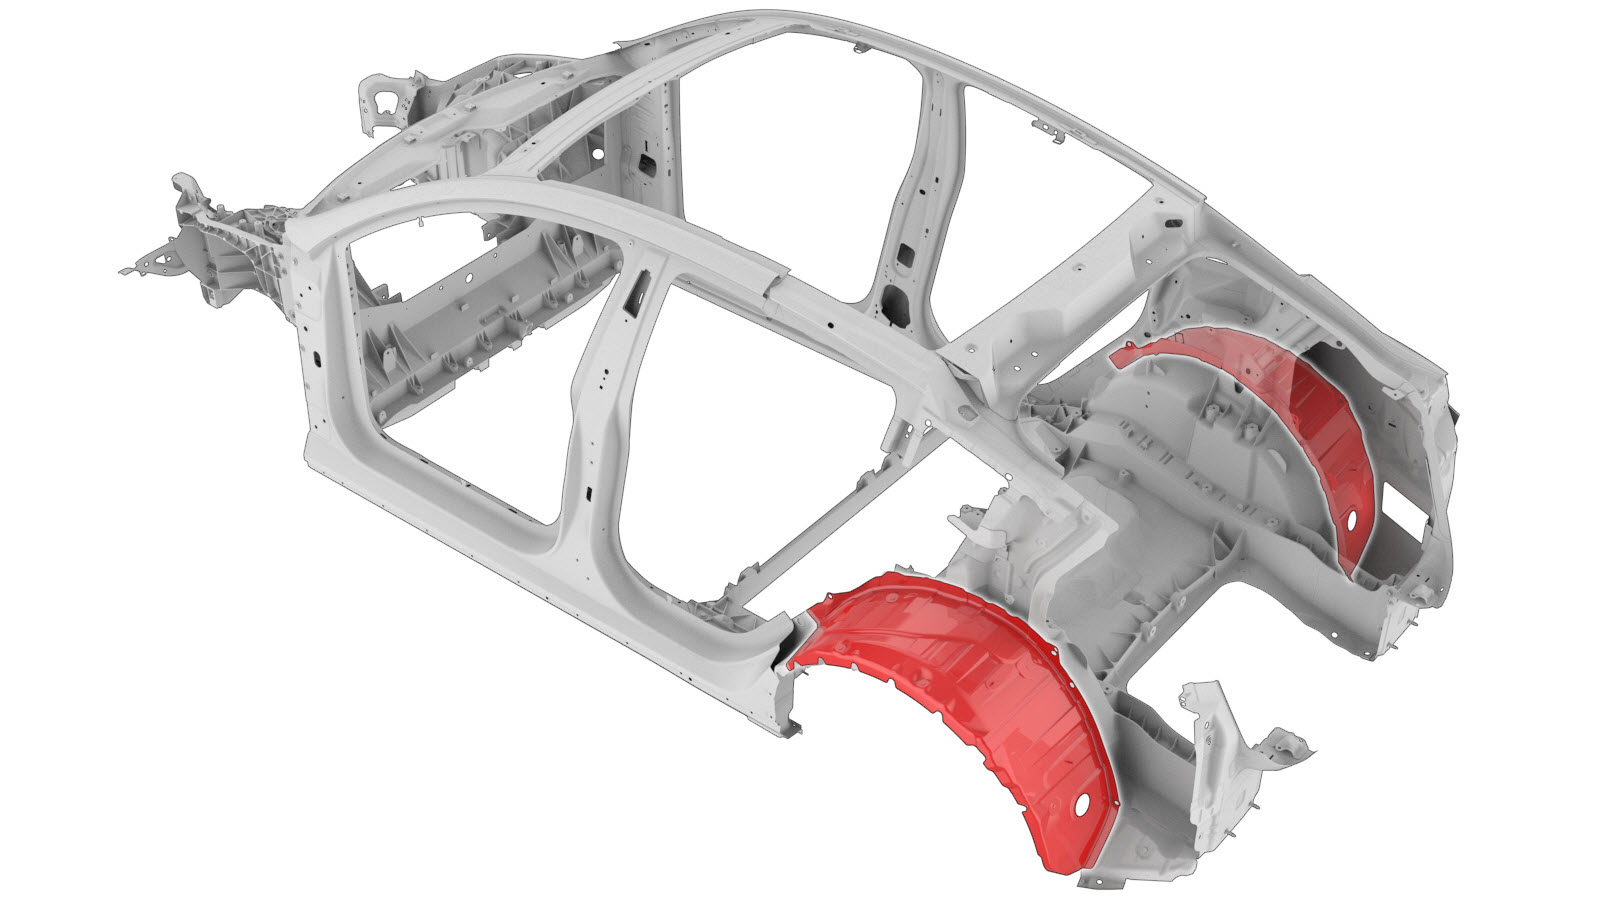
Wheelhouse Outer (Rear)
 Correction code:
10101918802
10101918902
NOTE:
Unless explicitly stated in the procedure, the above
correction code includes all Collision Repair work required
to perform this procedure, including the linked Collision
Repair procedures. Do not stack Collision Repair
correction codes unless explicitly told to do
so. Add any associated mechanical procedures
needed to perform this procedure.
Repair Information
- Review all collision repair general practices and safety documentation and wear the appropriate PPE (Personal Protective Equipment) before beginning this procedure.
- This procedure can be completed without using a frame bench.
- Replaced in a single repair as a single complete component, using the ASSEMBLY,WHEEL HOUSE OUTER,SVC E-COATED (Wheelhouse Outer) service part and the instructions in the Repair Procedure section of this document.
- Any individual section of the Wheelhouse Outer can be replaced so long as the guidelines from the Sectioning Guidelines are followed.
Parts List
| Quantity | Description | Image / Notes |
|---|---|---|
| 1 | ASSEMBLY,WHEEL HOUSE OUTER,SVC E-COATED (Wheelhouse Outer) | |
| 4 | ||
| 3 | ||
| 2 | Tesla part number 1008833-01-A. | |
| 2 | Tesla part number 1006628-01-A. |
When ordering parts, refer to the Parts Catalog and enter the VIN of the vehicle being repaired to find the correct parts (and the part numbers) for the vehicle. Alternatively, use the search function in the Parts Catalog to find a specific part for the vehicle.
Sectioning Guidelines
- It is allowable to cut through a clearance hole or a non functional hole (exterior trim hole).
- Do not cut within 25 mm. of the center of a bolt hole or stud.
- Seal all open seams after structural adhesive has cured.
The image below shows the Wheelhouse Outer (complete). The colored areas indicate if sectioning is allowed. Compare the damaged area of the vehicle's Wheelhouse Outer to the image below, then use the repair criteria corresponding to the color of the highlighted area to find the criteria to use to determine if the damaged area of the component can be sectioned.
| Wheelhouse Outer Sectioning | |
|---|---|
Based on the colors used in the image above, the allowed repairs are as follows:
| Area Color | Area Repairability |
|---|---|
| Green areas: | Sectioning is allowed in these
areas. Overlap joints must have at least a 25 mm. of overlap that is secured with structural adhesive. When using an overlap joint between a red zone area and a green zone area, the red zone area must overlap into the green zone area 25 mm. or more (do not overlap into the red zone). Note The gap between the adjacent panels of the butt joint
for this section should be as small as possible to
maximize joint strength. Note Seal all open seams after welding. |
| Yellow areas: | Sectioning is allowed in these areas. Note Sectioning in
these areas requires the component be returned to its
original geometry for proper function. Overlap joints must have at least a 25 mm. of overlap that is secured with structural adhesive. When using an overlap joint between a red zone area and a yellow zone area, the red zone area must overlap into the yellow zone area 25 mm. or more (do not overlap into the red zone). Areas shown in yellow include areas that:
|
| Red areas: | Sectioning is not allowed. |
Repair Procedure
-
Remove the necessary portion
of the Dogleg Lower to expose the underlying component being replaced.
-
Remove the Rear Quarter Inner.
-
Remove the original component.
or Factory SPRs
or Factory Spot Welds
-
Prepare for installation.
- Apply structural adhesive to the mating surfaces on the vehicle and the new component or components.
-
Install the new component or components.
Torque the bolts to 22 Nm.NoteMake sure to cut the NVH foam under the subwoofer to allow for rivet clearance.
-
Install the Rear Quarter Inner.
-
Install the portion of the
Dogleg Lower
that was removed to expose the component being replaced.
- Perform any necessary post-repair operations.