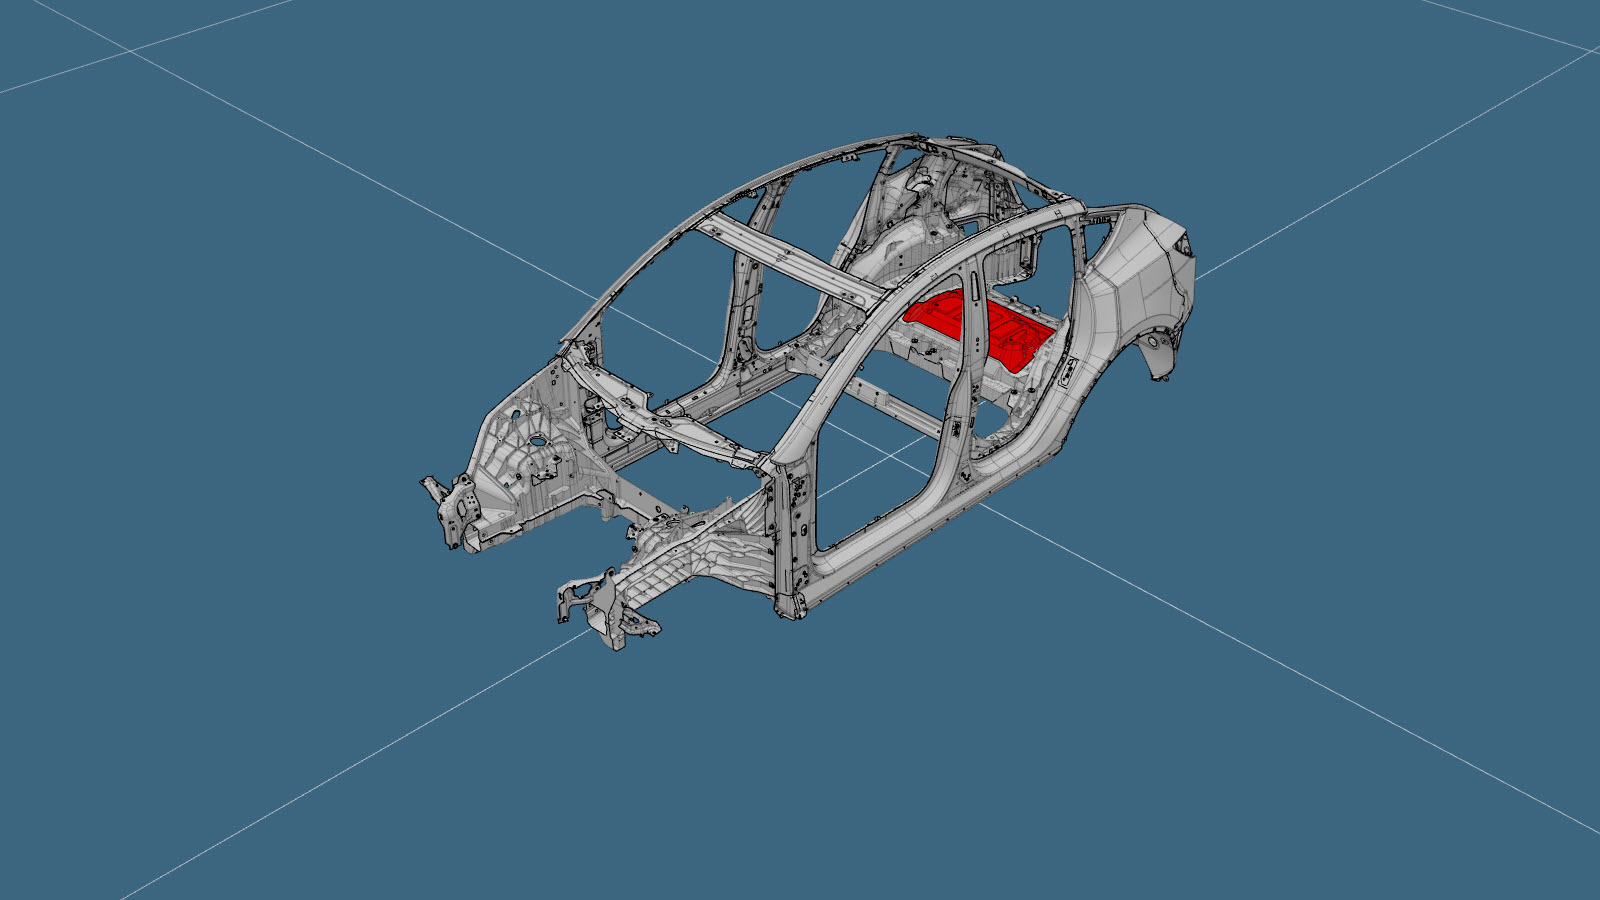
Motor Cover (Large Area)
 Correction code:
10102201702
NOTE:
Unless explicitly stated in the procedure, the above
correction code includes all Collision Repair and Service
repair work required to perform this procedure, including
the linked Collision Repair procedures and linked Service
procedures. Do not stack Collision Repair correction
codes unless explicitly told to do so. Depending
on the damage to the vehicle, additional repairs may be
required.
Correction code:
10102201702
NOTE:
Unless explicitly stated in the procedure, the above
correction code includes all Collision Repair and Service
repair work required to perform this procedure, including
the linked Collision Repair procedures and linked Service
procedures. Do not stack Collision Repair correction
codes unless explicitly told to do so. Depending
on the damage to the vehicle, additional repairs may be
required.
Repair Information
- Depending on the damage to this component, it may be possible to repair this component. Refer to Cast Rear Under Body (1-Piece) Repair Guidelines for more information.
- There are two retrofit options:
- Motor Cover (Large Area) (this procedure) includes removing the top portion of the Motor Cover, installing new bolts and nuts to provide attachment points for the Rear Motor Bay Noise Absorber, and then installing the new Motor Cover. The Large Area Retrofit removes more of the original Motor Cover than the Small Area Retrofit, and requires the installation of new bolts and nuts to provide attachment points for the Rear Motor Bay Noise Absorber.
- Motor Cover (Small Area) includes removing the top portion of the Motor Cover, leaving the existing attachment points for the Rear Motor Bay Noise Absorber, and then installing the new Motor Cover. The Large Area Retrofit removes less of the original Motor Cover than the Small Area Retrofit, and re-uses the existing attachment points for the Rear Motor Bay Noise Absorber.
- Review all collision repair general practices and safety documentation and wear the appropriate PPE (Personal Protective Equipment) before beginning this procedure.
- This procedure can be completed without using a frame bench.
Parts List
| Quantity | Description | Image / Notes |
|---|---|---|
| 1 | MY MY MOTOR COVER SVC E-COATED (Motor Cover) | |
| 10 | Structural Bulb Rivet, 6.5 mm | |
| 4 | Bolt , M6x30 Flange Head Hex Bolt | Tesla part number 1129025-00-A. |
| 4 | Bolt , M6 Flange Hex Nut&Washer Assembly | Tesla part number 1485241-00-A. |
| 8 | Nut , M6 Flange Head Nut | Tesla part number 1116867-00-A. |
| 1 | BUTYL FOIL PATCH - M3 480 X 240 X 2.0 | Tesla part number 1004964-00-A. |
| 4 | BUTYL FOIL PATCH 150X120X2MM | Tesla part number 1043439-00-A. |
| 1 | Windshield Glass Adhesive |
When ordering parts, refer to the Parts Catalog and enter the VIN of the vehicle being repaired to find the correct parts (and the part numbers) for the vehicle. Alternatively, use the search function in the Parts Catalog to find a specific part for the vehicle.
Repair Procedure
- Remove the Seat Back - 2nd Row - LH (Remove and Replace).
- Remove the Seat Back - 2nd Row - RH (Remove and Replace).
- Remove the Carpet - Rear (Remove and Replace).
- Remove the Noise Absorber - Motor Bay - Rear (Remove and Replace).
- Inspect the original Motor Bay Cover for a raised cut line.
-
Use the new Motor Bay Cover as a
template to trace a line around the original Motor Bay Cover.
-
Remove the original component.
If the original Motor Bay Cover:
- Does have a raised cut line,
cut on the raised cut line to remove the necessary portions of the original cast
Motor Cover. NoteAfter removing the necessary portion of the original cast Motor Cover, the new Motor Cover should overlap the remaining portion of the original component by at least 25 mm.
- Does not have a raised cut line, cut 25 mm. inside the traced line and remove the necessary portions of the original cast Motor Cover. Leave at least 25 mm. between the cut line and traced line to create an overlap with the new Motor Cover.
- Reference Line/Point
- Cut LineA = 25 mm
- Does have a raised cut line,
cut on the raised cut line to remove the necessary portions of the original cast
Motor Cover.
-
Prepare to install the Rear Motor Bay Noise Absorber attachment bolts in the
new Motor Cover.
- Reference Line/Point
- or Bolts B = 106 mm C = 183 mm D = 52 mm E = 77 mm
NoteStart with rearward measurements and overlay the Rear Motor Bay Noise Absorber to ensure front measurements are properly identified. -
Install the Rear Motor Bay Noise Absorber attachment bolts and nuts in the new Motor
Cover.
Install the parts on the new Motor Cover in the following order:
- M6x30 Flange Head Hex Bolt (Tesla part number 1129025-00-A). Torque to 7.5 Nm.
- NUT,HF,M6-1.0 (Tesla part number 1116867-00-A).
- MARKKEPS[FL],HX,M6-1.0 (Tesla part number 1485241-00-A).
-
Prepare for installation.
NoteMake sure that the gap for the application of the urethane bead will be sufficient to provide proper sealing.
-
Apply Windshield Glass
Adhesive (urethane adhesive) to the mating surfaces on the vehicle and the new
component or components.
NoteFollow the urethane manufacturer's application instructions.
- Install the new component or components.
-
Install the butyl patches.
-
Install the butyl patches.
-
Install the butyl patches.
- Perform any necessary post-repair operations.
- Install the Noise Absorber - Motor Bay - Rear (Remove and Replace).
- Install the Carpet - Rear (Remove and Replace).
- Install the Seat Back - 2nd Row - RH (Remove and Replace).
- Install the Seat Back - 2nd Row - LH (Remove and Replace).