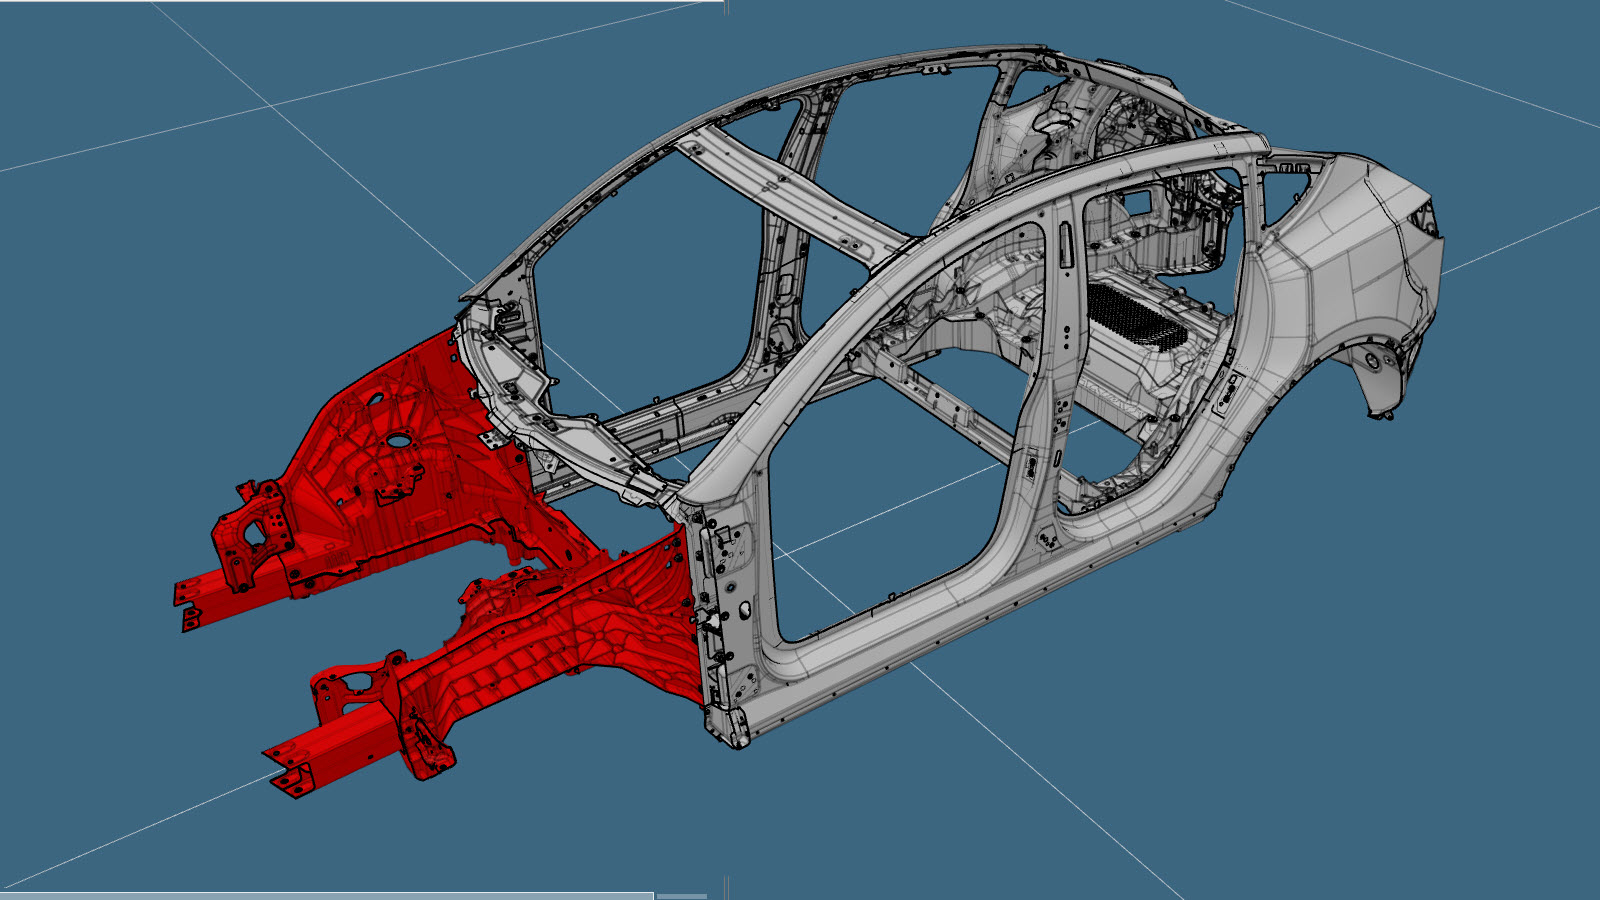
Cast Front Under Body (Vehicles Built After February 7, 2024)
 Correction code:
10101301802
NOTE:
Unless explicitly stated in the procedure, the above
correction code includes all Collision Repair and Service
repair work required to perform this procedure, including
the linked Collision Repair procedures and linked Service
procedures. Do not stack Collision Repair correction
codes unless explicitly told to do so. Depending
on the damage to the vehicle, additional repairs may be
required.
Correction code:
10101301802
NOTE:
Unless explicitly stated in the procedure, the above
correction code includes all Collision Repair and Service
repair work required to perform this procedure, including
the linked Collision Repair procedures and linked Service
procedures. Do not stack Collision Repair correction
codes unless explicitly told to do so. Depending
on the damage to the vehicle, additional repairs may be
required.
Repair Information
- Review all collision repair general practices and safety documentation and wear the appropriate PPE (Personal Protective Equipment) before beginning this procedure.
- Depending on the damage to this component, it may be possible to repair this component. Refer to Cast Front Under Body Repair Guidelines for more information.
- Properly mount the vehicle on a frame bench when performing this procedure.
Parts List
| Quantity | Description | Image / Notes |
|---|---|---|
| 1 | FUB COMPLETE WITH DASH - CAST FUB (Cast Front Under Body) | |
| 4 | Flow Form Rivet S38 | |
| 1 | BUTYL FOIL PATCH 90X70x1MM | Tesla part number 1032245-00-A. |
| 14 | BOLT,TEP,M10-1.5x35 | Tesla part number 1618776-00-B. |
| 2 | T2000,M8x1.25-30,HH,[109-I],G1009,SERR | Tesla part number 1637725-00-A. |
When ordering parts, refer to the Parts Catalog and enter the VIN of the vehicle being repaired to find the correct parts (and the part numbers) for the vehicle. Alternatively, use the search function in the Parts Catalog to find a specific part for the vehicle.
Repair Procedure
- Remove the Windshield (HW4) (Remove and Replace).
-
Remove the
Hinge - Hood - LH (Remove and Replace).
NoteRemove both the LH and RH hood hinges.
- Remove the Supermanifold (Remove and Replace).
- Remove the Carrier - Front End (Remove and Replace).
- Remove the Module - Cooling Fan (Remove and Install).
- Remove the Electromechanical Brake Booster Assembly (Structural Pack) (Remove and Replace).
- Remove the Super Dash (Structural Pack) (Remove and Replace).
- Remove the Hydraulic Control Unit (HCU) - Brake (Structural Pack) (Remove and Replace).
- Remove the Harness - Main Front (Structural Pack) (Remove and Replace).
- Remove the HV Battery (RWD) (Remove and Install).
- Remove the Brake Lines - Front Bundle (Structural Pack) (Remove and Replace).
-
Remove the
Front Upper Control Arm (FUCA) Mount - LH (Remove and Replace).
NoteRemove both the LH and RH control arm mounts.
- Remove the Brake Hose - Flexible - Front - LH (Remove and Replace).
- Remove the Sensor - Wheel Speed - ABS - Front - LH (Remove and Replace).
- Remove the Subframe Assembly - Front (Dual Motor) (Remove and Install).
-
Remove the LH and the RH Body Side Outer Front Cap.
-
From the new service part, remove the
parts indicated below to make the new component.
- 1 - COWL SIDE BRIDGING PLATE LH
- 2 - COWL SIDE BRIDGING PLATE RH
- 3 - MY GFB COWL ASSEMBLY
-
On the LH and RH sides, cut an access
window in the original component.
- Reference Line/Point
- Cut Line A = 10 mm B = 44 mm C = 90 mm D = 129 mm
-
Remove the original component.
- or Factory SPRs
- or Bolt, Torx-head
-
Remove the original component.
- or Factory SPRs
-
Remove the original component.
- or Bolt, Torx-head
- or Bolts
-
Prepare for installation.
NoteA red X indicates a location where a factory-installed fastener is not being replaced.
-
Prepare for installation.
- or Bolt, Torx-head
- or Bolts
- Apply structural adhesive to the mating surfaces on the vehicle and the new component or components.
-
Install the new component or components.
Torque the bolts as follows:
- BOLT,TEP,M10-1.5x35 bolts (x5 each side) (Tesla part number 1618776-00-B) that attach the Front Under Body to the Door Ring Inner (inboard side): 50 Nm.
- BOLT,TEP,M10-1.5x35 bolts (x2 each side) (Tesla part number 1618776-00-B) that attach the Front Under Body to the Door Ring Inner (outboard side): 65 Nm.
- T2000,M8x1.25-30,HH,[109-I],G1009,SERR bolts (x1 each side) (Tesla part number 1637725-00-A) that attach the Front Under Body to the Side Sill Insert: 48 Nm.
-
Cut the BUTYL FOIL PATCH into two
45x50 mm. pieces, and use them to cover the access window cut in the LH and RH Door Ring
Outer components.
-
Install the LH and the RH Body Side Outer Front Cap.
- Perform any necessary post-repair operations.
- Install the Subframe Assembly - Front (Dual Motor) (Remove and Install).
- Install the Sensor - Wheel Speed - ABS - Front - LH (Remove and Replace).
- Install the Brake Hose - Flexible - Front - LH (Remove and Replace).
-
Install the
Front Upper Control Arm (FUCA) Mount - LH (Remove and Replace).
NoteInstall both the LH and RH control arm mounts.
- Install the Brake Lines - Front Bundle (Structural Pack) (Remove and Replace).
- Install the HV Battery (RWD) (Remove and Install).
- Install the Harness - Main Front (Structural Pack) (Remove and Replace).
- Install the Hydraulic Control Unit (HCU) - Brake (Structural Pack) (Remove and Replace).
- Install the Super Dash (Structural Pack) (Remove and Replace).
- Install the Electromechanical Brake Booster Assembly (Structural Pack) (Remove and Replace).
- Install the Module - Cooling Fan (Remove and Install).
- Install the Carrier - Front End (Remove and Replace).
- Install the Supermanifold (Remove and Replace).
-
Install the
Hinge - Hood - LH (Remove and Replace).
NoteInstall both the LH and RH hood hinges.
- Install the Windshield (HW4) (Remove and Replace).