Front Under Body (Small Section)
 Correction code:
10101029702
10101029802
NOTE:
Unless explicitly stated in the procedure, the above
correction code includes all Collision Repair work required
to perform this procedure, including the linked Collision
Repair procedures. Do not stack Collision Repair
correction codes unless explicitly told to do
so. Add any associated mechanical procedures
needed to perform this procedure.
Correction code:
10101029702
10101029802
NOTE:
Unless explicitly stated in the procedure, the above
correction code includes all Collision Repair work required
to perform this procedure, including the linked Collision
Repair procedures. Do not stack Collision Repair
correction codes unless explicitly told to do
so. Add any associated mechanical procedures
needed to perform this procedure.
Repair Information
- Review all collision repair general practices and safety documentation and wear the appropriate PPE (Personal Protective Equipment) before beginning this procedure.
- Properly mount the vehicle on a frame bench when performing this procedure.
Parts List
| Quantity | Description | Image / Notes |
|---|---|---|
| 1 | FUB SMALL SECTION (Front Under Body – Small Section) | |
| 1 | OUTBOARD CUTLINE JIG (LH) |
Tesla part number 2031072-00. |
| 1 | OUTBOARD CUTLINE JIG (RH) |
Tesla part number 2031074-00. |
| 1 | INBOARD CUTLINE JIG (LH) |
Tesla part number 2031073-00. |
| 1 | INBOARD CUTLINE JIG (RH) |
Tesla part number 2031075-00. |
| 7 | Structural Flange Rivet | |
| 2 | Bolt , BOLT HF M10-1.5X41 [149] G0410 M | Tesla part number 1622577-00. |
| 1 | Bolt BOLT - M8x28 | Tesla part number 1112247-00. |
When ordering parts, refer to the Parts Catalog and enter the VIN of the vehicle being repaired to find the correct parts (and the part numbers) for the vehicle. Alternatively, use the search function in the Parts Catalog to find a specific part for the vehicle.
Repair Procedure
-
Remove the original component.
or Bolts
-
Mark the cut line on the original
component.
Install the outboard and inboard cut line jigs, mark the cutline, then remove the jigs.NoteAvoid damaging the jigs so that they can be reused.
-
Bulk cut and remove the original
component.
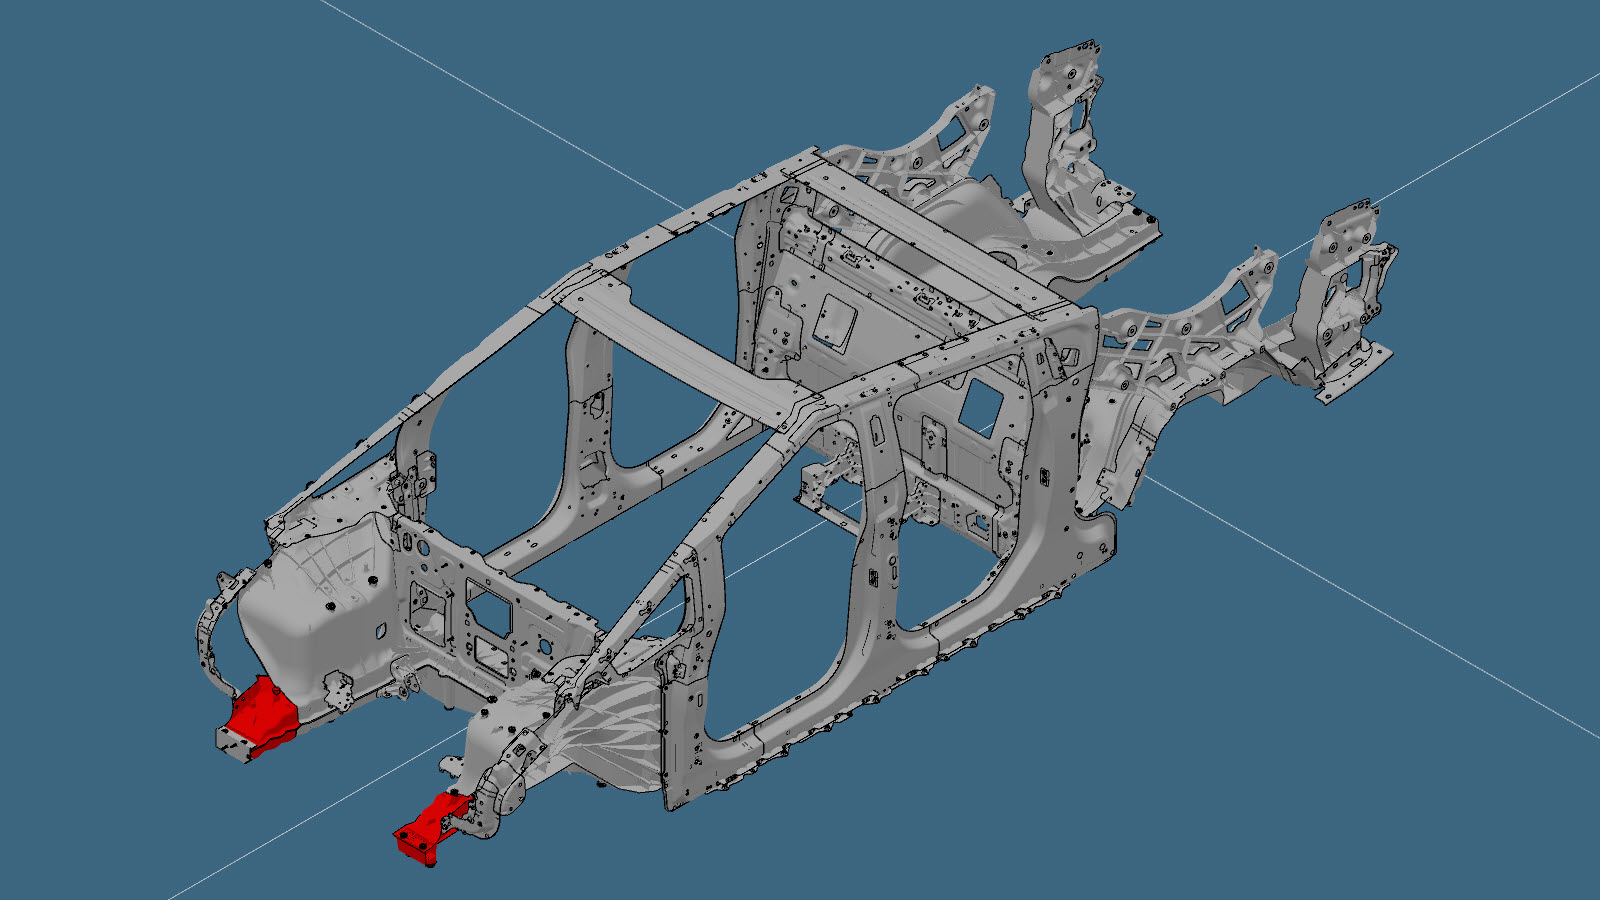
Cut forward of the cut line (in the area shown in yellow).WarningCut only in the area shown in yellow. Do not cut in the area shown in red.
-
Trim the component on the vehicle to
the cut line by removing the remaining material (the area shown in red) with a grinder.
Cut Line
-
Trim the remaining portion of the
component on the vehicle to fit.
NoteDo not trim the service part. If trimming is required for a proper fit, trim only the remaining portion of the component on the vehicle.NoteThe maximum allowed gap between the new component and the original component is 3 mm.
-
Prepare for installation.
-
Apply structural adhesive to the mating surfaces on the vehicle and the new component or components.
NoteUse structural adhesive to fill any gaps between the original component on the vehicle and the new component.
-
Install the new component or components.
Torque the bolts as follows:
- BOLT HF M10-1.5X41 [149] G0410 M bolts, part number 1622577-00: 64 Nm.
- BOLT - M8x28 bolt, part number 1112247-00: 28 Nm.
-
Install the Bumper Beam Mount.
-
Attach the harness clips to the new
component.
- A = 48 mm (For this clip, this is a new location on the cast Front Under Body.)
- B = 60 mm (The location for the clip on the harness is changed, but the clip is attached to the original location on the cast Front Under Body.)
- Perform any necessary post-repair operations.