Seat Back - 2nd Row - RH (Remove and Replace)
 Correction code
13054102
0.30
NOTA: Salvo explicitamente indicado em contrário no procedimento, o código de correção acima e o FRT refletem todo o trabalho necessário para a realização deste procedimento, incluindo os procedimentos associados. Não acumule códigos de correção, salvo se explicitamente instruído.
NOTA: Consulte Tempos de taxa fixa para saber mais sobre FRT e sobre a respetiva criação.
NOTA: Consulte Proteção pessoal para garantir que utiliza o EPI adequado durante a realização do procedimento abaixo. NOTA: Consulte para conhecer as práticas seguras e saudáveis de trabalho.
Correction code
13054102
0.30
NOTA: Salvo explicitamente indicado em contrário no procedimento, o código de correção acima e o FRT refletem todo o trabalho necessário para a realização deste procedimento, incluindo os procedimentos associados. Não acumule códigos de correção, salvo se explicitamente instruído.
NOTA: Consulte Tempos de taxa fixa para saber mais sobre FRT e sobre a respetiva criação.
NOTA: Consulte Proteção pessoal para garantir que utiliza o EPI adequado durante a realização do procedimento abaixo. NOTA: Consulte para conhecer as práticas seguras e saudáveis de trabalho.
- 2024-07-25: Added a note for NA vehicles to remind that the seat covers without ISOFIX flag for child locks must be replaced.
Torque Specifications
| Description | Torque Value | Recommended Tools | Reuse/Replace | Notes |
|---|---|---|---|---|
| Bolt that attaches the RH seat back lower frame to the vehicle |
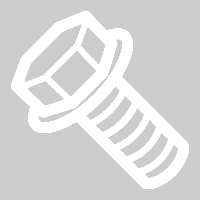 37 Nm (27.3 lbs-ft) |
|
Replace |
CUIDADO Bolts must be installed in the following sequence:
|
Remove
- Remove the RH lower C-pillar trim. See .
-
Release the clips that attach the main carpet to the lower seat cushion frames.
-
Remove the bolts (x4) that
attach the RH 2nd row seat back frame to the vehicle.
TIpUse of the following tool(s) is recommended:
- 11 mm socket
TIpThe two frontmost bolts are behind the main carpet. -
Carefully fold down the RH
2nd row seatback.
CUIDADOPlace a protective covering on the seat back upholstery and take care not to damage the upholstery during removal of the seat back.CUIDADODo not place any additional weight on the seatback. Doing so may damage the seat frame alignment tabs, which can cause unevenness between the 60 and 40 seatbacks.
-
Disconnect the electrical harness from the connector at the RH lower seat frame.
-
With assistance, carefully remove the RH 2nd row seat back assembly from the vehicle.
CUIDADOPlace the seat back assembly in an area where it will not be tipped over or otherwise damaged.
Install
Installation procedure is the reverse of removal, except for the following:
- Front Outboard
- Rear Inboard
- Rear Outboard
- Front Inboard