Installing Tesla Projection Lights
Note
This procedure and
illustrations detail how to install the left front Tesla Projection Light. Instructions
for the right side are mirrored.
CAUTION
Do not close the door
during installation. Closing the door may damage the window.
Note
Install the left (LH) Tesla Projection
Light to the left front door panel, and the right (RH) Tesla Projection Light to the
right front door panel.

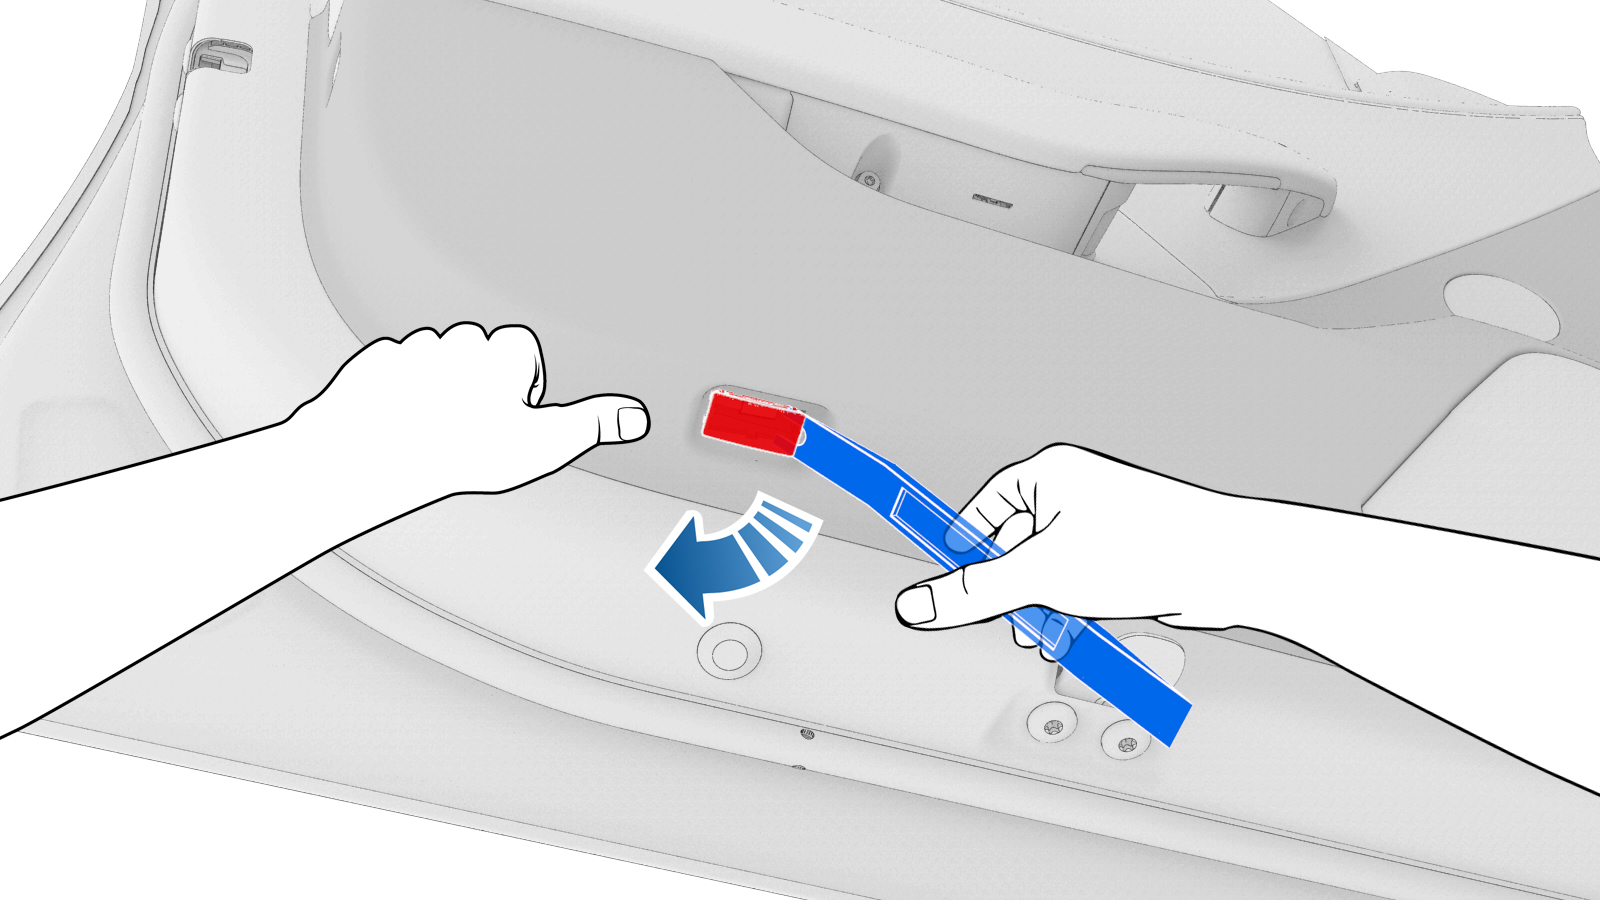
- Open the left front door and fully
lower the left front window. Carefully use a small screwdriver or pry tool to pry
the puddle lamp out of the bottom of the left front door panel.
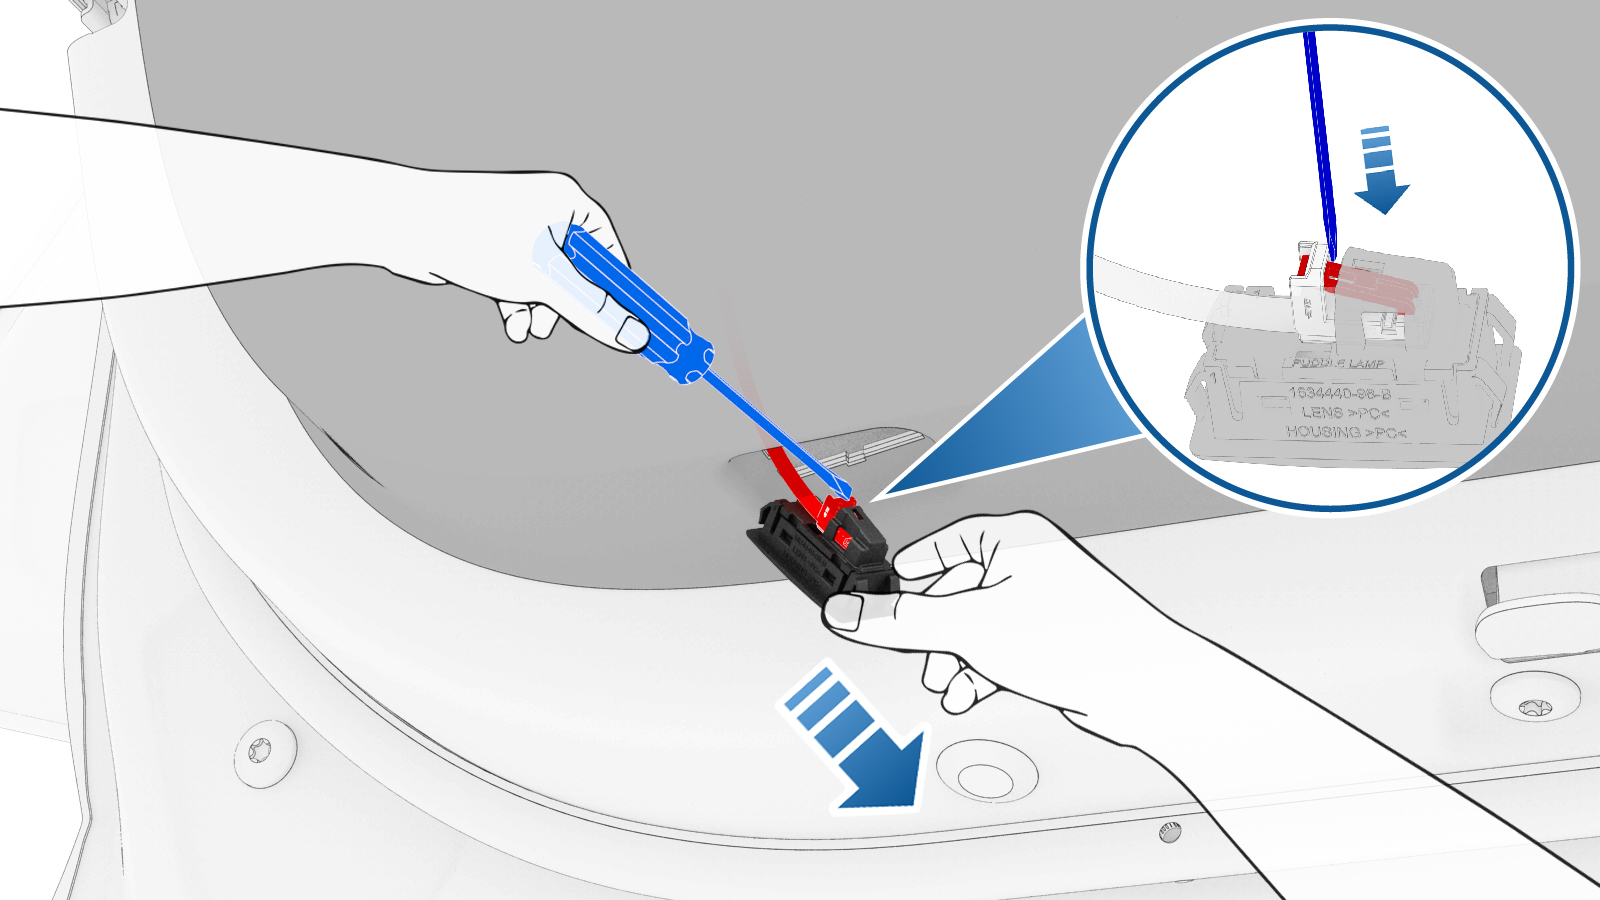
- Press down on the locking tab to
disconnect the puddle lamp connector, and then remove the light from the
vehicle.CAUTIONDo not pull the puddle lamp too far from the door panel, as the puddle lamp connector is still attached.
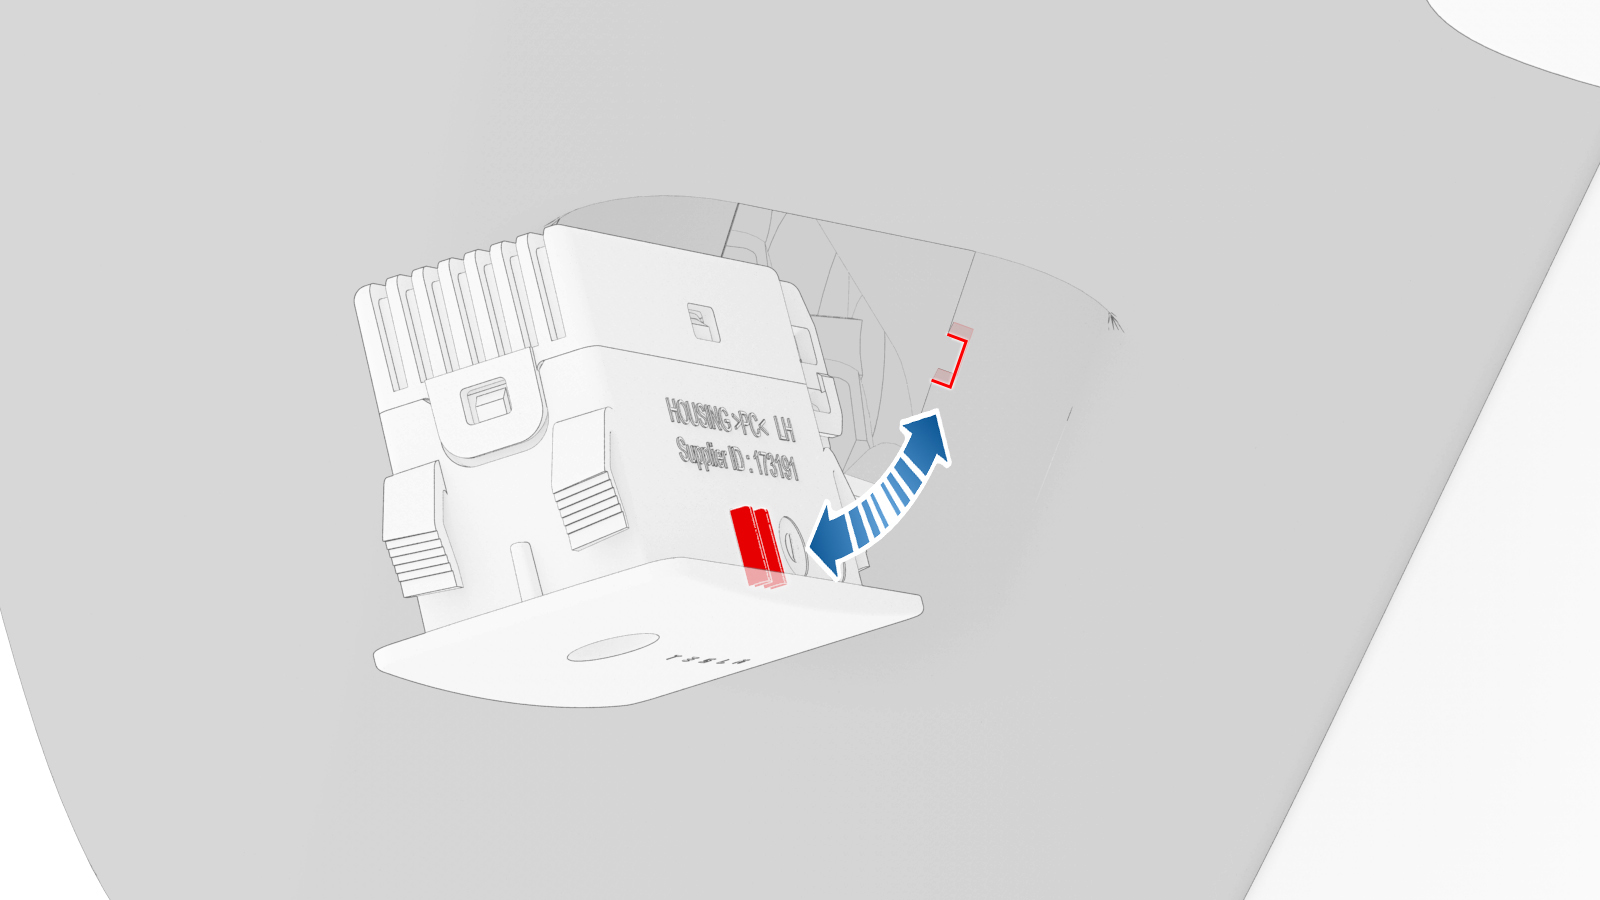
- Align the raised ribs on the light
with the corresponding slot in the door panel.
- Connect the electrical wiring harness
to the Tesla Projection Light. Check to ensure both puddle lightsNoteOnce connected correctly, the Tesla Projection Light will turn on and display the Tesla logo.
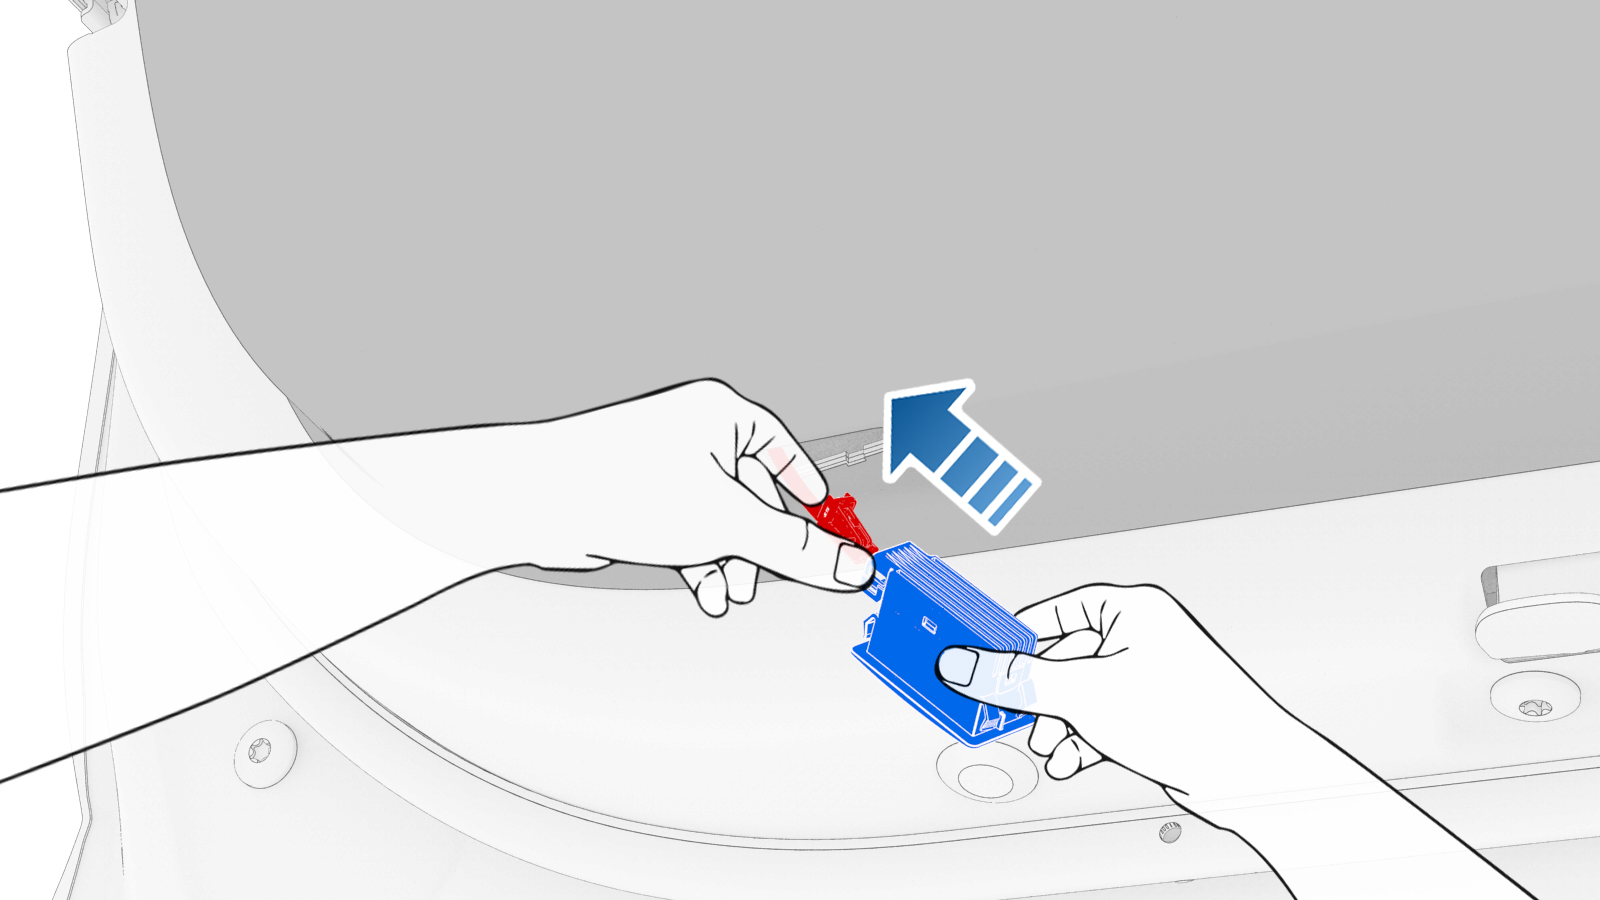
- After connecting the electrical wiring harness to the Tesla Projection Light, ensure the “Tesla” logo correctly projects on the floor before securing the Projection Light in place.
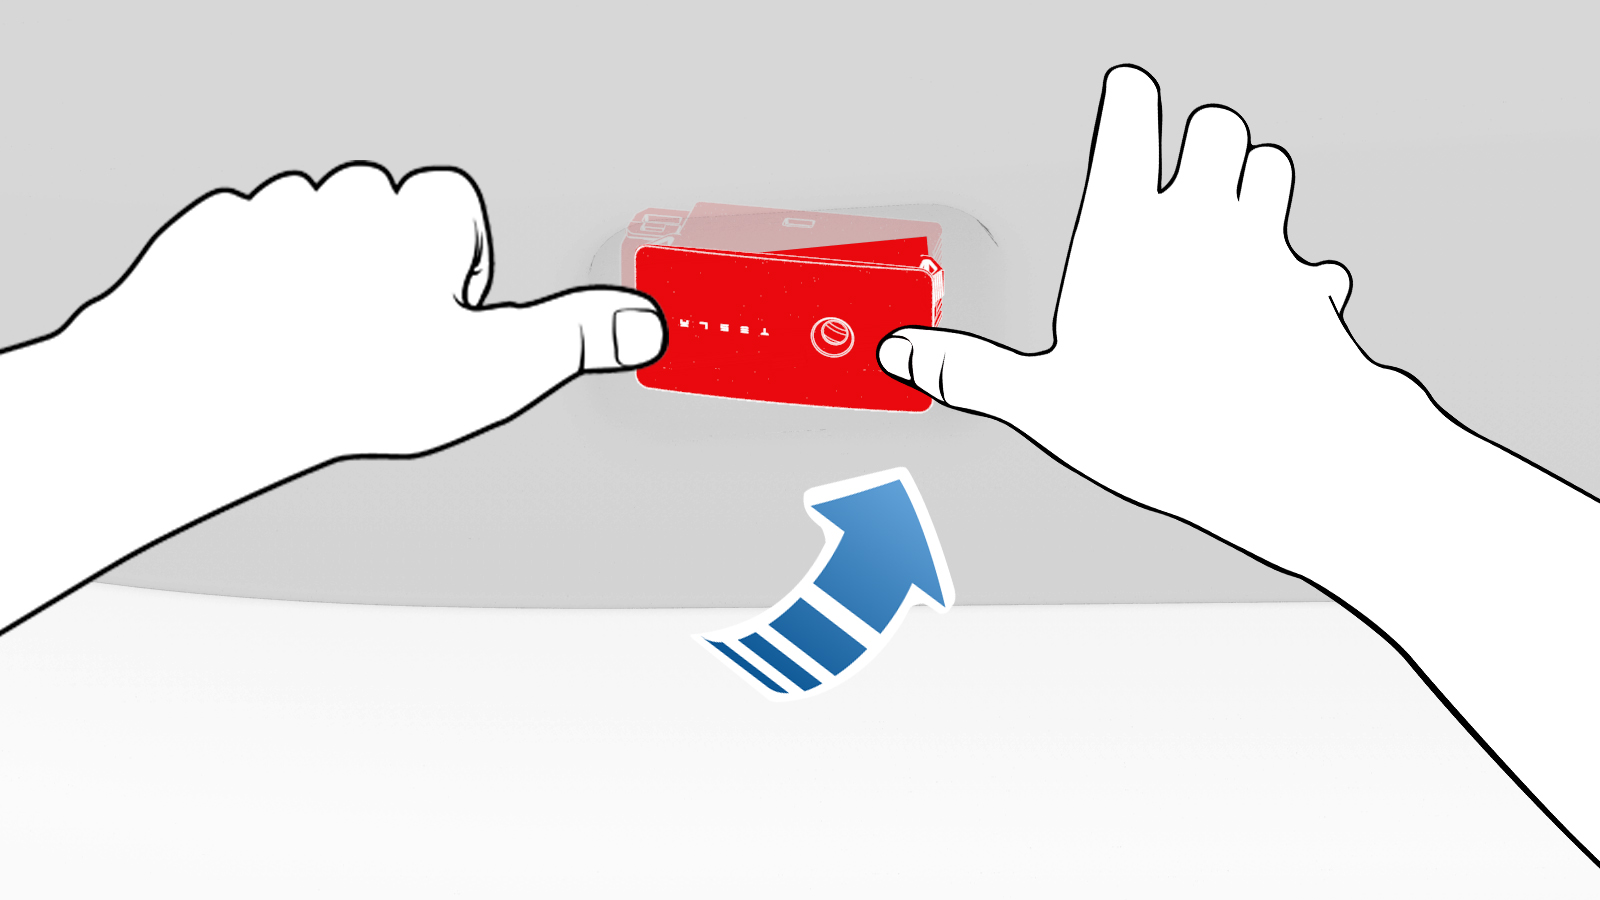
- Insert the Tesla Projection Light in
the opening at the bottom of the door panel. Press upward firmly to ensure the Tesla
Projection Light snaps securely into the door panel.
- Raise the left front window and close the left front door.
- Perform this procedure again on the right side of the vehicle to install the right Tesla Projection Light.


