Replacing the HEPA Filters
Note
For vehicles manufactured
as of approximately February 2025: although the images may depict an earlier vehicle,
the procedure is the same.
If equipped, Tesla recommends replacing the HEPA filters every 3 years (every year in China).
Removal:
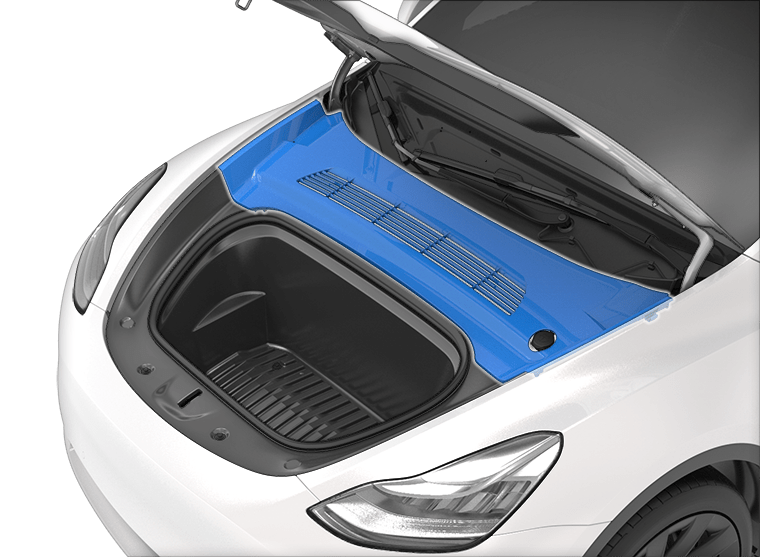
- Open the hood.
- Remove the vehicle's underhood apron
by inserting a small, non-marring flat tool or your fingers underneath the panel.
Pull up to loosen the clips and set the underhood apron aside.
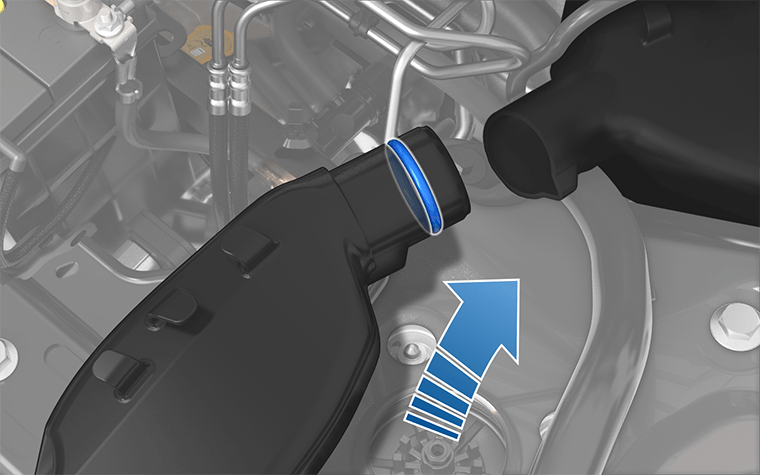
- Using a 10mm socket, remove the bolt
that attaches the washer fluid reservoir neck to the underhood storage unit.
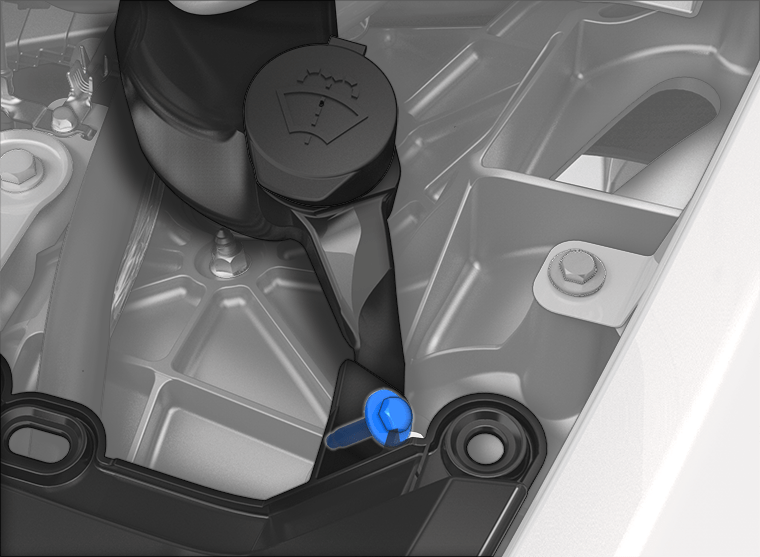
- Remove the washer tank neck from the
vehicle. If the windshield washer reservoir is full, some washer fluid may leak
out.NoteYou do not need to remove the hose from the neck.
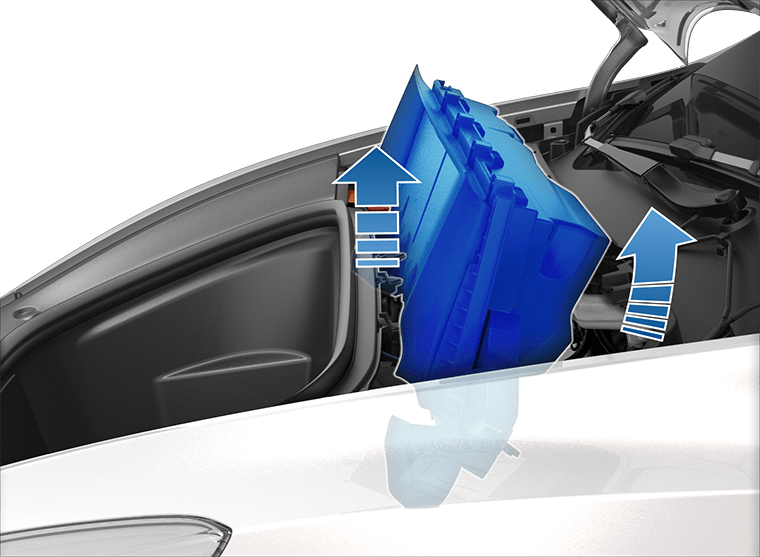
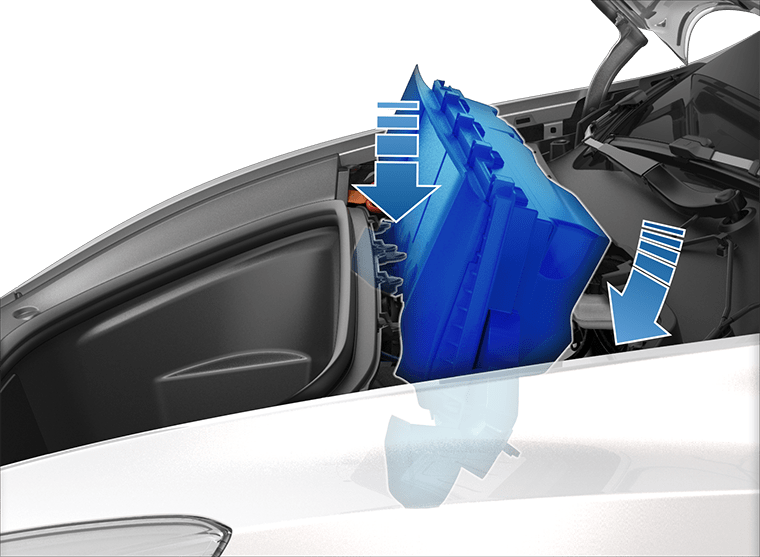
- With a 10mm socket, remove the bolts
(x2) that attach the HEPA filter assembly to the vehicle.
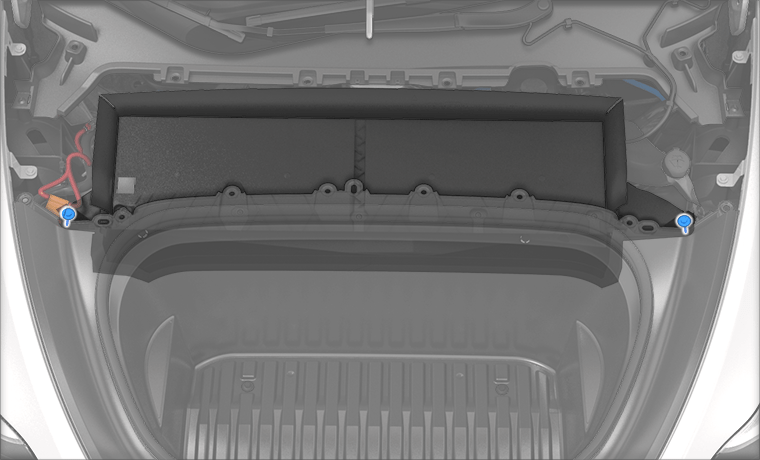
- Carefully remove the HEPA filter
assembly from the vehicle by tilting the rear edge of the filter assembly up past
the brake fluid reservoir and lifting the filter assembly out of the vehicle, taking
care not to bump into or damage other components.
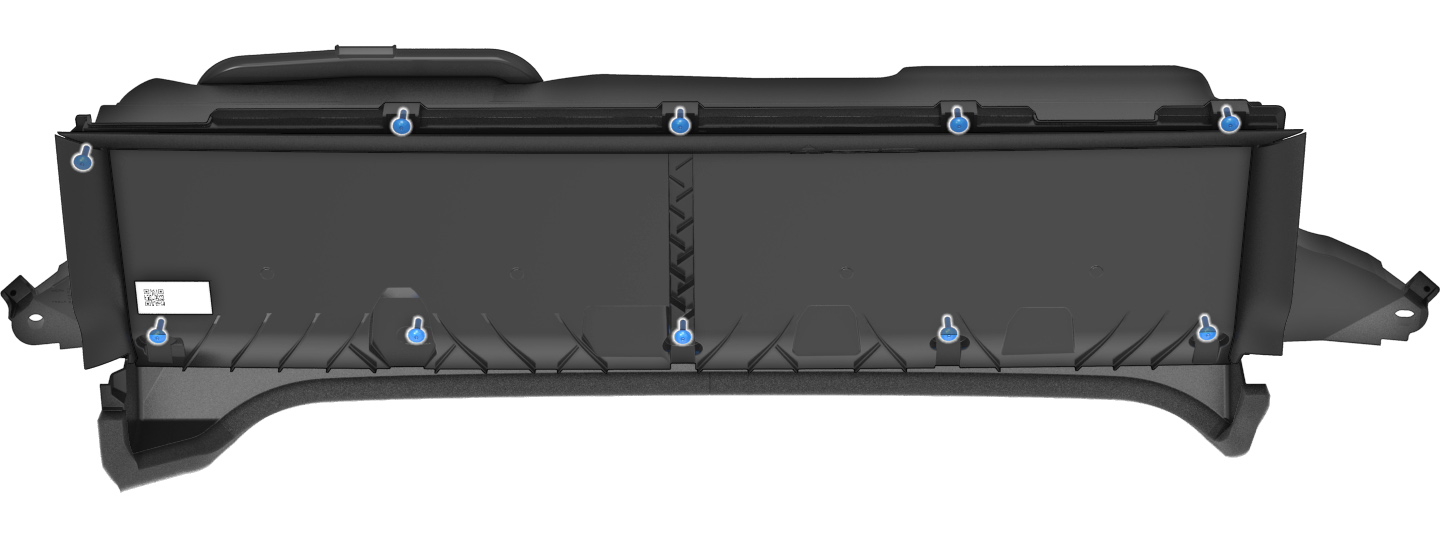
- With a Torx T20 screwdriver, remove
the screws (x10) that attach the HEPA filter cover to the HEPA filter assembly, then
remove the cover from the assembly.
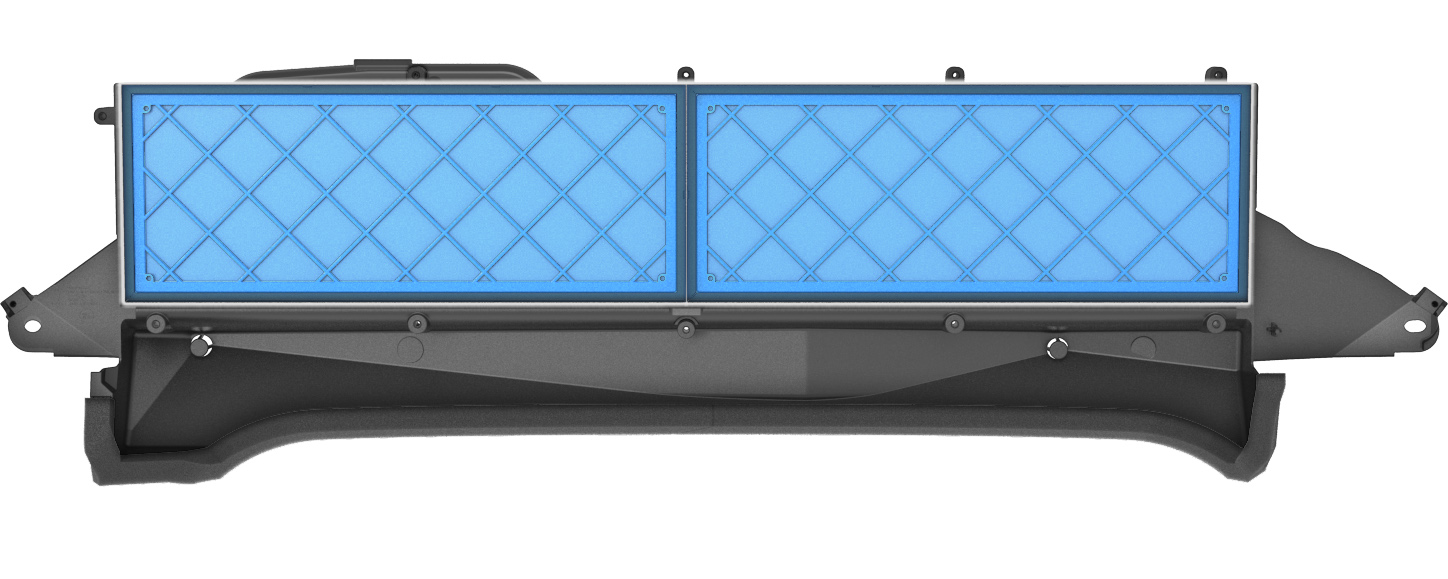
- Remove the old carbon filters from the filter housing.
- Remove the old HEPA filters from the HEPA filter housing by carefully prying the rubber gasket to release the filter along the gasket.


Installation:
- Place the new HEPA filters into the
HEPA filter assembly. Flex the housing outward to make sure the seal is fully seated
around the filters.
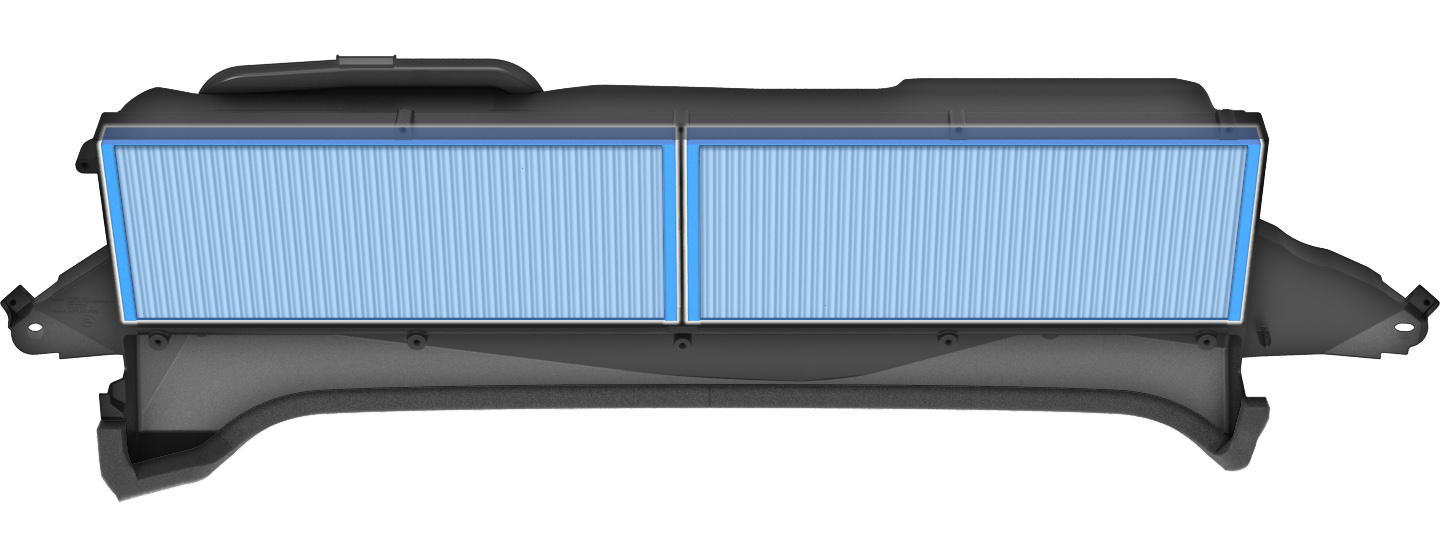
- Place new carbon filters into the
filter assembly, with the arrows on the filters pointing toward you.
- Use a Torx T20 screwdriver to
reinstall the screws (x10) that attach the HEPA filter cover to the HEPA filter
assembly. Torque to 1.6 Nm (1.2 ft-lb). CAUTIONDo not over-torque the screws. Doing so may cause damage.
- Maneuver the HEPA filter assembly
into place, taking care not to bump into or damage other components.
- With a 10mm socket, tighten the bolts
(x2). Torque them to 10 Nm (7.4 ft-lb).
- Make sure the O-ring on the washer
tank neck is fully seated, and then install the washer tank neck by inserting it
into the washer tank.
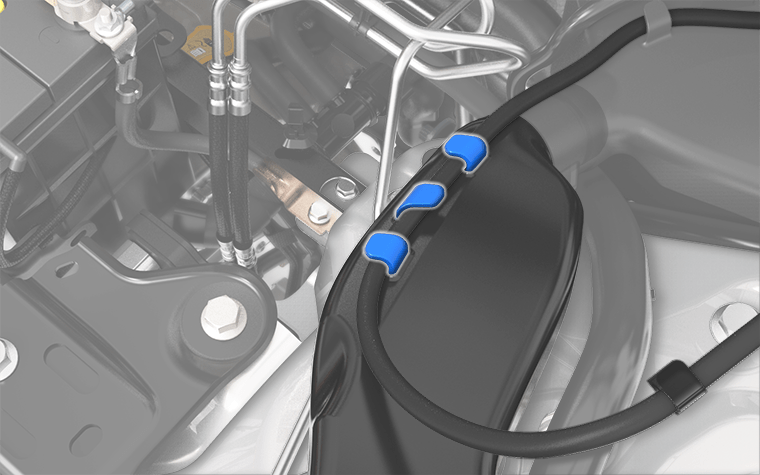
- Route the hose so that it is secured
by the tabs (x3) that connect it to the washer tank neck.
- Vehicles manufactured prior to
approximately February 2025: Install the push clip, which attaches the washer fluid
reservoir neck to the underhood storage unit.
- Replace the underhood apron by
aligning the clips into their openings in the front trunk. Press down to lock them
in place. The clips make an audible clicking sound when secured.
- Close the hood.


