Installing Mud Flaps (2024+)
Note
This procedure is for vehicles manufactured as of approximately January 2024. For
vehicles manufactured prior to approximately January 2024, see Installing Mud Flaps and Splash Guards (2017 – 2023).
You can purchase mud flaps for your vehicle on the Tesla Shop. Perform the following to install the mud
flaps:
Note
This procedure and illustrations detailed how to install the
left mud flap. Instructions for the right side are mirrored.
- Clean the installation area with alcohol and allow to fully dry before installation.
- Open the Driver’s side (left) front door.
- Turn the steering wheel fully to the
left to provide access to the working area.

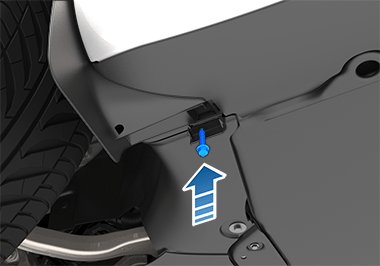
- Open the front-most rocker panel bolt
access cover, and then use a 10mm socket to remove the bolt and washer that secures
the rocker panel to the body.

- Carefully use a flathead screwdriver
or trim tool to remove the push clips (x2) on the front wheel arch liner.

- Put on cut-resistant gloves, then use a retractable blade knife to carefully cut off
the open access cover from the lower rocker panel.WarningEnsure cut-resistant gloves are worn during this step to avoid personal injury.
- Position the mud flap onto the wheel
arch liner and rocker cover, then secure the push clips (x2).

- Install the bolt that secures the
bottom of the mud flap to the rocker panel cover. Tighten the bolt to 2.5 Nm (1.8 ft-lb).
- Perform this procedure again on the right side of the vehicle to install the right mud flap or splash guard.


