Installing Mud Flaps and Splash Guards (2017 – 2023)
Note
This procedure is for vehicles manufactured prior to approximately January 2024. For
vehicles manufactured as of approximately January 2024, see Installing Mud Flaps (2024+).
You can purchase mud flaps for your vehicle on the Tesla Shop. Perform the following to install the mud flap or splash guards:
- Clean the installation area with alcohol and allow to fully dry before installation.
- Turn the steering wheel fully to the left
to provide access to the working area.

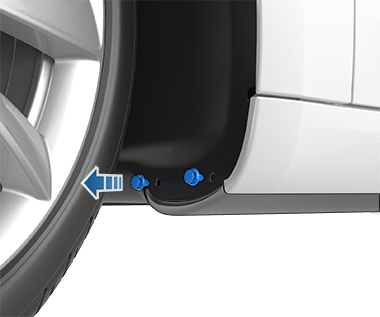
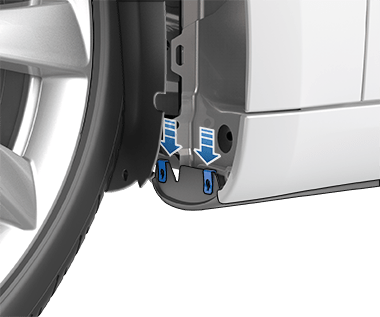
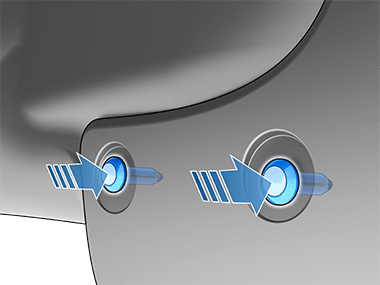
- Carefully use a flathead screwdriver to
remove the lower push clips (x2) that secure the front wheel arch liner.
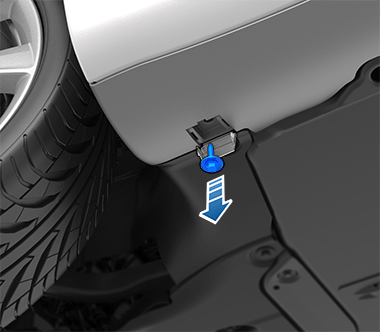
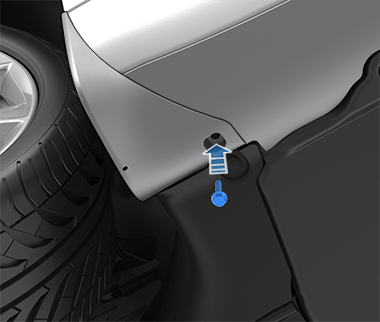
- Open the front-most rocker panel bolt
access cover, and then remove the bolt and washer.
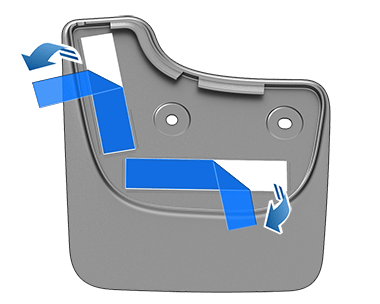
- Carefully use scissors to remove the open
access cover from the rocker panel.

-
IF INSTALLING SPLASH GUARDS:
Remove the adhesive backing from the splash guard, and then align the splash guard with the
mud flap so that the holes are aligned. Once aligned, apply pressure along the mud flap to
ensure it is adhered to the splash guard.NoteSplash guards are recommended if you drive on roads where salt, sand, or gravel are commonly used to improve road conditions.
-
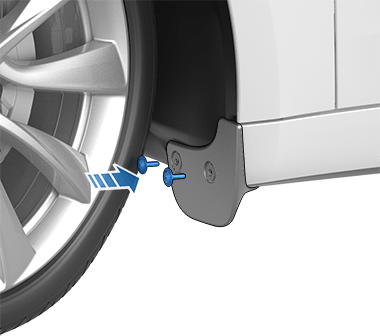
1st GENERATION KITS ONLY: While
carefully pulling the lower portion of the front wheel arch liner away from the wheel well,
install the U-nuts (x2) over the holes in the rocker panel. Make sure the holes are
aligned.
-
1st GENERATION KITS ONLY: Place
a washer over the screws (x2), and then install the screws to secure the mud flap/splash
guard to the U-nuts in the front wheel arch liner. Tighten the screws to 1.5 Nm (1
ft-lbs).
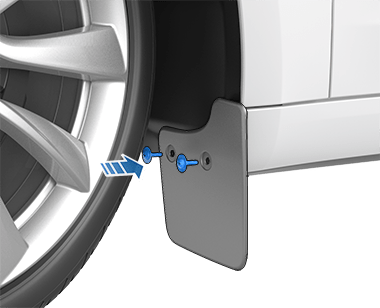
-
2nd GENERATION KITS ONLY: Align
the holes in the mud flap/splash guard to the holes in the front wheel arch liner, and then
insert the opened (plastic rivet pulled out) push clips into the holes. Once the push clips
are fully inserted, push the plastic rivets in to close the push clips and lock the mud
flap/splash guard in place.
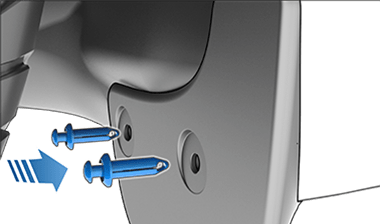
- Install the new bolt that secures the
bottom of the mud flap to the lower rocker panel cover. Tighten the bolt to 5 Nm (4
ft-lbs).
- Perform this procedure again on the right
side of the vehicle to install the right mud flap or splash guard.NoteThis procedure and illustrations detailed how to install the left mud flap and splash guard. Instructions for the right side are mirrored.


