Troubleshooting a Multi-Powerwall 3 System

Informational PurposesAn informational icon, calling your attention
Note
As described in the following procedures, only commission and register the Leader Powerwall 3. Do not attempt to commission or register any Follower units.

Common Issues

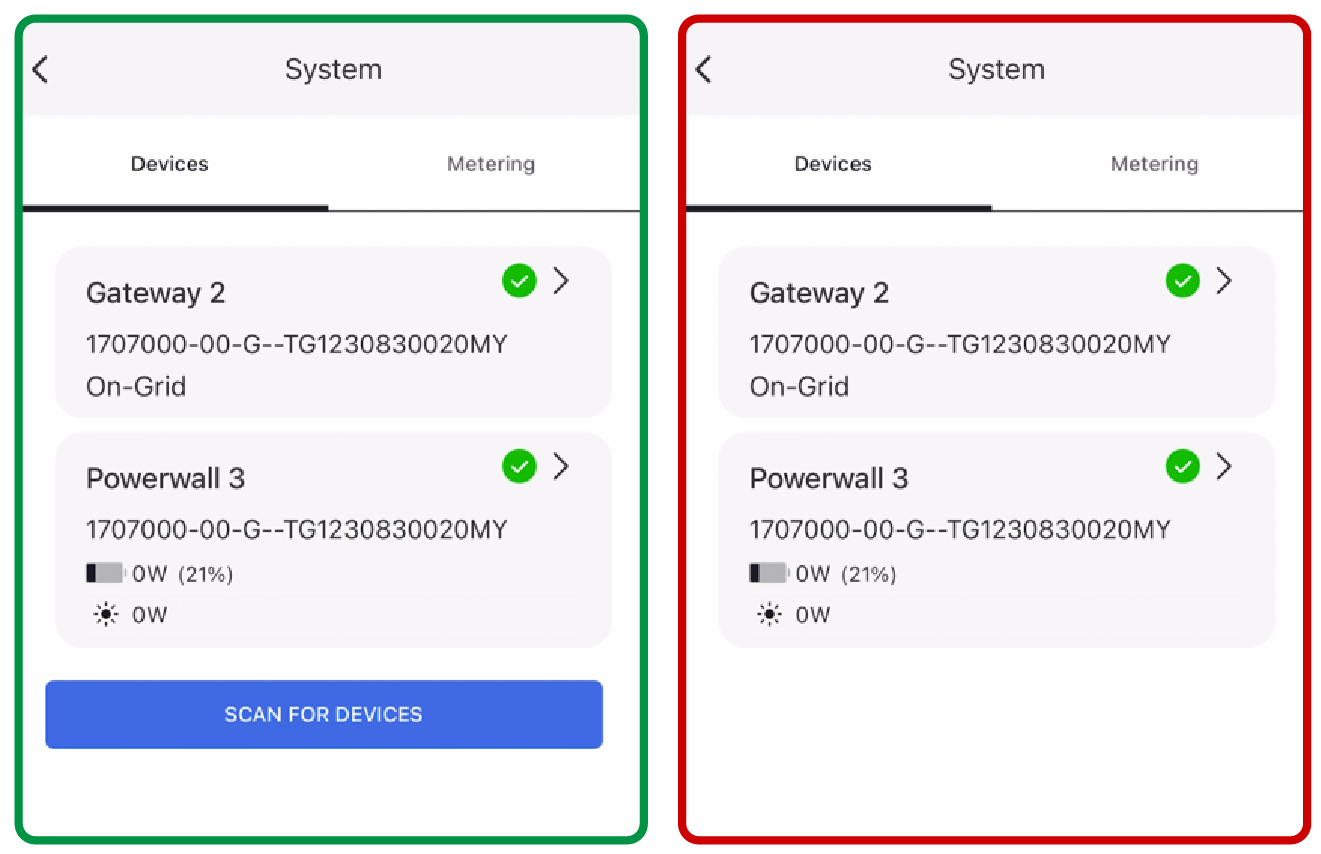
Common Issue: Scan for Devices button does not appear on the Leader Powerwall 3 Devices page

Troubleshooting Steps

Figure 1. Scan for Devices Available (left) vs. Not Available (right)

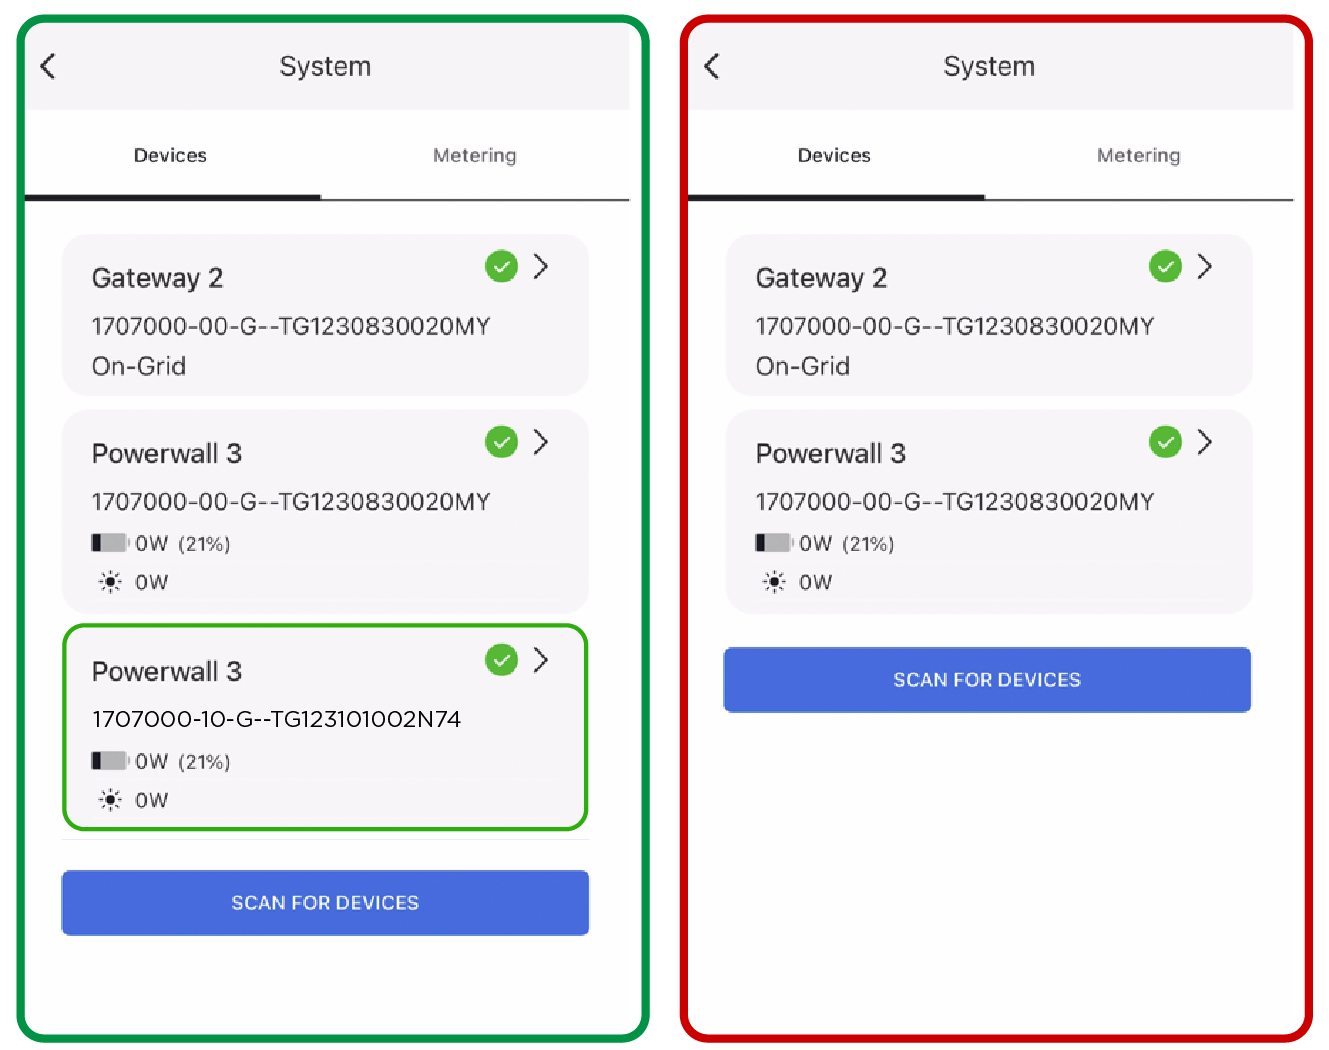
Common Issue: Follower unit does not appear on the Devices page after selecting Scan for Devices

Troubleshooting Steps

Figure 2. Follower Paired Correctly (left) vs. Follower Not Paired (right)

Common Issue: Follower unit "Failed to Join" the system

Troubleshooting Steps

Figure 3. Follower Paired Correctly (left) vs. Follower Failed to Join (right)

Common Issues

Issue Example Screenshots Link to Troubleshooting Steps
Scan for Devices button does not appear on the Leader Powerwall 3 Devices page
Figure 4. Scan for Devices Available (left) vs. Not Available (right)
Troubleshooting Steps
Follower unit does not appear on the Devices page after selecting Scan for Devices
Figure 5. Follower Paired Correctly (left) vs. Follower Not Paired (right)
Troubleshooting Steps
Follower unit "Failed to Join" the system
Figure 6. Follower Paired Correctly (left) vs. Follower Failed to Join (right)
Troubleshooting Steps

Troubleshooting: Scan for Devices button does not appear on the Leader Powerwall 3 Devices page

Possible Root Cause Troubleshooting
System is running and Followers cannot be paired in this state
  1. Connect to the Leader Powerwall 3 in the Tesla One Device Setup interface
  2. Select Stop System from the landing page.
  3. Select System, then Scan for Devices.

Troubleshooting: Follower unit does not appear on the Devices page after selecting Scan for Devices

Possible Root Cause Troubleshooting
Ethernet wiring issue between Leader and Followers
  1. Replace any custom Ethernet cable(s) with store-bought Ethernet cable(s).
  2. If it is not possible to use store-bought Ethernet cables, see Ethernet Cable Testing to test the custom cable(s)
Follower is powered OFF
  1. Confirm all breakers and Enable switches are closed (ON), all E-stops are closed, and the Follower unit has a light blue LED.
  2. Select Scan for Devices to try pairing the Follower(s) again.
Follower is not on the minimum software version that supports multi-Powerwall 3 systems (23.44.1)
  1. Connect to the Follower in the Tesla One Device Setup interface.
  2. From the landing page, select Stop System.
  3. Select Networking from the landing page and connect to a reliable Wi-Fi network (if one has not already been configured).
  4. Select Software, then Check for Update and allow the system to download and install the update (23.44.1 or 23.44.100-factory).
Follower was already commissioned
  1. Connect to the Follower in the Tesla One Device Setup interface.
  2. Select Settings, then Advanced Settings, then Factory Reset to factory reset the Follower unit.
  3. Wait for the Follower unit to boot up after the factory reset (indicated by a light blue LED).
  4. Connect to the Leader Powerwall 3 in the Tesla One Device Setup interface, then select System, then Scan for Devices.
  5. If, after multiple retries, the Follower unit has still not paired, contact Tesla support.
No islanding contactor detected on either Leader or Follower
  1. Confirm the communication wiring is correct at each device:
    Figure 7. Backup Gateway Communication Wiring
    Figure 8. Backup Switch Communication Wiring
    Figure 9. Powerwall 3 Communication Wiring
  2. While connected to the Leader unit in Tesla One, select Stop System. The islanding controller should automatically be displayed on the System page.
  3. If the issue persists, check for continuity on all low voltage wires.
  4. Confirm the islanding controller LED is ON

Troubleshooting: Follower unit "Failed to Join" the system

Possible Root Cause Troubleshooting
Poor Ethernet wiring issue between Leader and Follower(s)
  1. Replace any custom Ethernet cable(s) with store-bought Ethernet cable(s).
  2. If it is not possible to use store-bought Ethernet cables, see Ethernet Cable Testing to test the custom cable(s)
Follower was already commissioned
  1. Connect to the Follower in the Tesla One Device Setup interface.
  2. Select Settings, then Advanced Settings, then Factory Reset to factory reset the Follower unit.
  3. Wait for the Follower unit to boot up after the factory reset (indicated by a light blue LED).
  4. Connect to the Leader Powerwall 3 in the Tesla One Device Setup interface, then select System, then Scan for Devices.
  5. If, after multiple retries, the Follower unit has still not paired, contact Tesla support.
Follower is not on the minimum software version that supports multi-Powerwall 3 systems (23.44.1)
  1. Connect to the Follower in the Tesla One Device Setup interface.
  2. From the landing page, select Stop System.
  3. Select Networking from the landing page and connect to a reliable Wi-Fi network (if one has not already been configured).
  4. Select Software, then Check for Update and allow the system to download and install the update (23.44.1 or 23.44.100-factory).

Ethernet Cable Testing

Informational PurposesAn informational icon, calling your attention
Note
As noted in Ethernet Wiring Issue Between Leader and Followers, Tesla recommends factory-made Ethernet cable(s) rather than field-crimped Ethernet cable(s) wherever possible to reduce the possibility of incorrectly crimped custom cables.
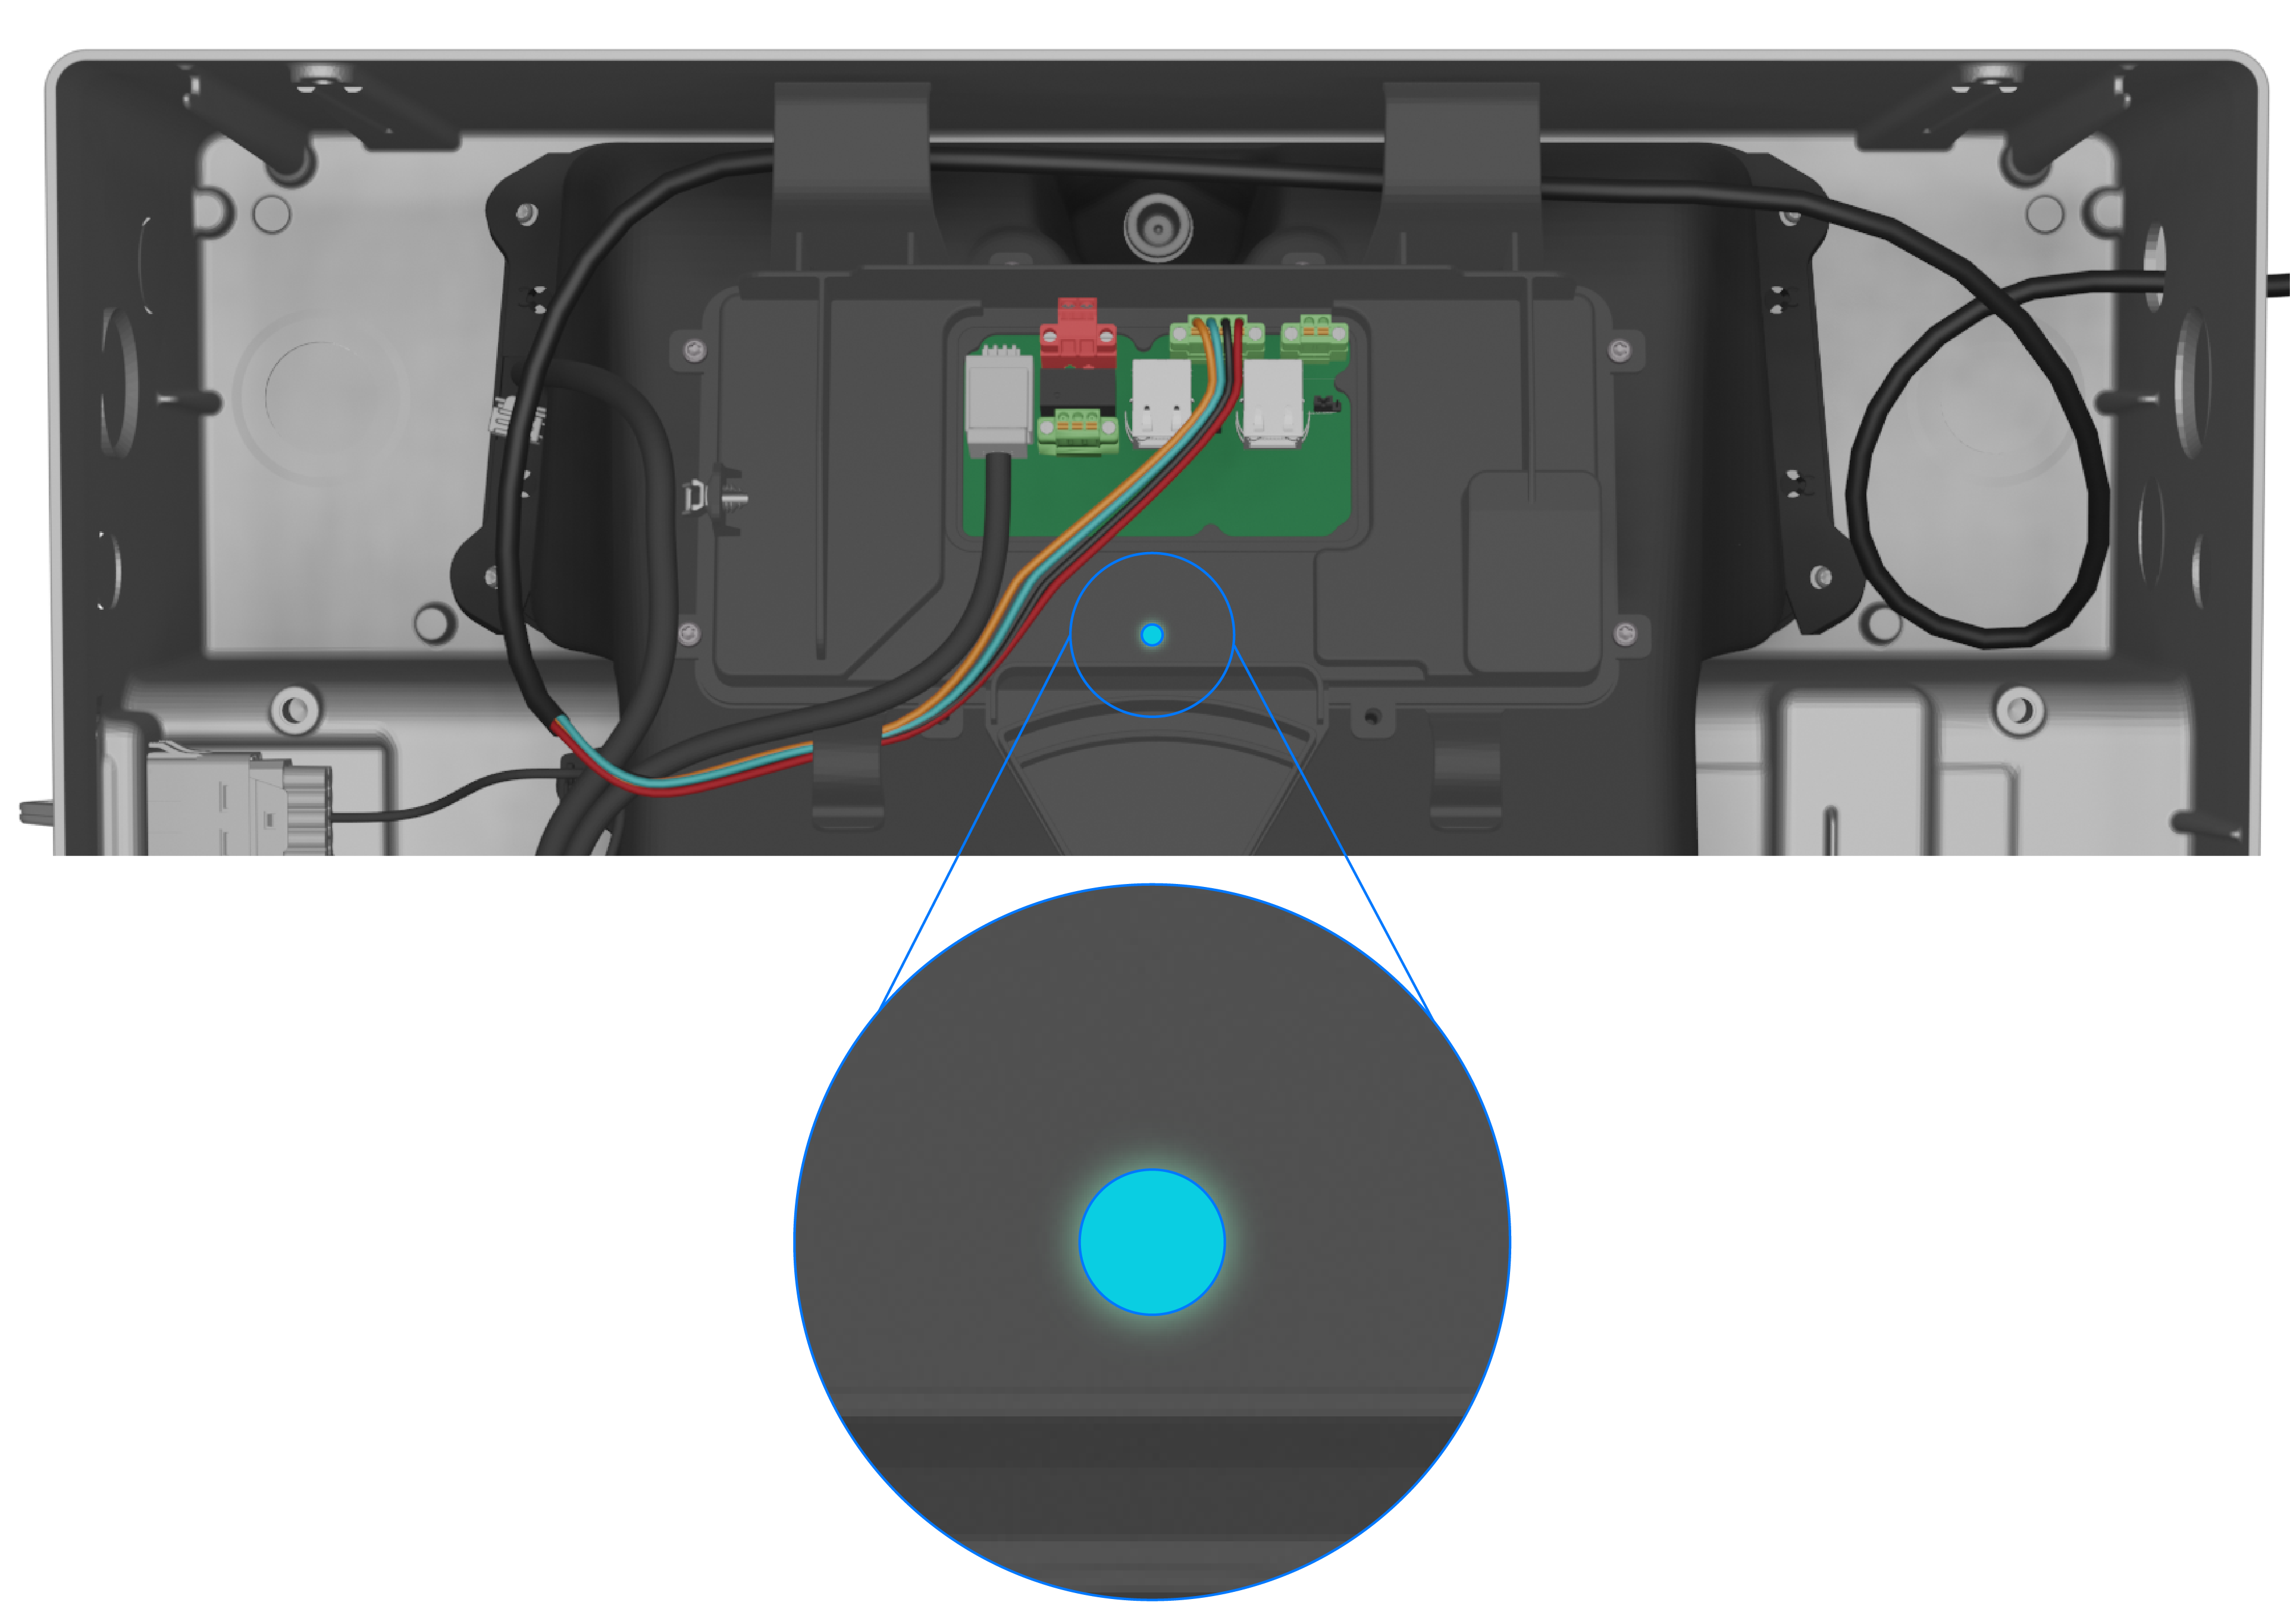
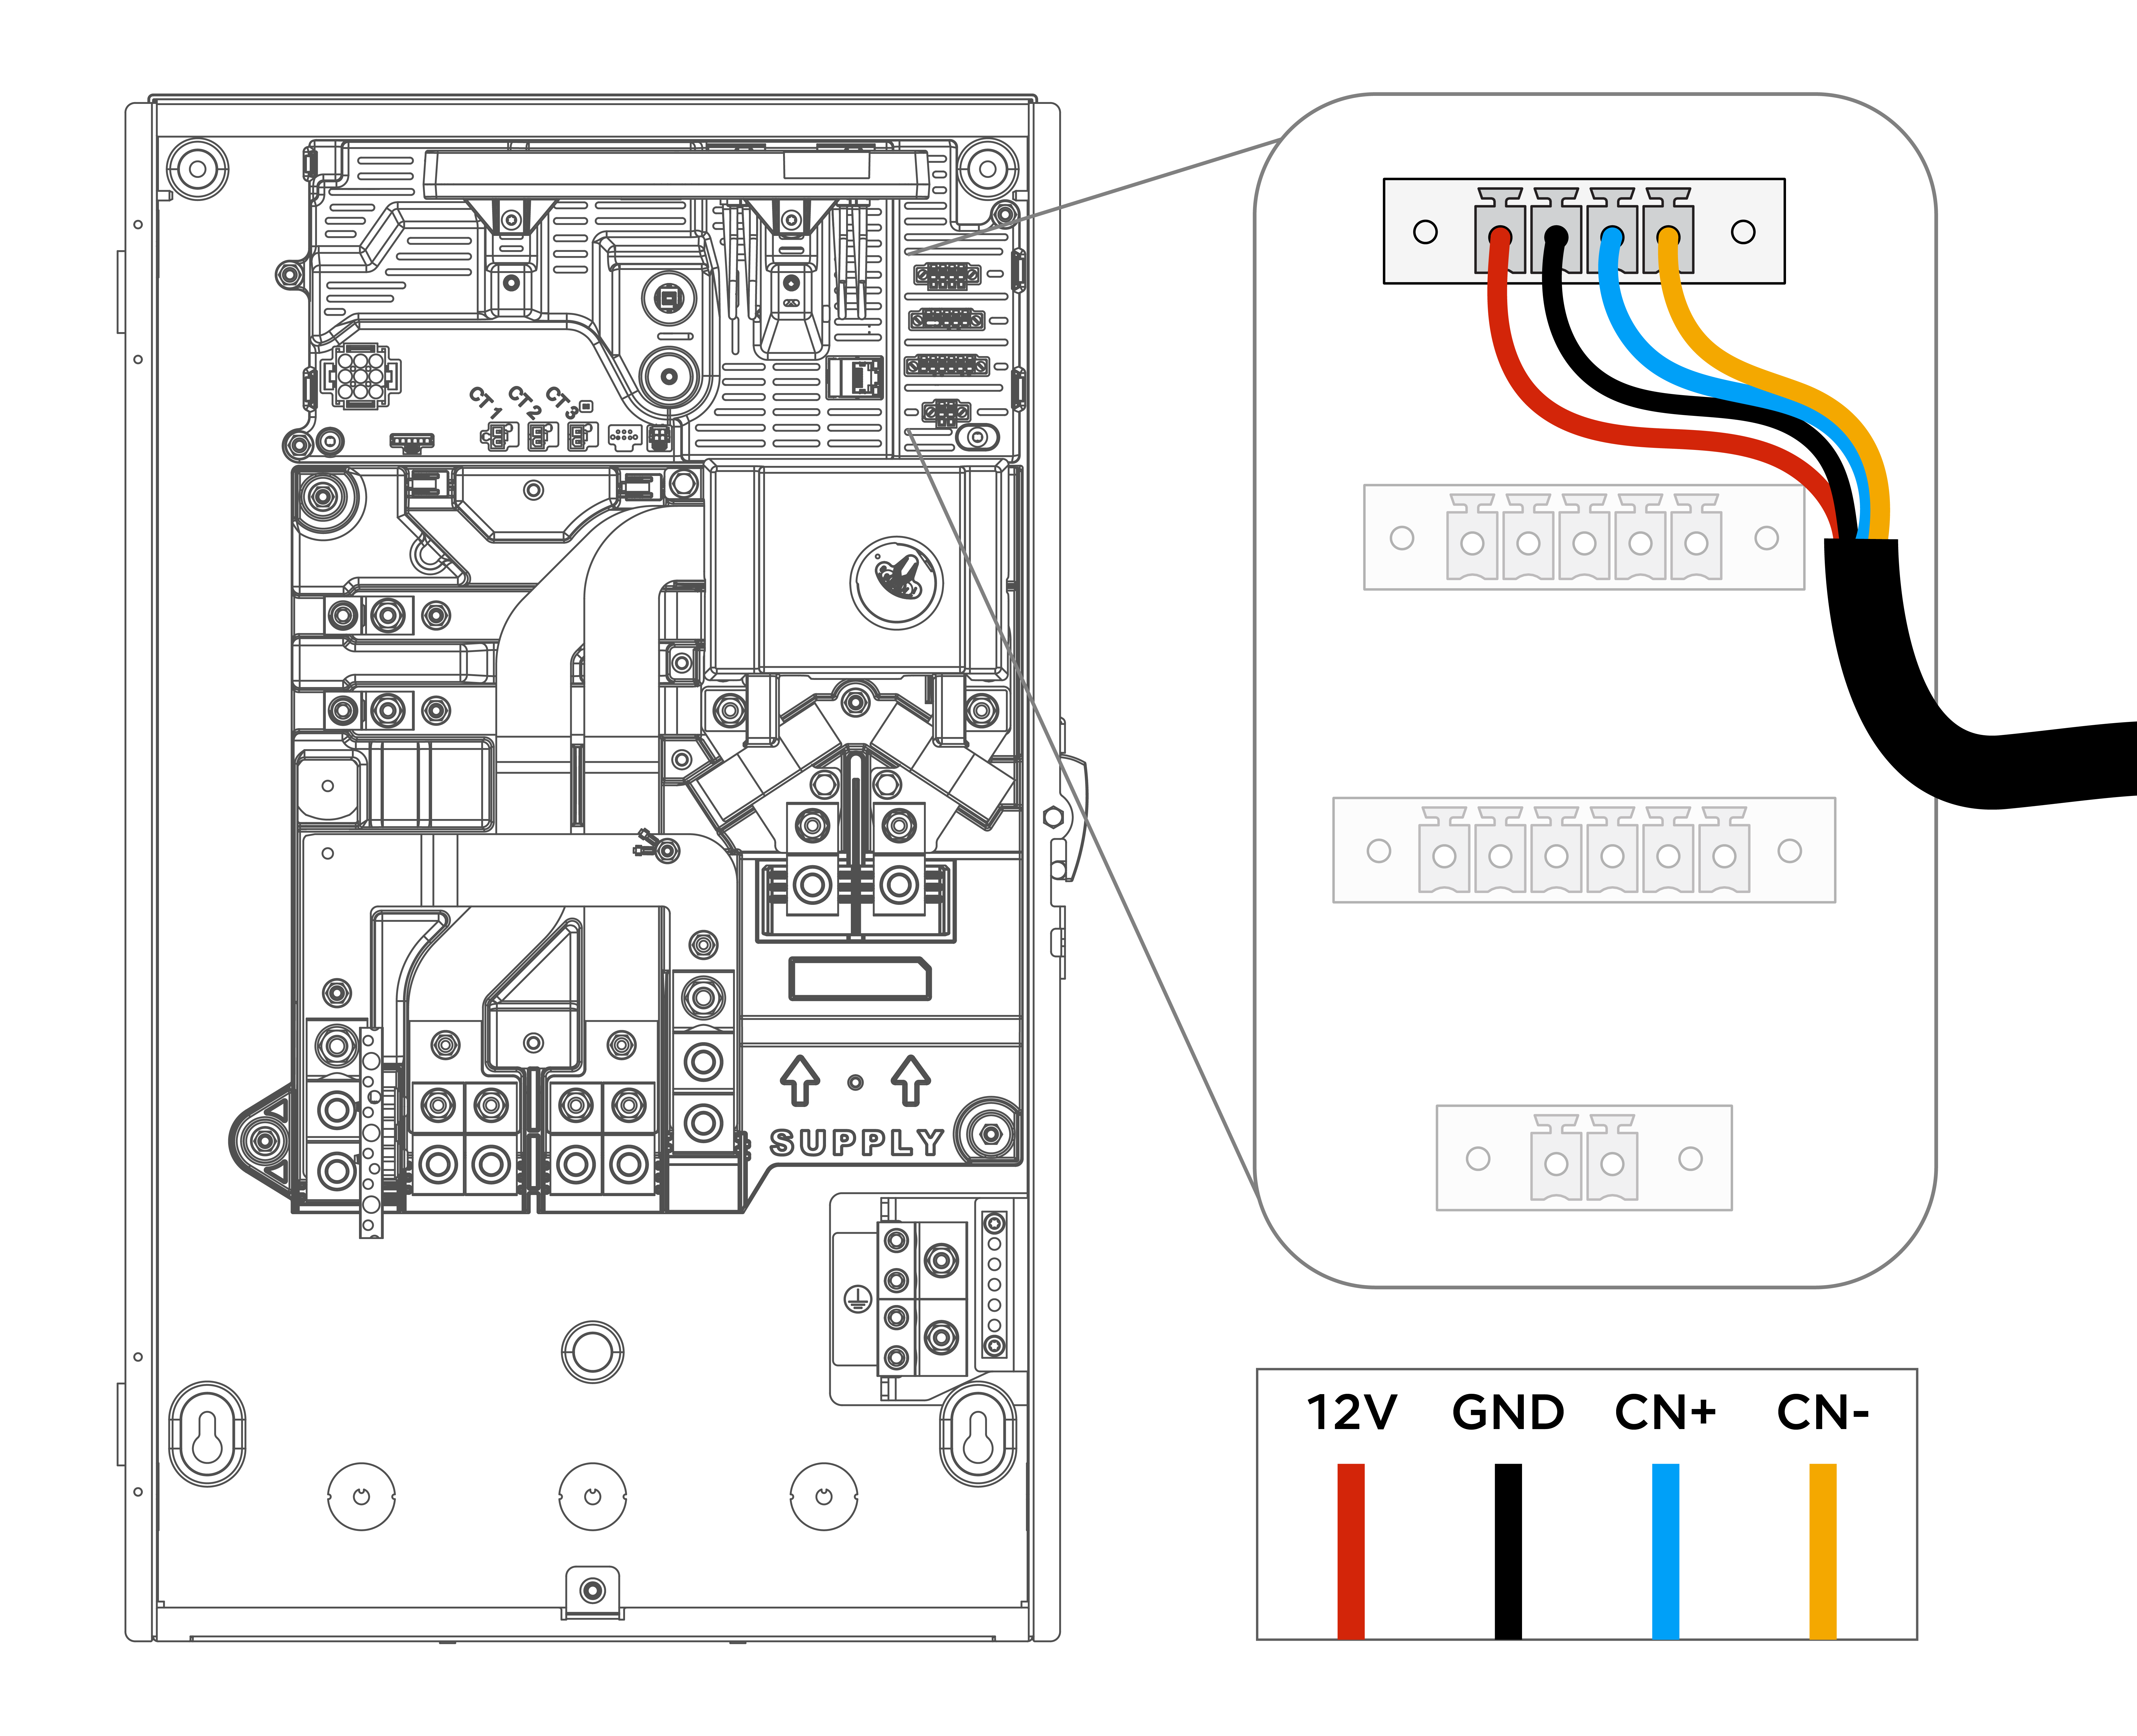
  1. Use an Ethernet tester to confirm the cable was made properly and is not damaged (test each end of the cable). If the cable is field-crimped, Tesla recommends crimping to the T-568B standard.
  2. If the cable fails the test, either replace the cable or cut the cable and crimp new RJ45 connectors (see install manual).
  3. If the cable passes the test but the Ethernet connection is still not functioning:
    1. Confirm the cable has been crimped to the T-568B standard. A common crimping error is depicted below:
    2. Look for damage including cuts or nicks along the length of the cable. Replace the entire cable with a factory-made cable if needed.
    Informational PurposesAn informational icon, calling your attention
    Note
    Some Ethernet testers are not capable of detecting all Ethernet wiring errors.
    • Klein Tools LAN Scout Jr. 2 (manufacturer part number VDV526-200) is recommended for its range of testing capabilities.
    • Klein Tools LAN Explorer (manufacturer part number VDV526-100) or similar testers are not recommended as they are not capable of detecting all wiring errors, including the common error depicted above.