09/01/2025 16:49:59

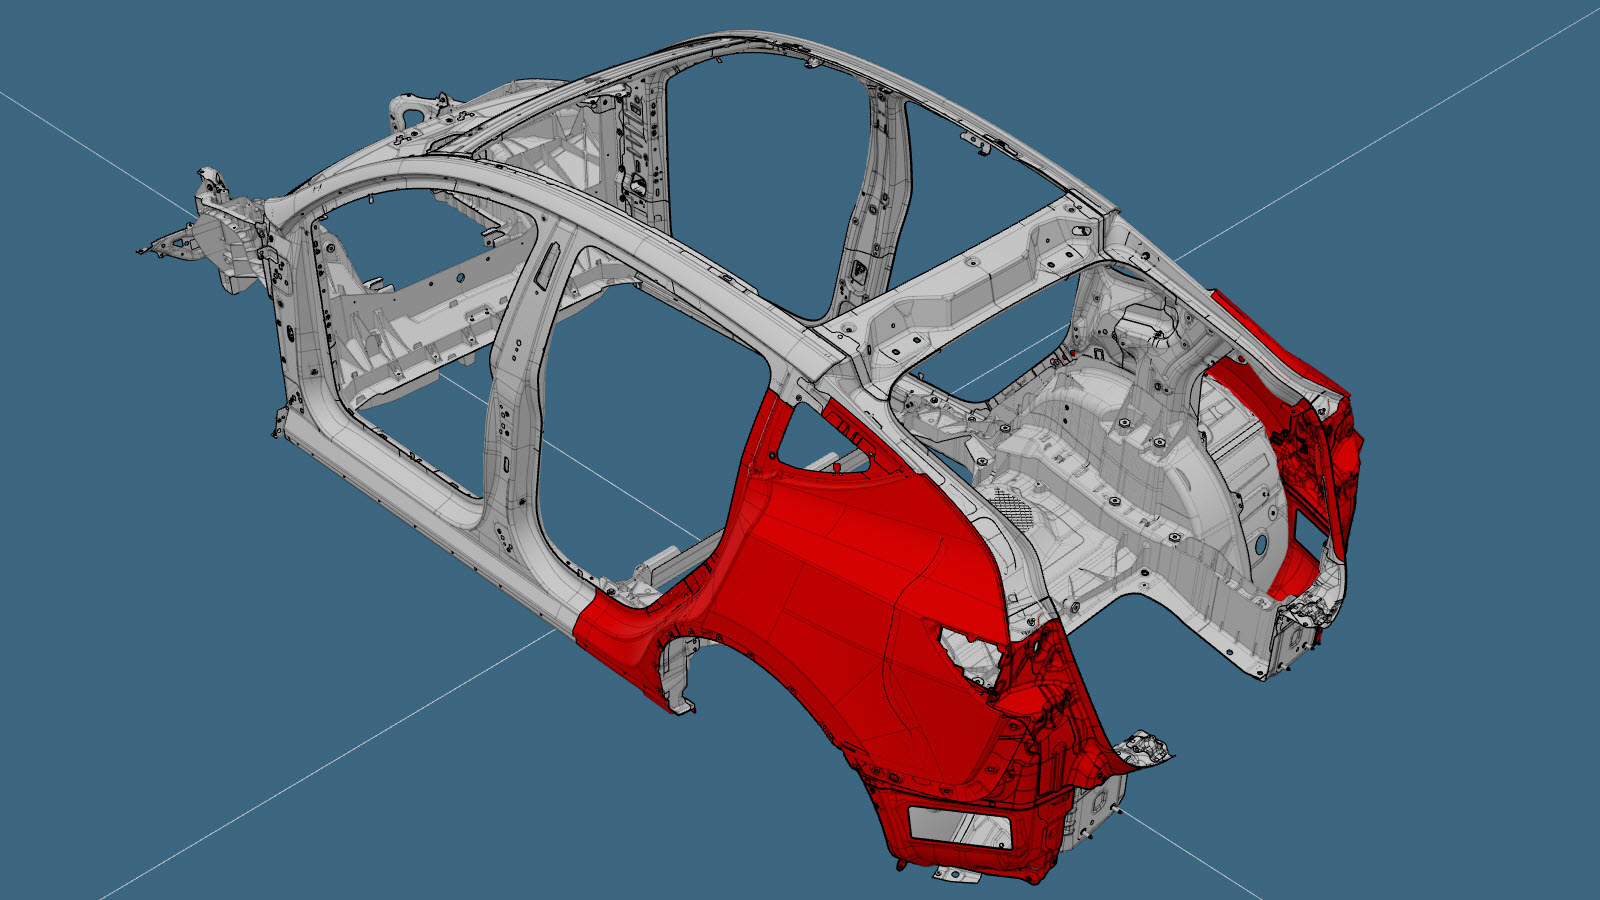
Quarter Outer Assembly (Without Upper Trough)

维修信息

Informational PurposesAn informational icon, calling your attention
Note
If the repair area includes any portion of the Roof Rail, do not use this procedure; instead, refer to the 车身侧外件.

Using this Document

This document contains two major parts:
  1. Quarter Outer Assembly Section Descriptions provides information on where and how to section the Quarter Outer Assembly (or subassemblies) as necessary to replace damaged areas of the Quarter Outer assembly, or to gain access to underlying parts of the vehicle structure. Use the section descriptions to determine where to successfully section the Body Side Outer Assembly as needed for the repair being performed.
    Informational PurposesAn informational icon, calling your attention
    Note
    Sections of the Quarter Outer Assembly can be replaced individually or in any combination of sections so long as the referenced cut locations identified in this document are used.
    Informational PurposesAn informational icon, calling your attention
    Note
    Measurements from bolt hole locations are from the center of the referenced holes unless stated differently in the section description.
  2. The 维修程序 portion of this document contain the information necessary to replace the entire Quarter Outer Assembly. If replacing sections of the Quarter Outer (not the entire Quarter Outer Assembly), use the relevant portions of each step to determine which parts and fasteners are needed and the steps required to complete the repair.

Quarter Outer Assembly Section Descriptions

Quarter Outer Assembly Sectioning
The Quarter Outer Assembly is a single assembly, and can be replaced as a single repair, or instead of replacing the complete Quarter Outer Assembly, areas of the Quarter Outer can be replaced using portions of the complete Quarter Outer Assembly using the cut lines described in this document.


Quarter Outer Section Descriptions Joint Descriptions

Quarter Outer Skin Section

参考线/点

切割线
  • A = 77 mm
  • B = 163 mm
  • C = 33 mm
  • D = 146 mm
Informational PurposesAn informational icon, calling your attention
Note
Refer to the 车身侧外件 procedure for sectioning guidelines.

GMA 焊缝

Informational PurposesAn informational icon, calling your attention
Note
The gap between the adjacent panels of the butt joint for this section should be as small as possible to maximize joint strength.

Rear Sill Section

参考线/点

切割线
  • E = 165 mm
  • F = 412 mm
Informational PurposesAn informational icon, calling your attention
Note
Refer to the 车身侧外件 procedure for sectioning guidelines.

GMA 焊缝

Informational PurposesAn informational icon, calling your attention
Note
The gap between the adjacent panels of the butt joint for this section should be as small as possible to maximize joint strength.

Dogleg Section

参考线/点

切割线
  • G = 118 mm
  • H = 76 mm
Informational PurposesAn informational icon, calling your attention
Note
Refer to the 车身侧外件 procedure for sectioning guidelines.

GMA 焊缝

Informational PurposesAn informational icon, calling your attention
Note
The gap between the adjacent panels of the butt joint for this section should be as small as possible to maximize joint strength.

Rear Roof Rail Section

Informational PurposesAn informational icon, calling your attention
Note
If the repair area includes any portion of the Roof Rail, do not use this procedure; instead, refer to the 车身侧外件 procedure.

维修程序

  1. Remove the Upper Trough from the Rear Quarter Outer Assembly service part.
    原厂点焊焊缝
    钻透原厂点焊焊缝
    Informational PurposesAn informational icon, calling your attention
    Note
    钻除点焊焊缝时,请确保使用的钻头能钻出一个大小合适的孔,以便用紧固件代替点焊。
  2. 拆卸原装部件
    原厂点焊焊缝

    原厂 SPR

    钻透原厂点焊焊缝
    Informational PurposesAn informational icon, calling your attention
    Note
    钻除点焊焊缝时,请确保使用的钻头能钻出一个大小合适的孔,以便用紧固件代替点焊。
  3. 准备安装
    Informational PurposesAn informational icon, calling your attention
    Note
    红色 X 表示此处工厂安装的紧固件未进行更换。

    安装点焊焊缝

    钢塞焊焊缝

    GMA 焊缝

    结构型灯笼铆钉,6.5 毫米

    流型铆钉,S18

  4. 在车辆接合面以及新部件上涂抹结构型粘合剂
  5. 安装新部件
  6. 执行电阻点焊
    安装点焊焊缝
    Warning IconA warning icon, calling your attention to a possibly risky situation
    Warning
    未遵守包括使用个人防护装备在内的任何焊接安全注意事项,可能导致严重的人身伤害或财产损失。只有已完成 Tesla 认可的焊接培训课程的维修技师才有权在 Tesla 车辆上焊接结构组件。
    Warning IconA warning icon, calling your attention to a possibly risky situation
    CAUTION
    切勿在执行车辆电气绝缘程序前焊接 Tesla 车辆(请参阅车辆专用维修手册,了解有关车辆电气绝缘程序的更多信息)。在具有通电高压或低压系统的 Tesla 车辆上进行焊接可能会损坏车辆部件。
  7. 执行 GMA 焊接
    钢塞焊焊缝

    GMA 焊缝

    Warning IconA warning icon, calling your attention to a possibly risky situation
    Warning
    未遵守包括使用个人防护装备在内的任何焊接安全注意事项,可能导致严重的人身伤害或财产损失。只有已完成 Tesla 认可的焊接培训课程的维修技师才有权在 Tesla 车辆上焊接结构组件。
    Warning IconA warning icon, calling your attention to a possibly risky situation
    Warning
    为保持车辆碰撞完整性,在采用 GMA 焊接法焊接 Tesla 车辆时,仅允许使用经批准的焊丝和 GMA 焊接器。请参阅已批准的气体保护金属极弧 (GMA) 焊接器和焊丝了解有关经批准的 GMA 焊接器和焊丝的信息。
    Warning IconA warning icon, calling your attention to a possibly risky situation
    CAUTION
    切勿在执行车辆电气绝缘程序前焊接 Tesla 车辆(请参阅车辆专用维修手册,了解有关车辆电气绝缘程序的更多信息)。在具有通电高压或低压系统的 Tesla 车辆上进行焊接可能会损坏车辆部件。
    Informational PurposesAn informational icon, calling your attention
    Note
    进行 GMA 焊接之前,使用规格和类型相同的材料执行焊接测试,以确保焊接设备的设置能保证满意的焊接效果。
  8. 执行任何必要的维修后操作