Connect to Wall Connector
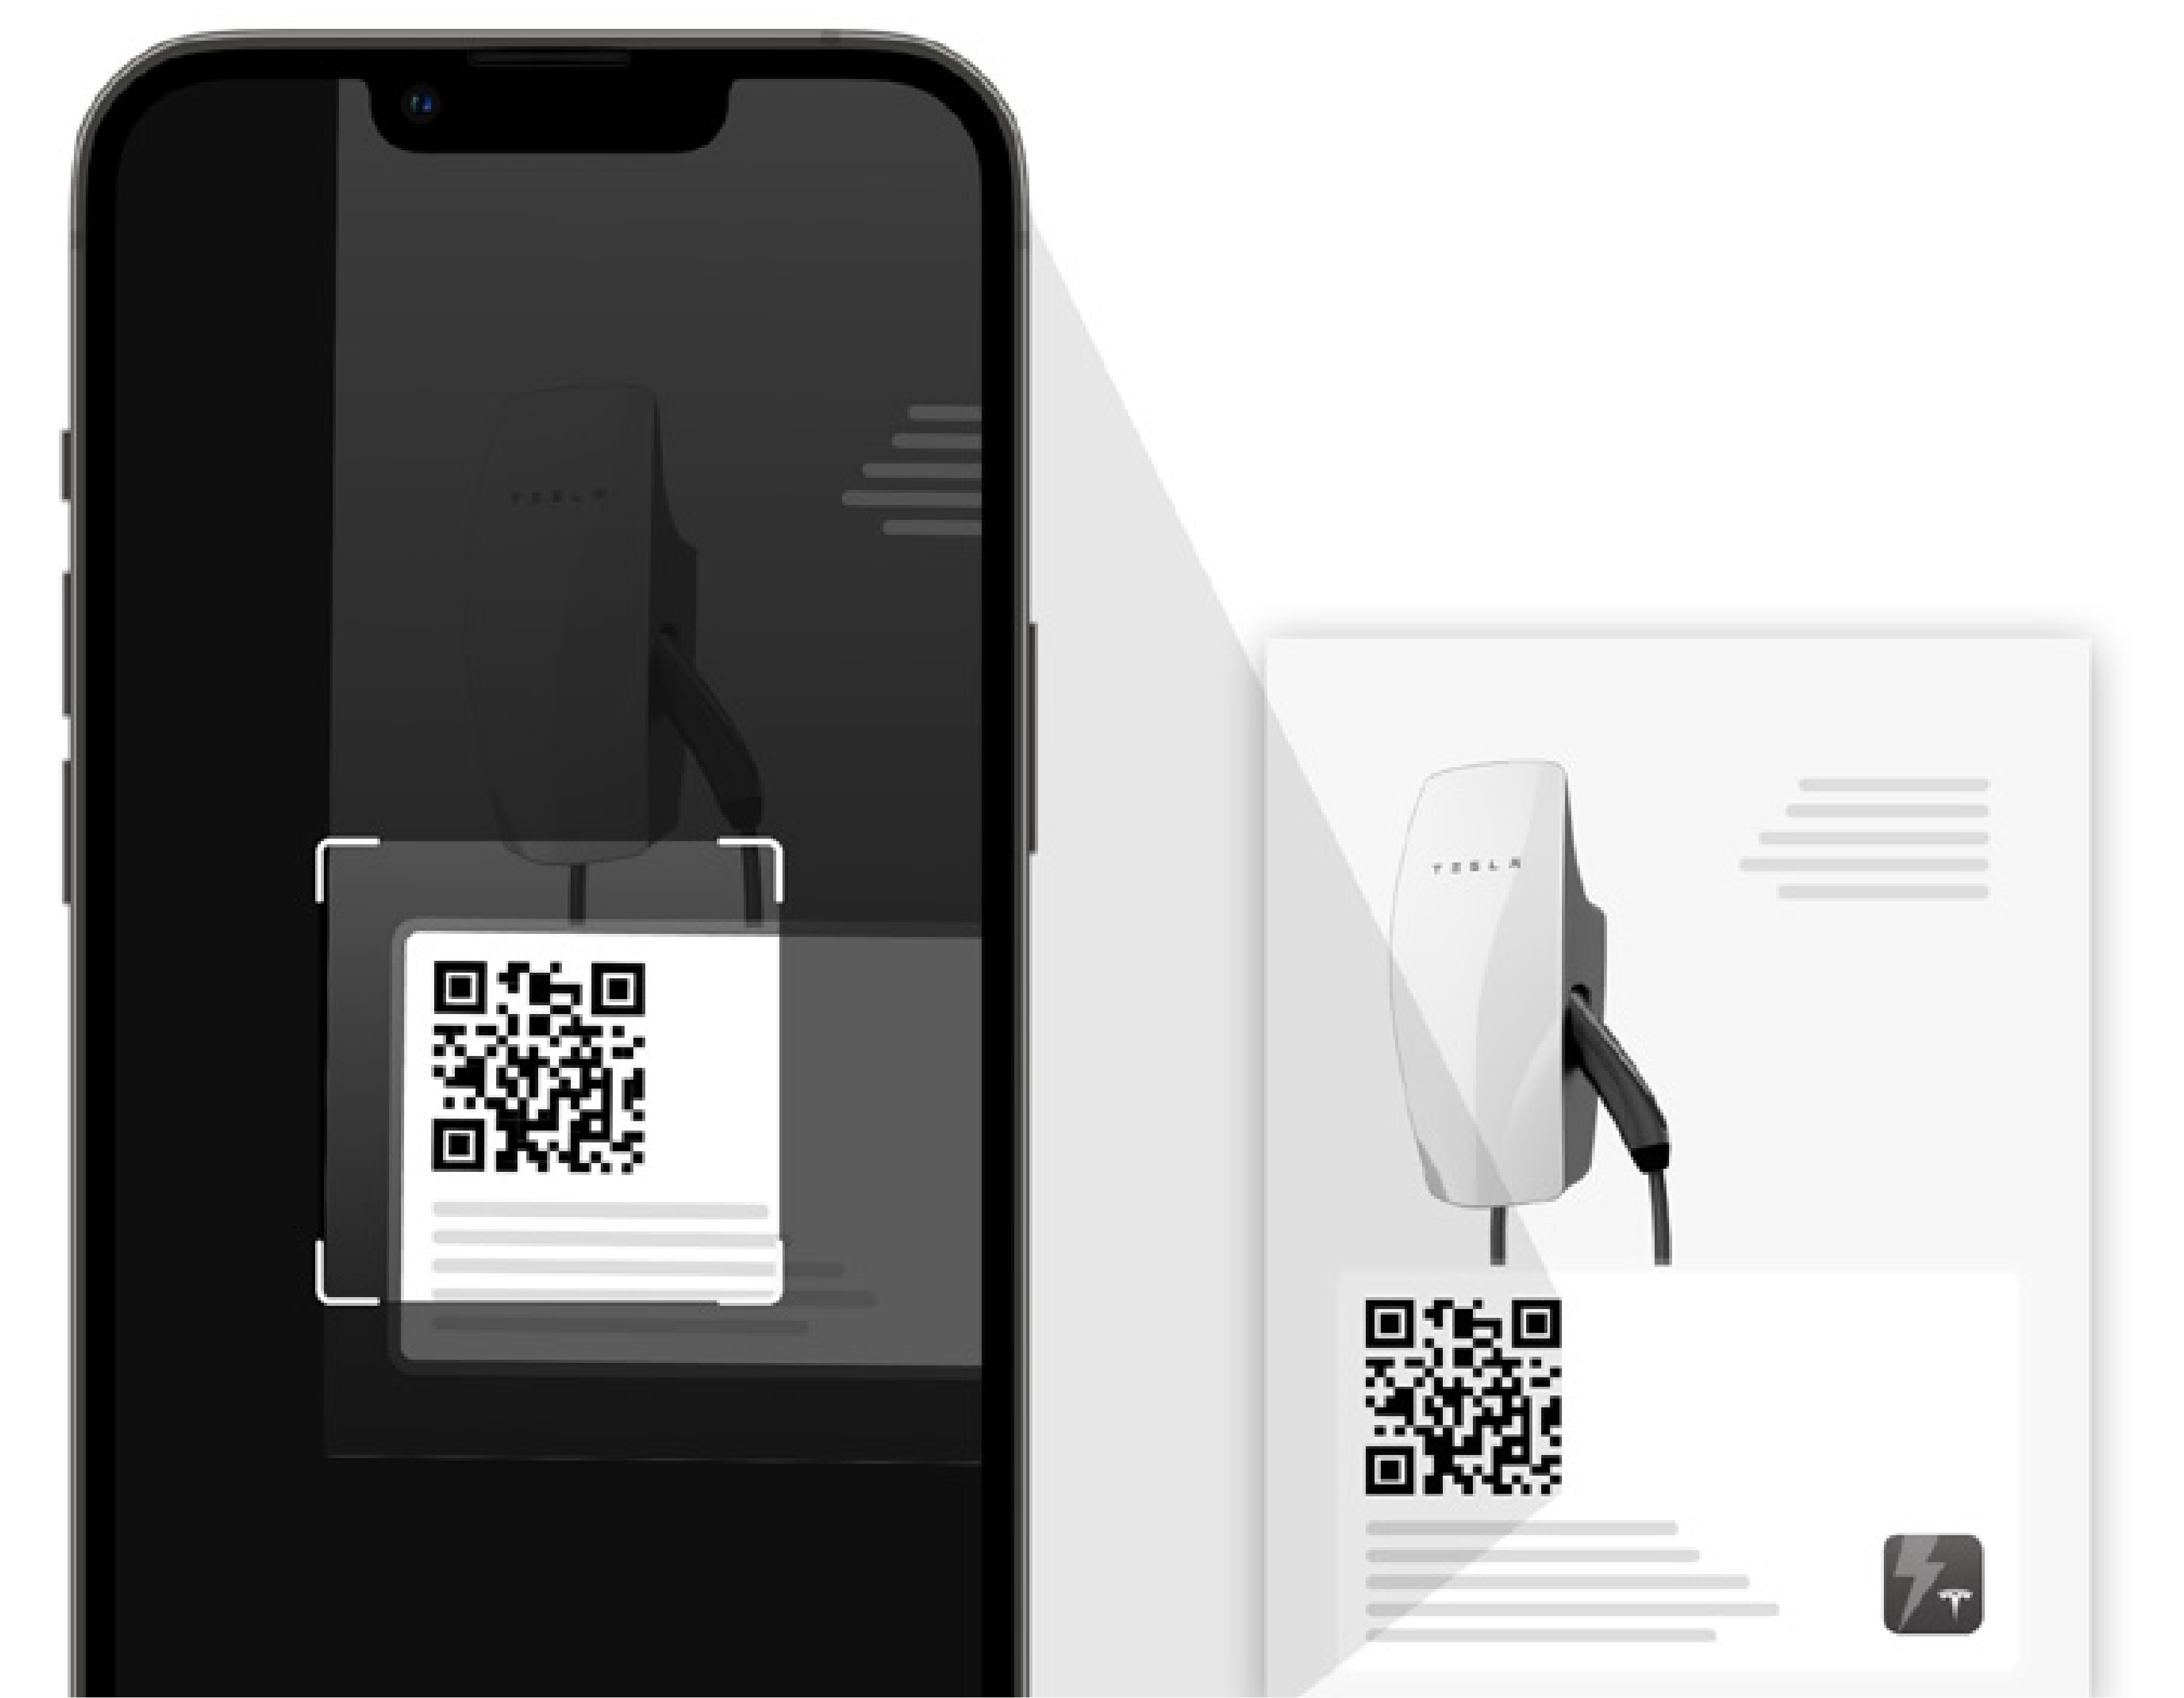
The Quick Start Guide is included with the Wall Connector and contains a QR code that is used to connect to Wall Connector to perform device setup.
Note
Ensure the Quick Start Guide is not discarded as the QR code may be required in the
future!
CAUTION
Start the device setup
process only when the Wall Connector is powered on. Do not
connect to any load when the face plate is separated from the main unit.
- Using the smartphone camera, scan the QR label on the Quick Start Guide.
- If the Tesla Pros app has not yet been installed, follow the prompts to install the app.
- If the Tesla Pros app is
already installed, ensure it has been updated to version 10.8 or greater
(select More, then
select Settings,
then the app version to see if an update is available).
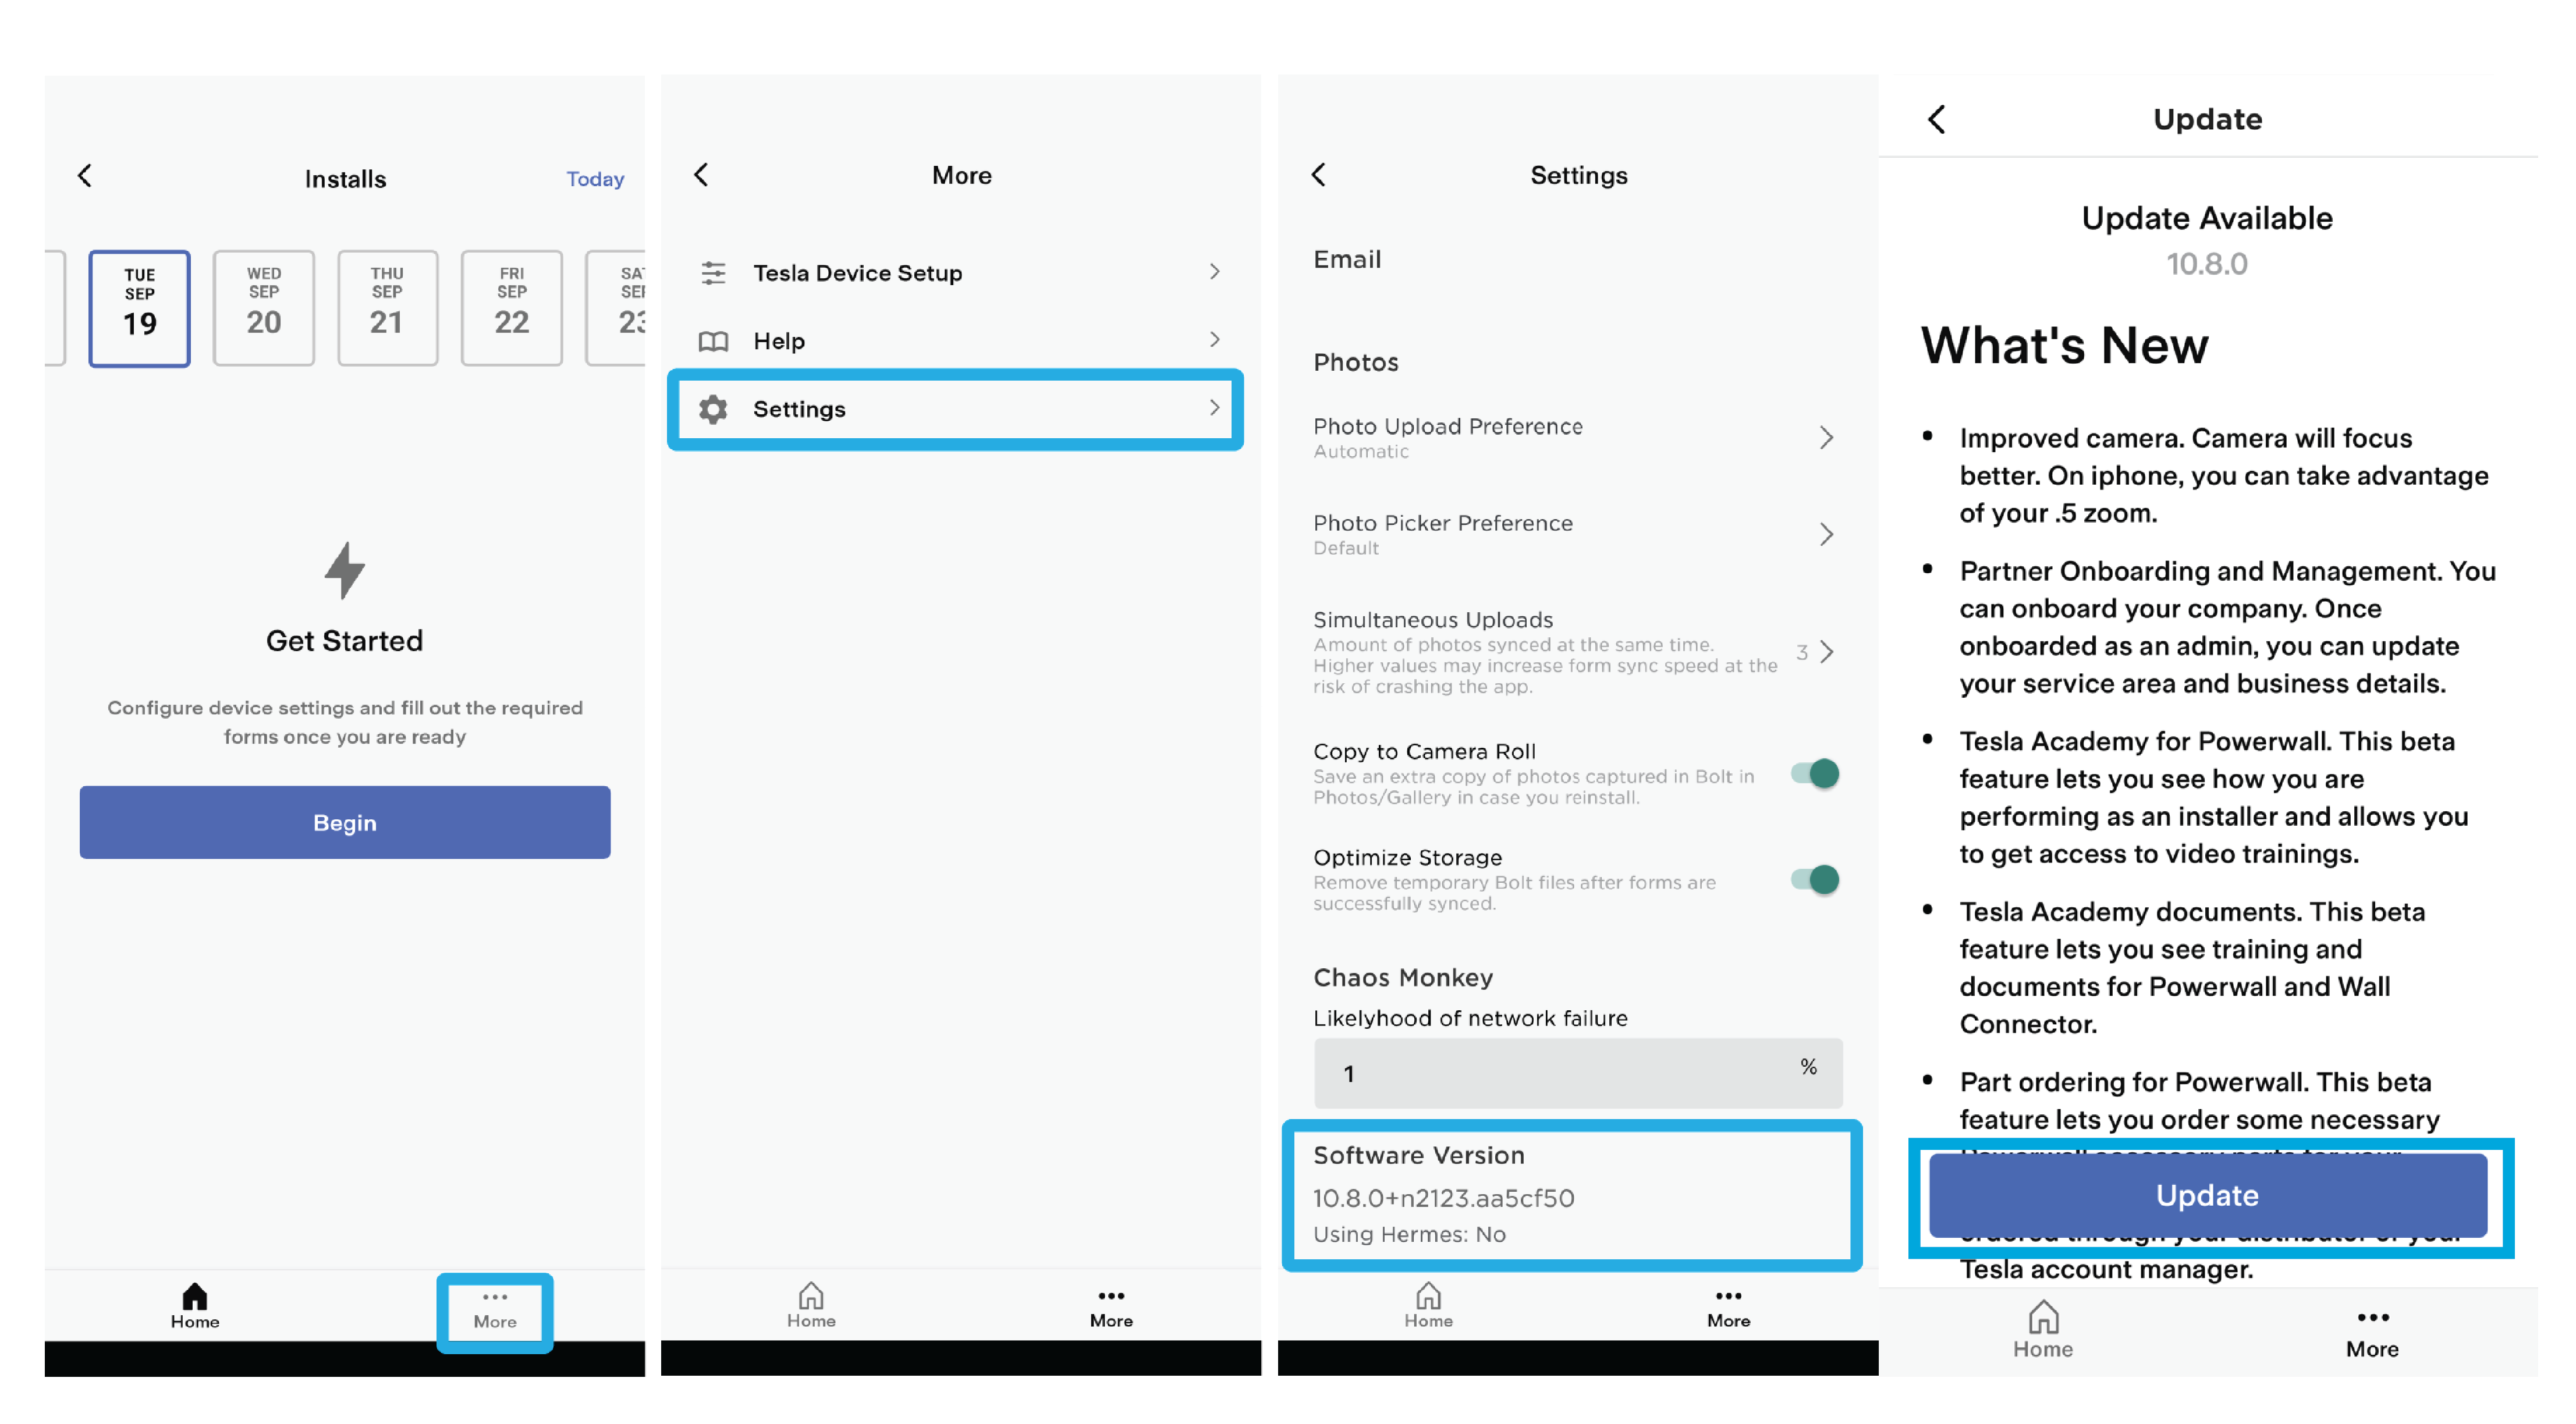 NoteTesla Pros gets new features every week, so update frequently! The app should automatically update but it is best practice to check for new updates, and manually update when one is available.
- Log in to Tesla Pros using your Tesla Partner Portal account, or select Create Account to create
a new account.NoteApple users may be prompted to allow Tesla Pros to find and connect to devices on the local network. Select Allow or OK, as this is required to connect to the Wall Connector Wi-Fi network. If the prompt does not automatically appear, permission can be granted by selecting Settings > Apps > Tesla Pros > Local Network.NoteAndroid users may be prompted to allow Location Consent. Allow all the time or Allow only while using the app, as this is required to allow Tesla Pros to find and connect to devices. If the prompt does not automatically appear, permission can be granted by selecting Settings > Apps > Tesla Pros > Location.
- Select
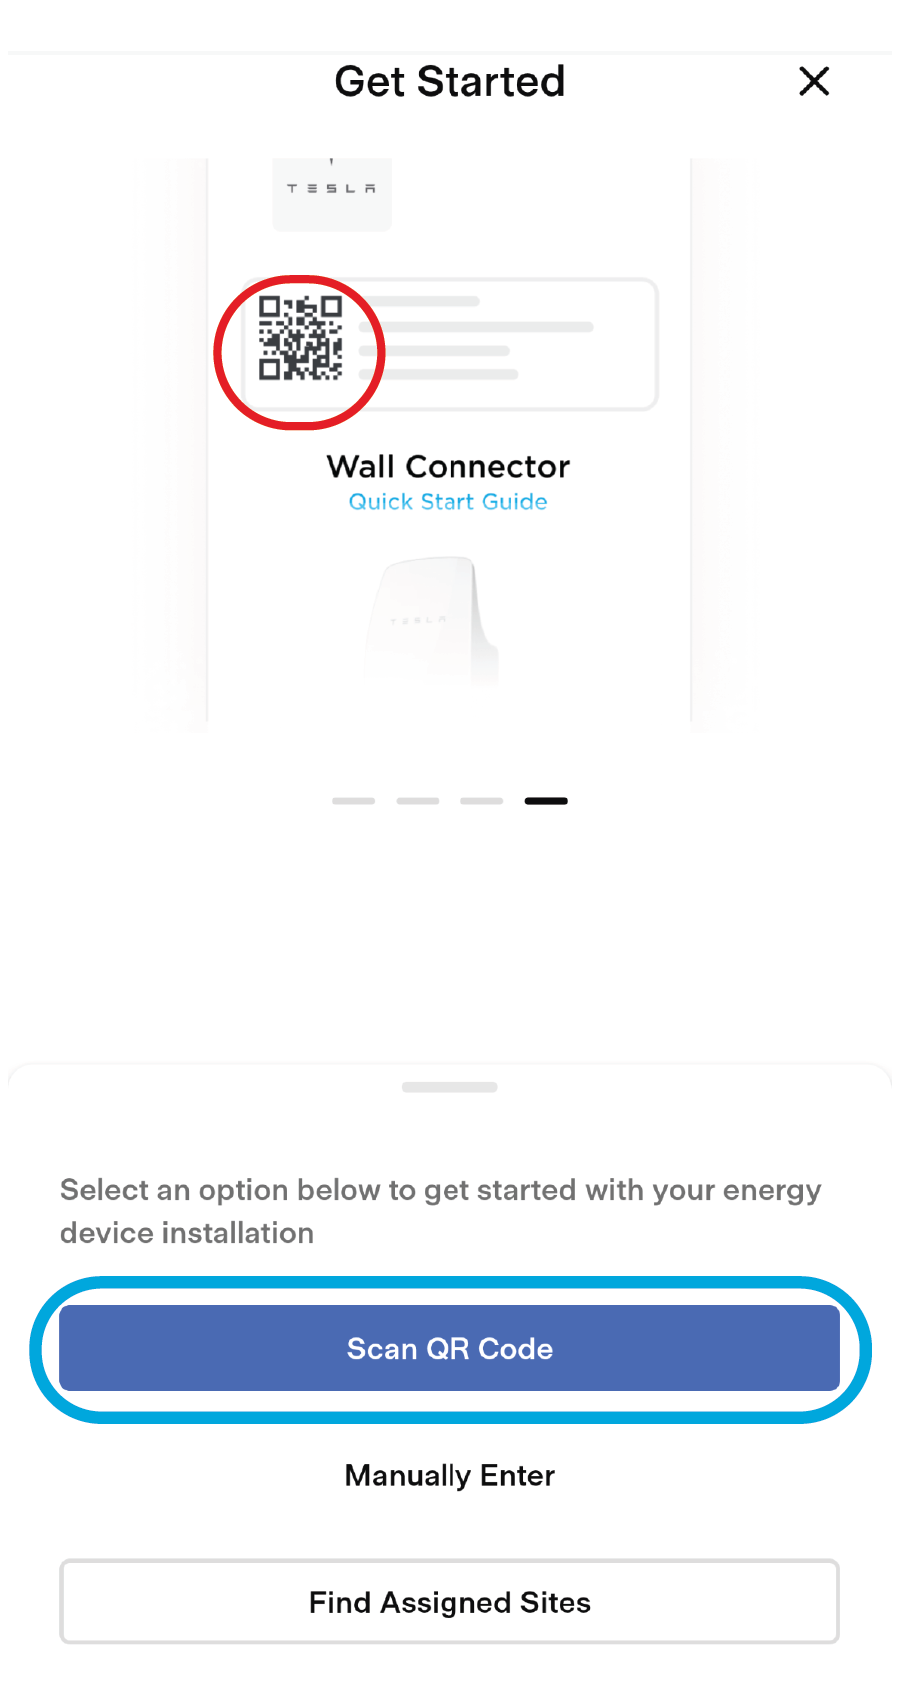
Installs, then select Begin.


- Select Scan QR Code, then use
the smartphone camera to scan the QR code on the Quick Start Guide again.
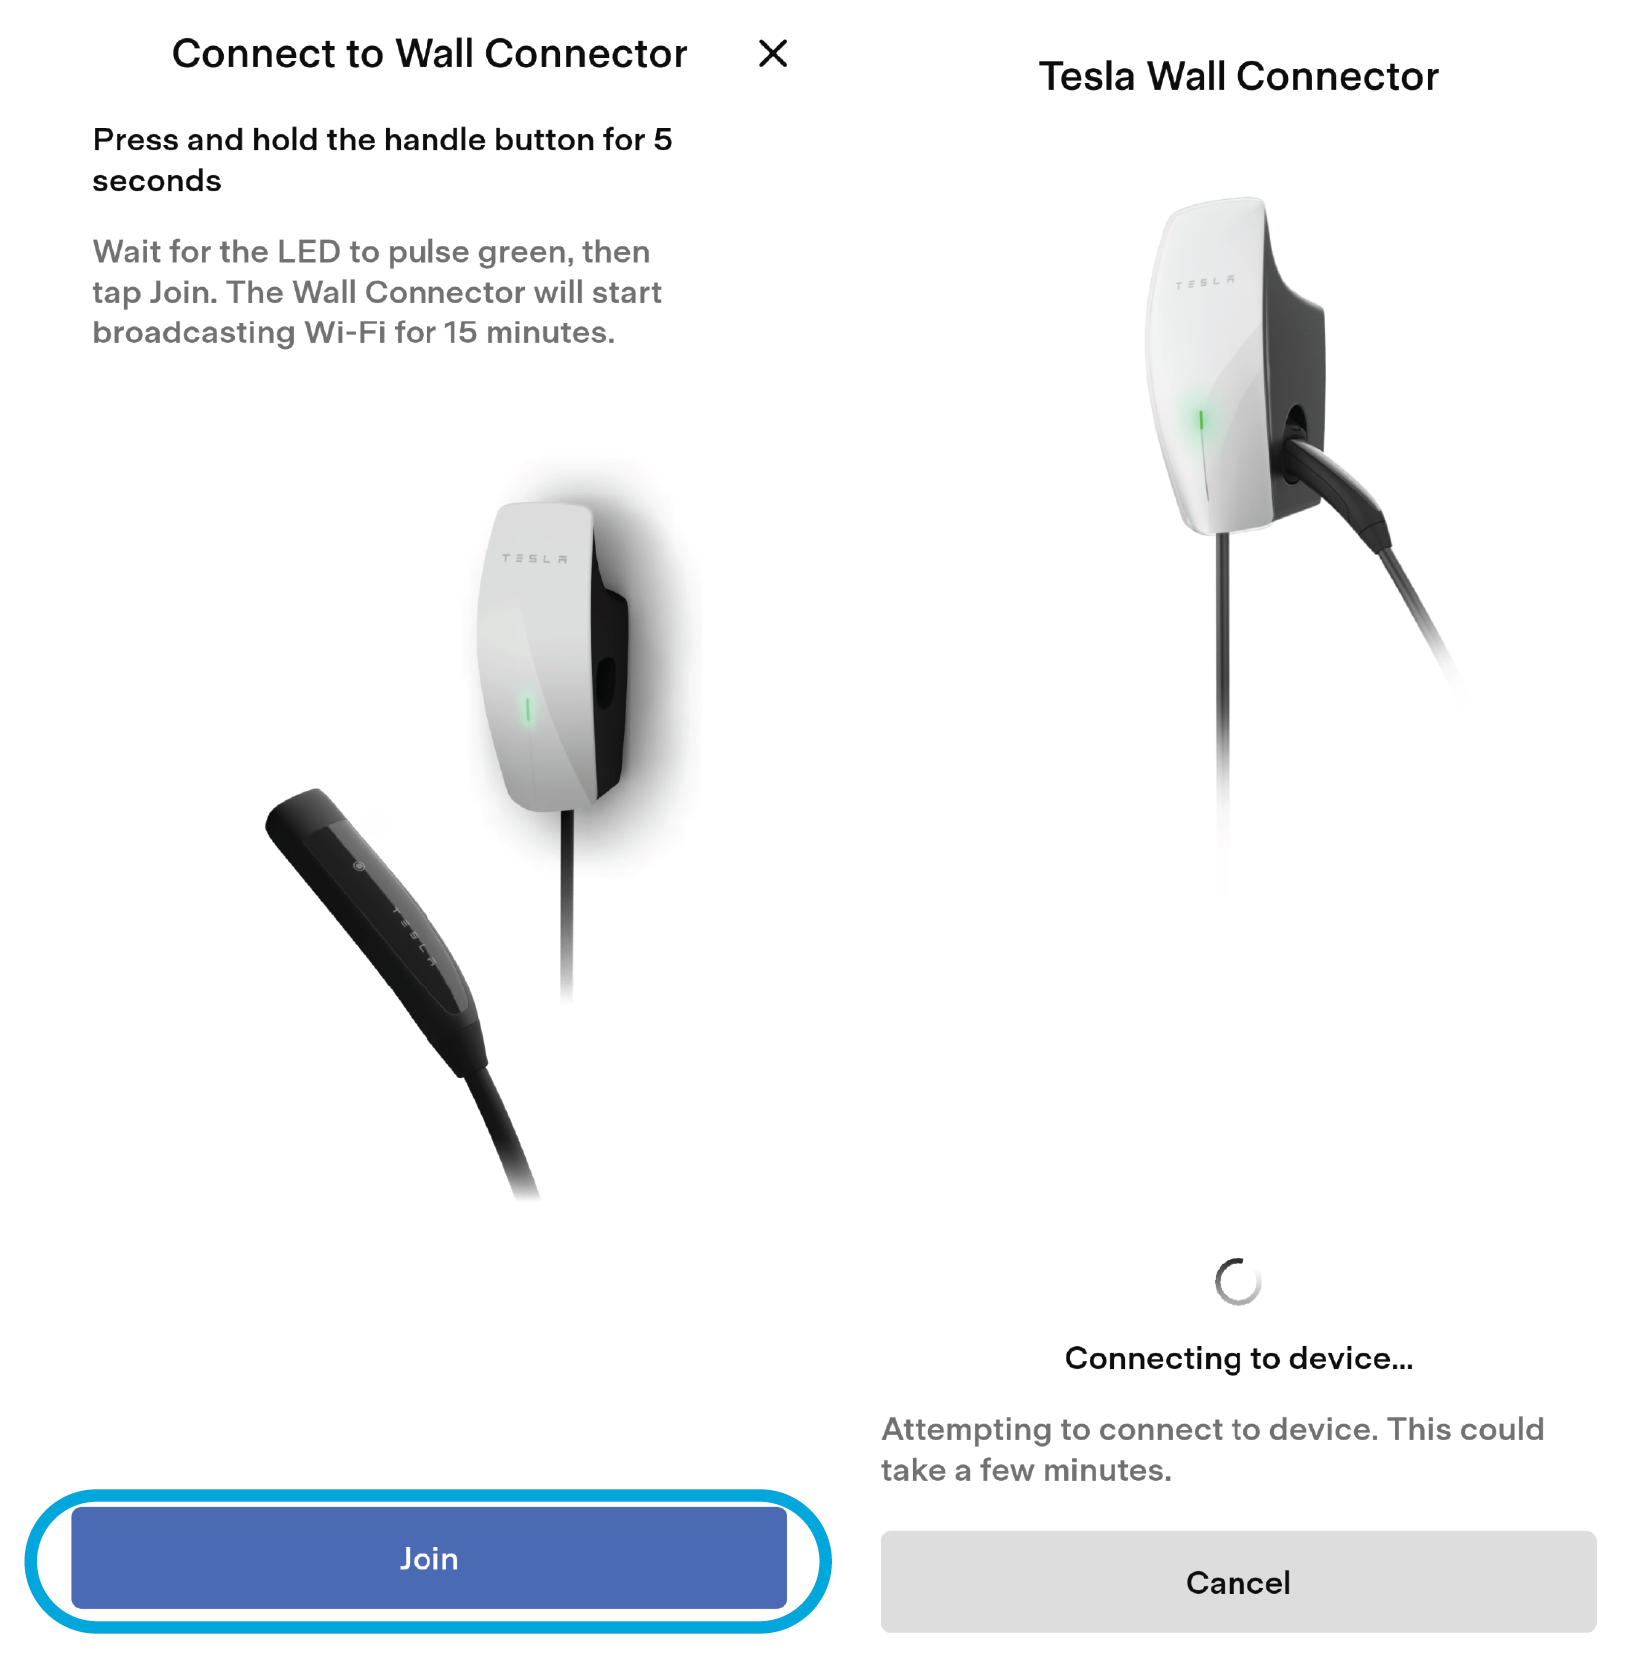
- On the charge handle, press and
hold the handle button for 5 seconds. Wait for the LED to pulse green, then
select Join.