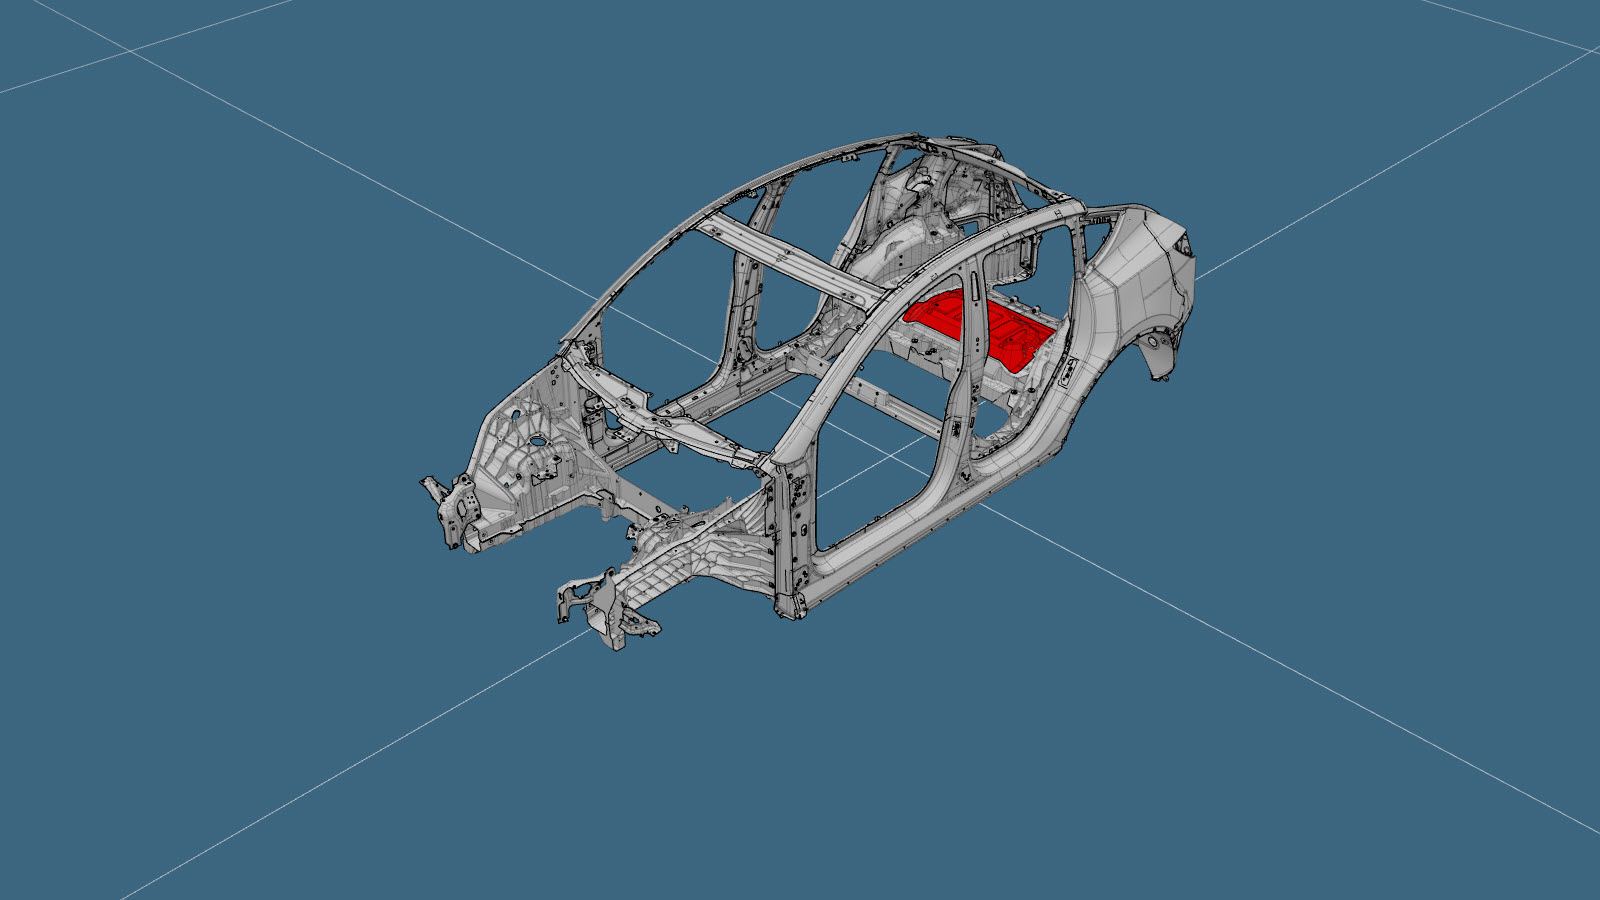
Motordeksel (lite område)
 Korrigeringskode:
10102201402
MERK: Med mindre det er uttrykkelig oppgitt i prosedyren, omfatter korrigeringskoden ovenfor all kollisjonsreparasjon som kreves for å gjennomføre denne prosedyren, inkludert de tilknyttede prosedyrene for kollisjonsreparasjon. Ikke stable korrigeringskoder for kollisjonsreparasjon med mindre du bli uttrykkelig bedt om det. Legg til eventuelle tilknyttede mekaniske prosedyrer som trengs for å utføre denne prosedyren.
Reparasjonsinformasjon
- Avhengig av skaden på denne komponenten kan det være mulig å reparere den. Se Retningslinjer for reparasjon for bakre støpedel under karosseri (1 stykker) for mer informasjon.
- Det finnes to alternativer for ettermontering:
- Motordeksel (stort område) inkluderer demontering av øvre del av motordekselet, med montering av nye bolter og mutre for å lage festepunkter for støydemperen for bakre motorbrønn. Monter deretter det nye motordekselet. Ved en stor ettermontering fjernes mer av det originale motordekselet enn ved den lille ettermonteringen, og det kreves nye bolter og muttere som skal fungere som festepunkter for støydemperen for bakre motorbrønn
- Motordeksel (lite område) (denne prosedyren) inkluderer demontering av øvre del av motordekselet, og lar de eksisterende festepunktene for støydemperen for bakre motorbrønn være. Monter deretter det nye motordekselet. Ved en stor ettermontering fjernes mer av det originale motordekselet enn ved den lille ettermonteringen, og de eksisterende festepunktene brukes på nytt for støydemperen for bakre motorbrønn.
- Gjennomgå all generell praksis og sikkerhetsdokumentasjon for kollisjonsreparasjon, og ta på deg egnet personlig verneutstyr før du starter denne prosedyren.
- Denne prosedyren kan utføres uten å bruke rammeløfter.
Deleliste
| Antall | Beskrivelse | Bilde/merknader |
|---|---|---|
| 1 | MY MY MOTOR COVER SVC E-COATED (motorbrønndeksel) | |
| 10 | Konstruksjonspopnagle, 6,5 mm | |
| 1 | BUTYL FOIL PATCH - M3 480 X 240 X 2.0 | Tesla-delenummer 1004964-00-A. |
| 4 | BUTYL FOIL PATCH 150X120X2MM | Tesla-delenummer 1043439-00-A. |
| 1 | Klebemiddel for frontrute |
Når du bestiller deler, må du se delekatalogen og angi understellsnummeret for bilen som repareres for å finne de riktige delene (og delenumrene) for bilen. Alternativt kan du bruke søkerfunksjonen i delekatalogen for å finne en spesifikk del for bilen.
Reparasjonsprosedyre
-
Bruk det nye motorbrønndekselet som mal for å tegne en sporingslinje rundt det originale motorbrønndekselet.
-
Fjern den opprinnelige komponenten.
Skjær bare på innsiden av sporingslinjen, og fjern bare de nødvendige delene av det originale støpte motordekselet. La det være igjen minst 25 mm mellom skjærelinjen og sporingslinjen for å skape en overlapping med det nye motordekselet.ADVARSELIkke fjern festepunktene for støydemperen for bakre motorbrønn på undersiden av motordekselet.MerkFjern bare de nødvendige delene av de fremre hjørnene av det støpte motordekselet.Referanselinje/-punkt
- A = 25 mm
Skjærelinje
-
Klargjør for montering.
eller Konstruksjonspopnagler, 6,5 mmMerkSikre at mellomrommet for påføring av uretan vil være tilstrekkelig for ordentlig tetning.
-
Påfør klebemiddelet for frontrute (uretanlim) på kontaktflatene på bilen og ny(e) komponent(er).
MerkFølg påføringsinstruksjonene til uretanprodusenten.
- Monter den nye komponenten eller komponentene.
-
Monter butyllappene.
- Utfør nødvendige operasjoner etter reparasjon.