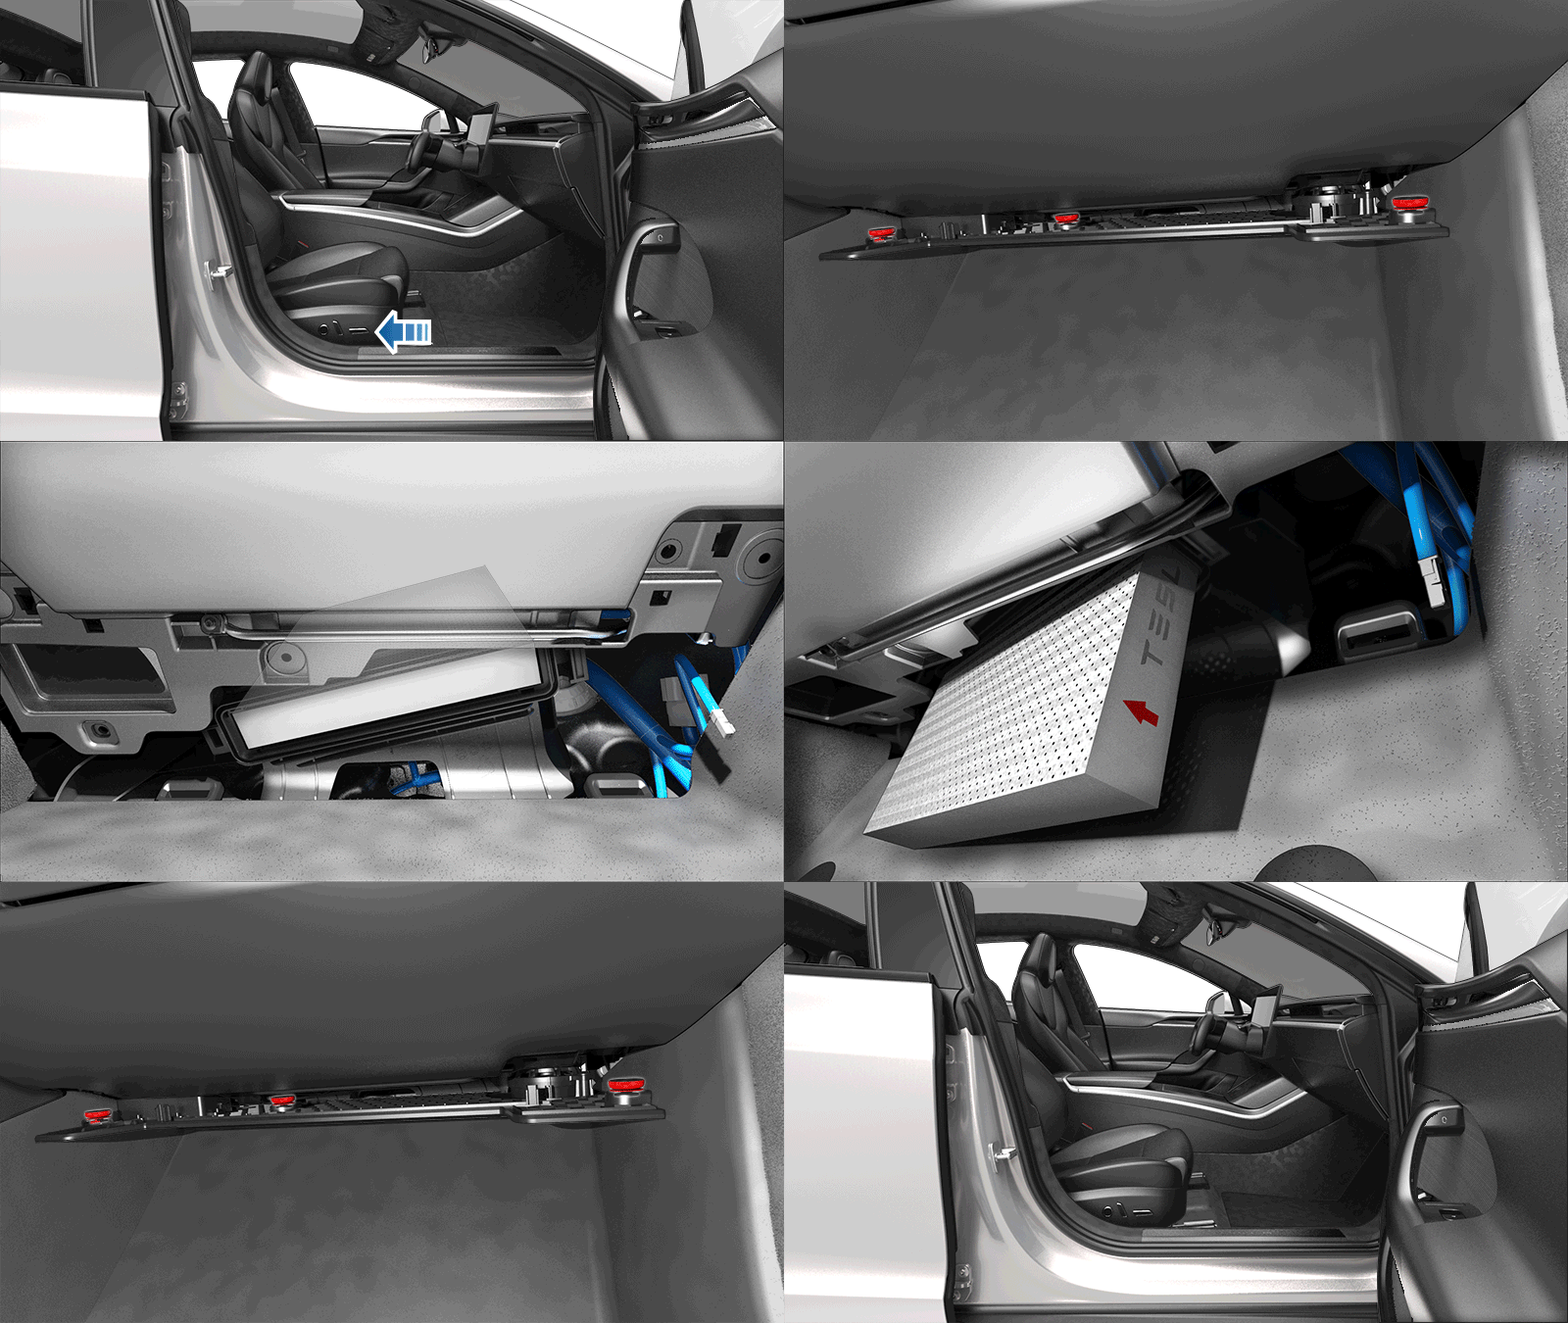
Replacing Cabin Filters
Model X has an air filter that prevents pollen, industrial fallout, road dust, and other particles from entering the cabin through the vents. Tesla recommends replacing these filters every 2 years (every year in China). Cabin filters can be purchased at the Tesla Shop (or https://shop.tesla.cn/ for China).
To replace the cabin filter:

- Turn off the climate control system.
- Move the front seat on the right-hand side fully rearward.
- Slowly and gently pull down the footwell cover to release the magnets, then disconnect the electrical harness on the right side of the cover. Set the footwell cover aside.
- Squeeze the cabin filter door lock to release it, and then remove and set the door aside.
- Note the direction of air flow printed on the cabin filter. The arrows on the filter should face toward the rear of the vehicle.
- Slide the filter out of the HVAC module.
- Ensuring that the arrows on the new filter face toward the rear of the vehicle, insert the new cabin filter into the HVAC module.
- Slide the cabin filter door onto the
HVAC module, and then push the door to lock it.NoteEnsure the lock is fully engaged and the door is sealed shut.
- Position the right-hand side front footwell cover on the vehicle and connect the electrical harness to the cover.
- Install the right-hand side front footwell cover, making sure the magnets (x3) are locked into position.
- Move the front seat on the right-hand side back to its original position.
- Reset the cabin air filter maintenance interval on your vehicle's maintenance summary (see Maintenance Summary).