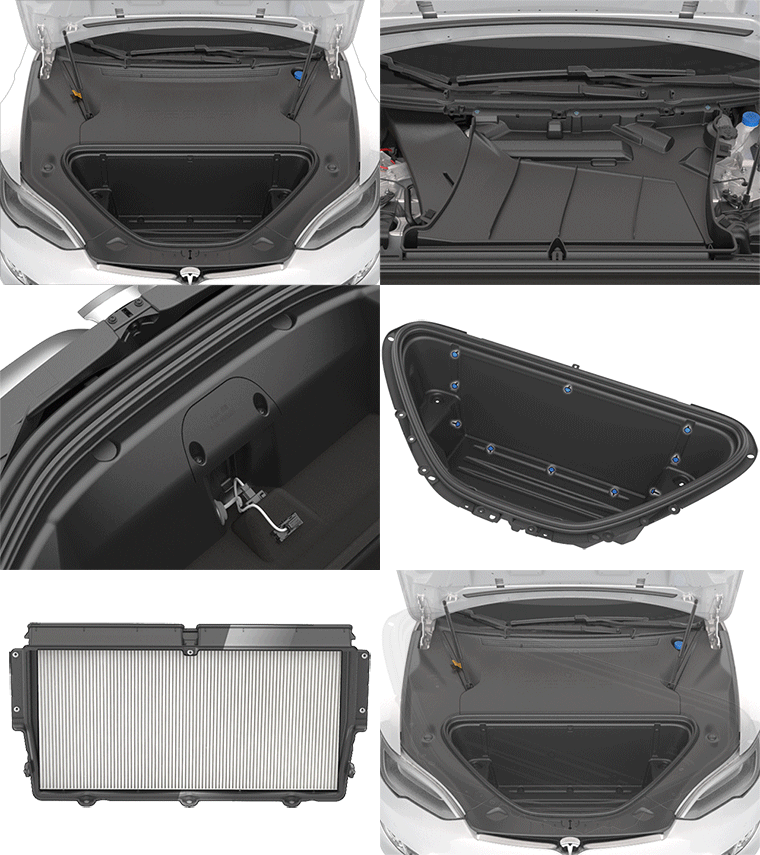
Replacing the HEPA Filter
If equipped, Tesla recommends replacing the HEPA filter every 3 years (every year in China). To replace the HEPA filter:

-
Open the hood.
-
Remove the rear underhood apron.
-
Remove both the left and right underhood aprons.
-
Remove the front underhood apron.
-
On each side of the HEPA filter inlet duct, release the drain hose from the cowl screen.
-
Use a trim tool to carefully release the clips (x3) that secure the HEPA filter inlet duct to the cowl screen. Remove the inlet duct from the vehicle.
CAUTIONEnsure you do not damage the tabs that align the intake duct to the HEPA filter housing. -
Release the HEPA filter outlet duct by gently lifting it up and towards the front of the vehicle, then rotating it clockwise. Remove the outlet duct from the vehicle.
-
Carefully fold back the trunk seals to release the front of the carpet from the underhood storage unit, then disconnect the electrical connector from the underhood storage unit lights and emergency release switch. Route the connectors through the carpet into the underhood storage unit.
-
Remove the carpet from the underhood storage unit.
-
Use a trim tool to release the push clips (x2) that secure the underhood storage unit.
-
Remove the fasteners (x2) that secure the underhood storage unit to the vehicle. Remove the underhood storage unit and HEPA filter from the vehicle as an assembly.
-
Remove the fasteners (x8) that secure the HEPA filter to the rear of the underhood storage unit.
-
Remove the old HEPA filter from the underhood storage unit.
-
Put the new HEPA filter in place behind the underhood storage unit.
-
Tighten the fasteners (x8) that secure the HEPA filter to the rear of the underhood storage unit (torque 3.5 Nm).
-
Put the underhood storage unit and HEPA filter assembly back in place in the front trunk.
-
Tighten the fasteners (x2) that secure the underhood storage unit to the vehicle (torque 7 Nm).
-
Re-secure the push clips (x2) that secure the underhood storage unit.
-
Place the carpet back into the underhood storage unit.
-
Route the electrical connectors through the carpet. Reconnect the electrical connectors for the underhood storage unit lights and emergency release switch then readjust the seal to prevent ingress.
-
Reinstall the HEPA filter outlet duct.
-
Resecure the clips (x3) that secure the HEPA filter inlet duct to the cowl screen.
-
On each side of the HEPA filter inlet duct, resecure the drain hose to the cowl screen.
-
Reinstall the front, left, right, and rear underhood aprons then close the hood.