Shroud - Motor - Upper

FRT No: 40011602

    Remove


  1. Remove power train assembly (refer to procedure).

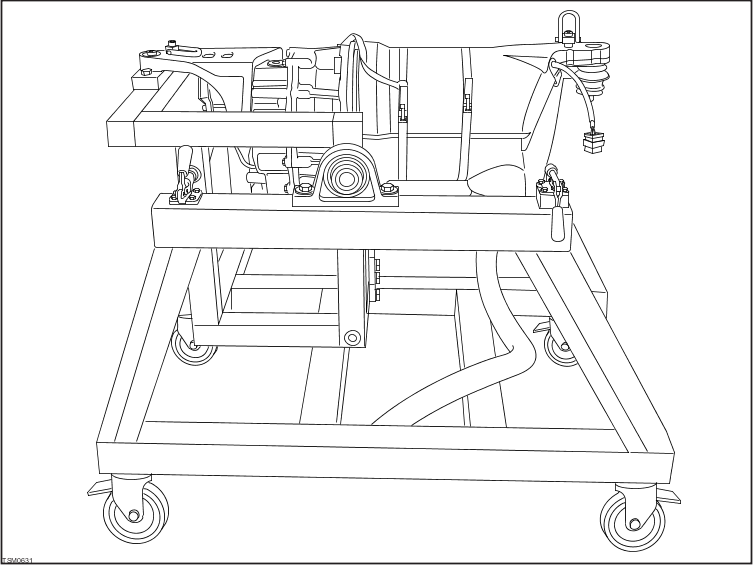
  2. Lower power train onto support cradle 1001024 and secure with mounting bolts.

  3. Rotate power train assembly into vertical position on cradle.

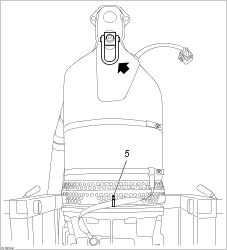
  4. Remove power train lifting eye.

  5. Remove cable tie securing earth strap to upper shroud.

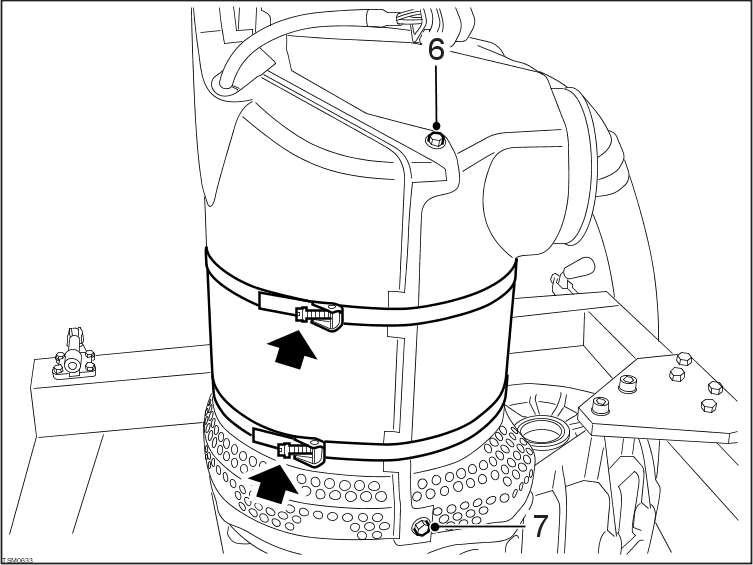
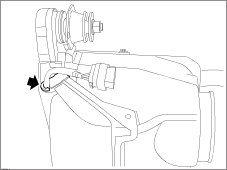
  6. Remove bolts and washers (x2) securing front edge of upper shroud to lower shroud (torque - 5 Nm).
  7. NOTE: When installing, apply Loctite® 222™ thread locking compound to bolt/screw threads.


  8. Remove bolts and washers (x2) securing rear edge of upper shroud to lower shroud (torque - 5 Nm).
  9. NOTE: When installing, apply Loctite® 222™ thread locking compound to bolt/screw threads.


  10. Loosen and remove shroud clamps (x2).

  11. Release encoder harness grommet from upper shroud.

  12. Remove upper shroud from motor.

    Installation


  1. Installation procedure is reverse of removal except for the following.

  2. Position the upper shroud and fit the power train lifting eye to located it in the correct position.

  3. Fit bolts and washers securing the motor cable edge of the upper to lower shroud.

  4. Correctly position the shroud clamps and ground strap. Make sure the screw fasteners on the clamp do not protrude outwards from the side of the shrouds.

  5. Slowly tighten both clamps to compress the shrouds together until the remaining fastener holes on the upper and lower shrouds are aligned.

  6. Fit bolts and washers securing the upper shroud to the lower shroud.

  7. Ensure upper and lower shrouds are correctly located to make a good seal and ensure the motor is correctly cooled.