HVAC Assembly
FRT No: 18010302
Remove
Remove solenoid valve to front TXV pipe
(refer to procedure).
Loosen clamps (x2) securing Air Distribution Unit (ADU) inlet hose. Remove hose.
Remove cable ties (x2) securing harness to HVAC assembly.
Remove Patchbolts (x2) securing HVAC assembly to body (torque - 15 Nm).
Disconnect harness connectors (x2) from evaporator thermal switch.
Release harness edge clips (x3) from body and remove cable ties (x3) securing harness to body.
Disconnect harness connectors (x2) from HVAC assembly.
Release clips (x2) securing blower motor to HVAC assembly.
Raise and support vehicle.
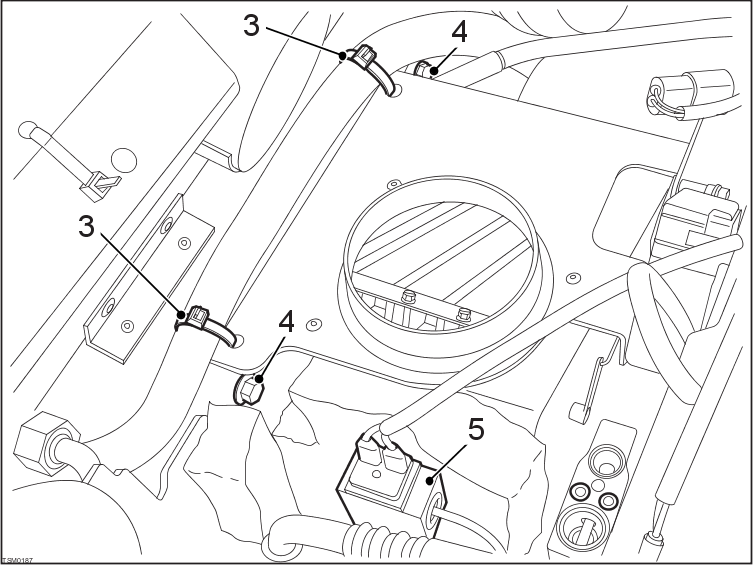
WARNING: Do not work on an incorrectly supported vehicle.
Remove RH front road wheel (torque - 105 Nm).
Remove cable tie securing drain tube to body.
Affix a draw string to end of drain tube to allow drain tube to be installed correctly.
Release HVAC assembly from blower motor and maneuver upwards, withdrawing drain tube from body.
CAUTION: Take care not to damage component(s).
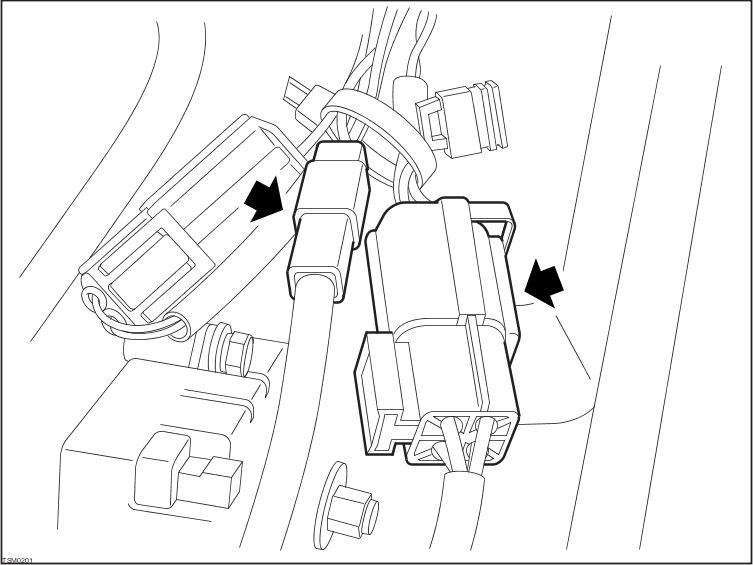
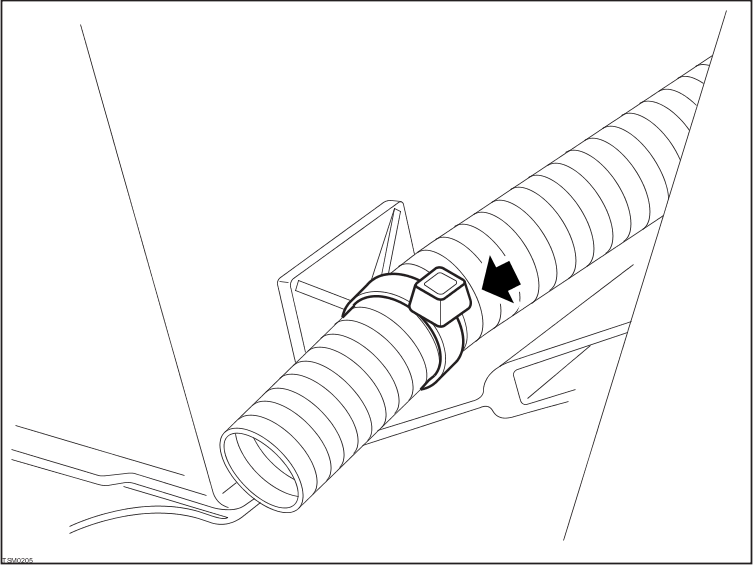
Remove HVAC assembly from vehicle.
Installation
Installation procedure is reverse of removal except for the following.
CAUTION: Replace all Patchbolt(s).